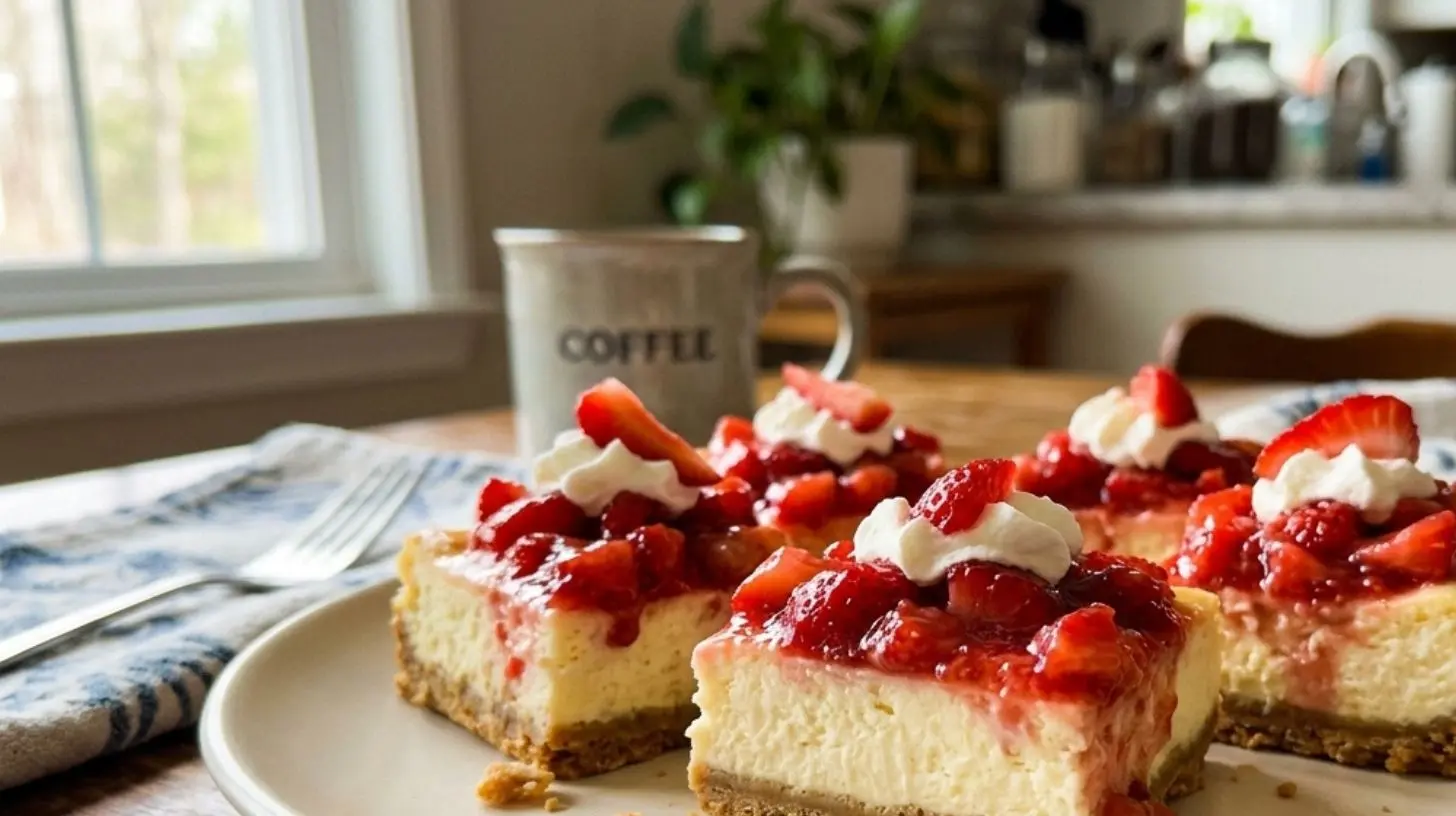
Strawberry Cheesecake Bars
A quick and easy recipe for delicious strawberry cheesecake bars.
Graham cracker crumbs
Cream cheese
Strawberries
Sugar
Butter
Crush the graham crackers into fine crumbs.
Mix the crumbs with melted butter and sugar.
Spread a layer of chopped strawberries over the crust.
Whip the cream cheese with sugar until smooth.
Spread the cream cheese mixture over the strawberries.
Chill the bars in the fridge for at least 2 hours.
Irresistible Strawberry Cheesecake Bars: The Ultimate Guide to a Perfect Dessert
Have you ever bitten into a dessert that instantly transported you to a sunny afternoon, where every mouthful balances creamy richness with bright, fruity tang? That’s exactly what these homemade Strawberry Cheesecake Bars deliver—and preparing them from scratch offers unmatched control over quality, sweetness, and texture. Whether you’re a seasoned baker or a first-timer, mastering these cheesecake bars at home ensures a treat that’s far superior to store-bought versions, with fresh strawberries and a buttery crust that simply can’t be replicated.
Ingredients & Kitchen Tools
Required Ingredients
– 1½ cups graham cracker crumbs – Forms the sturdy, buttery base. Substitute with crushed shortbread or gluten-free cookies if needed.
– 6 tablespoons unsalted butter, melted – Binds the crust; use vegan butter for dairy-free.
– 16 oz cream cheese, softened – The core of creamy richness; low-fat works but may alter texture.
– ¾ cup granulated sugar – Sweetens the filling; substitute with coconut sugar for a deeper flavor.
– 2 large eggs – Provide structure; flax eggs work for vegan versions.
– 1 teaspoon vanilla extract – Enhances the cheesecake profile.
– 1½ cups fresh strawberries, hulled and sliced – For swirled topping; frozen berries work if thawed and drained.
– 1 tablespoon lemon juice – Brightens strawberry flavor.
Kitchen Tools
– 9×9-inch baking pan (or 8×8 for thicker bars)
– Mixing bowls (small and large)
– Electric hand mixer or stand mixer (optional but helpful)
– Rubber spatula
– Parchment paper (for easy removal)
– Knife and cutting board (for strawberries)
Prep Time & Cooking Schedule
– Prep Time: 25 minutes (includes crust assembly and strawberry preparation)
– Cook Time: 35–40 minutes at 350°F
– Cooling Time: 1 hour at room temperature (essential to prevent cracking)
– Chill Time: Minimum 2 hours in the fridge (preferably 4+) for clean slicing
– Total Time: About 4 hours (mostly inactive)
Plan ahead: These bars taste best after overnight refrigeration, making them perfect for make-ahead entertaining.
Step-by-Step Instructions
1. Prepare the crust: Preheat your oven to 350°F. Line your baking pan with parchment paper, leaving an overhang on two sides. Combine graham cracker crumbs and melted butter in a bowl, mix until sandy texture forms. Press firmly into the pan bottom—use the flat bottom of a glass for even pressure. Bake 10 minutes, then cool slightly.
2. Make the filling: In a large bowl, beat softened cream cheese with sugar until smooth (no lumps). Add eggs one at a time, mixing on low to avoid incorporating too much air. Stir in vanilla extract.
3. Prepare the strawberry swirl: In a small saucepan, combine sliced strawberries and lemon juice. Cook over medium heat for 5–7 minutes until berries soften and release juices. Mash lightly with a fork, then let cool slightly.
4. Assemble the bars: Pour cream cheese mixture over the cooled crust. Drop spoonfuls of cooked strawberries over the top, then use a knife or toothpick to swirl gently—don’t overmix to maintain distinct ribbons.
5. Bake: Bake for 35–40 minutes, until edges are set but the center still jiggles slightly when shaken. Overbaking leads to dry, cracked cheesecake bars. Turn off the oven, crack the door, and let cool inside for 15 minutes.
6. Cool and chill: Remove from the oven, cool on a wire rack for 1 hour, then refrigerate for at least 2 hours (or overnight) before slicing. For cleaner cuts, dip your knife in hot water and wipe dry between cuts.
Nutritional Benefits & Advantages
These Strawberry Cheesecake Bars offer surprising nutritional perks when enjoyed mindfully. Strawberries are rich in vitamin C (100% DV per cup) and antioxidants called ellagic acid, which may reduce inflammation. The cream cheese provides calcium and protein, though the dessert is best considered an occasional treat. For a lighter version, use Neufchâtel cheese (⅓ less fat) and reduce sugar by 2 tablespoons—the orange-hued swirl still delivers flavor. The graham cracker base offers quick energy, but swapping for almond flour and coconut oil creates a keto-friendly alternative.
Tips Variations & Cooking Advice
– Flavor variation: Swap strawberries for raspberries or mixed berries for a summer medley.
– Chocolate twist: Add ¼ cup melted dark chocolate to the filling for strawberry-chocolate bars.
– Gluten-free option: Use certified gluten-free graham crackers or almond flour crust.
– Dairy-free adaptation: Use vegan cream cheese and coconut cream instead of eggs (¼ cup per egg).
– Portion change: Bake in mini muffin tins for 24 individual bite-sized bars (reduce bake time to 15–18 minutes).
– Texture secret: For a crack-free top, place a shallow pan of hot water on the oven’s lowest rack while baking.
Common Mistakes to Avoid
– Overmixing the filling: Causes too many air bubbles, leading to cracks. Mix just until smooth.
– Skipping the water bath alternative: While not always necessary for bars, placing the baking pan inside a larger pan with ½ inch hot water ensures even, gentle heating.
– Cutting before fully chilled: Warm cheesecake bars will crumble. Always refrigerate at least 2 hours.
– Using cold cream cheese: Leads to lumpy filling. Allow it to sit at room temperature for 30 minutes before mixing.
– Overbaking: The center should jiggle slightly; residual heat finishes the cooking. Overbaked bars become dry and dense.
Storage & Meal Prep Tips
– Refrigeration: Store in an airtight container for up to 5 days. Place parchment between layers to prevent sticking.
– Freezing: Wrap individual bars tightly in plastic wrap, then foil. Freeze for up to 3 months. Thaw in the fridge overnight.
– Reheating: For a warm dessert, microwave individual bars for 10–15 seconds. Avoid overheating, as the cream cheese can separate.
– Meal prep: Bake on Sunday, slice on Monday, and enjoy all week—these bars actually improve in flavor after 24 hours.
Conclusion
These Strawberry Cheesecake Bars deliver the perfect balance of tangy berries, velvety cream cheese, and buttery crust—all from simple ingredients you likely already have on hand. By following the techniques outlined above, you’ll consistently produce bakery-quality cheesecake bars that impress at any gathering. I encourage you to try this recipe this weekend and share your results in the comments below. Experiment with the variations, and let us know your favorite twist! For more decadent desserts and baking guides, explore our related posts on no-bake cheesecakes and fruit-based sweets.
FAQs
1. Can I use frozen strawberries instead of fresh?
Yes, but thaw and drain them first to avoid excess moisture. Reduce cooking time for the swirl by 2 minutes to prevent mushiness.
2. Why did my cheesecake bars crack on top?
Cracking usually occurs from overbaking or sudden temperature changes. Cool slowly in the oven with the door cracked open, and avoid overmixing the batter.
3. How do I make these cheesecake bars gluten-free?
Substitute graham cracker crumbs with certified gluten-free cookies or a mixture of almond flour (1½ cups) and melted butter (5 tablespoons).
4. Can I reduce the sugar without ruining the texture?
Reduce sugar by up to ¼ cup (50g). The texture will remain creamy, though the sweetness may be less balanced with tart strawberries. Add 1 tablespoon of honey for natural sweetness.
5. My bars turned out watery. What went wrong?
Excess moisture from strawberries or underbaking are common causes. Pat strawberry slices dry before cooking, and ensure the bars are baked until the edges are set but center is slightly jiggly.
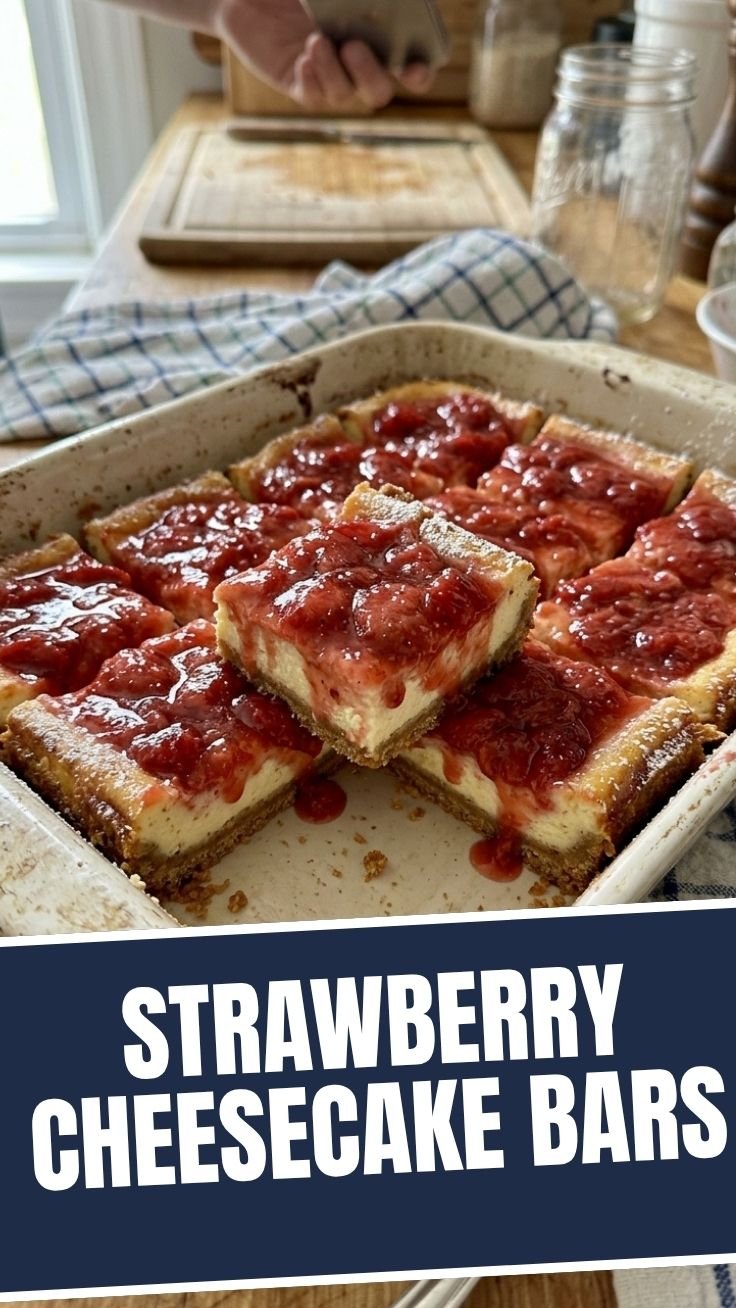
Strawberry Cheesecake Bars
Equipment
- 9x13 inch baking pan
- medium bowl
- electric mixer
- large bowl
- wire rack
Ingredients
Crust
- 2 cups graham cracker crumbs
- 1/4 cup granulated sugar
- 1/2 cup unsalted butter, melted
Cheesecake Filling
- 24 ounces cream cheese, softened
- 1 cup granulated sugar
- 3 large eggs
- 1 teaspoon vanilla extract
- 1/2 cup sour cream
Strawberry Topping
- 2 cups fresh strawberries, hulled and sliced
- 1/4 cup granulated sugar
- 1 tablespoon lemon juice
Garnish (Optional)
- whipped cream
- fresh mint leaves
Instructions
Crust Preparation
- Preheat your oven to 350°F (175°C) and lightly grease a 9x13 inch baking pan. In a medium bowl, thoroughly combine the graham cracker crumbs, sugar, and melted butter, then press this mixture evenly into the bottom of the prepared pan and bake for 10 minutes; set aside to cool slightly.
Cheesecake Filling Preparation
- Reduce the oven temperature to 325°F (160°C). In a large bowl, using an electric mixer, beat the softened cream cheese and sugar together until the mixture is smooth and creamy. Beat in the eggs one at a time, ensuring each is fully incorporated before adding the next, then stir in the vanilla extract and sour cream until just combined, being careful not to overmix.
Baking the Cheesecake Bars
- Pour the cheesecake filling over the cooled graham cracker crust and spread it evenly. Bake for 40-50 minutes, or until the edges are set and the center jiggles slightly when gently shaken; let cool completely on a wire rack, then refrigerate for at least 4 hours, or preferably overnight, before adding the topping.
Strawberry Topping Preparation
- In a medium bowl, combine the sliced strawberries, sugar, and lemon juice. Gently toss to coat the strawberries evenly and allow them to sit for about 15-20 minutes, which will help them release their juices and create a light syrup.
Assembly and Serving
- Once the cheesecake bars are thoroughly chilled, spoon the strawberry topping evenly over the top, making sure to distribute both the berries and the syrup. Slice into bars and serve, optionally garnished with a dollop of whipped cream and a fresh mint leaf for an extra touch of elegance.