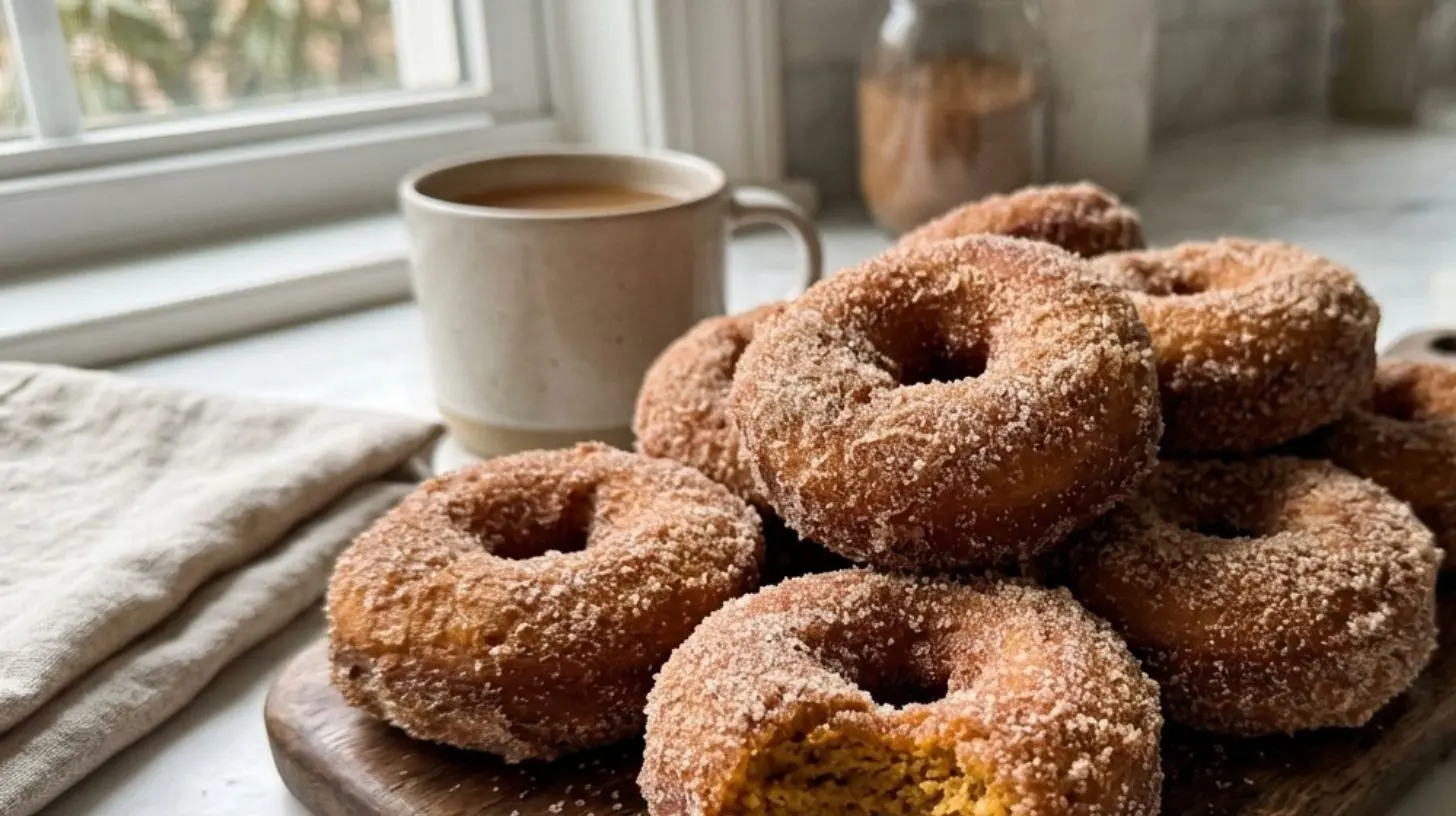
Apple Cider Donuts
Learn how to make delicious apple cider donuts at home!
Flour
Apple Cider
Cinnamon
Sugar
Eggs
Mix apple cider and sugar in a bowl.
Add eggs and mix well.
Gradually add flour and cinnamon to the mixture.
Fry donuts until golden brown.
The Ultimate Guide to Homemade Apple Cider Donuts: A Fall Favorite Made Easy
Is there anything that screams “autumn” quite like the aroma of warm, spiced Apple Cider Donuts fresh from the kitchen? These tender, cake-like rings are the quintessential treat for crisp mornings, apple orchard visits, and cozy weekends. While picking them up at a local farm stand is delightful, preparing them at home offers unmatched freshness, control over ingredients, and the ability to fill your home with that irresistible scent. In this comprehensive guide, we’ll walk you through every detail—from selecting the right apple cider to mastering the perfect cinnamon-sugar coating. Plus, we’ll show you how to find the best Apple Cider Donuts when you don’t have time to bake, and how to locate incredible Apple Cider Donuts near me for those spontaneous cravings.
Ingredients & Kitchen Tools
Essential Ingredients
– 2 cups apple cider – Reduced to ½ cup for concentrated flavor. Look for fresh, unfiltered cider.
– 3½ cups all-purpose flour – Substitution: Use 1:1 gluten-free flour blend for gluten-free donuts.
– 2 teaspoons baking powder – Ensures a light, airy crumb.
– 1 teaspoon baking soda – Adds extra lift and tenderness.
– 1 teaspoon ground cinnamon – The backbone of autumn spice.
– ½ teaspoon ground nutmeg – Freshly grated is best for depth.
– ½ teaspoon salt – Balances sweetness.
– ½ cup unsalted butter – Softened to room temperature for even mixing.
– 1 cup granulated sugar – Plus extra for coating.
– 2 large eggs – Room temperature for better emulsion.
– 1 teaspoon vanilla extract – Pure, not imitation.
– ½ cup buttermilk – Substitution: Add 1 tablespoon lemon juice to regular milk and let sit 5 minutes.
Kitchen Tools
– Donut pan – Nonstick or silicone; 12-cavity standard size.
– Medium saucepan – For reducing the apple cider.
– Large mixing bowl – For dry ingredients.
– Stand mixer or hand mixer – With paddle attachment.
– Wire rack – For cooling and coating.
– Pastry brush – For applying butter to the coating.
– Measuring cups & spoons – Precision matters for baked goods.
Prep Time & Cooking Schedule

– Prep Time: 20 minutes (including reducing the cider)
– Cooking Time: 10–12 minutes per batch
– Cooling Time: 10 minutes before coating
– Total Time: Approximately 45 minutes
Pro Tip: Reduce the apple cider up to 2 days ahead and store it in the refrigerator. This allows you to streamline the process when you’re ready to bake. The reduction intensifies the apple flavor and removes excess water that could make the batter too thin.
Step-by-Step Instructions
1. Reduce the Apple Cider
Pour the 2 cups of apple cider into a medium saucepan and bring to a boil over medium-high heat. Reduce to a simmer and cook, stirring occasionally, until the liquid thickens to about ½ cup. This takes roughly 15–20 minutes. Watch closely near the end to avoid scorching. Cool completely; warm cider can affect the butter’s texture.
2. Prepare the Dry Ingredients
In a large mixing bowl, whisk together the flour, baking powder, baking soda, cinnamon, nutmeg, and salt. Set aside.
3. Cream Butter and Sugar
In a stand mixer fitted with the paddle attachment, cream the softened butter and granulated sugar on medium speed until light and fluffy, about 3 minutes. Scrape down the sides as needed. Add the eggs one at a time, beating well after each addition, then mix in the vanilla extract.
4. Combine Wet and Dry
Reduce mixer speed to low. Add the dry ingredients in three additions, alternating with the buttermilk and reduced apple cider. Begin and end with the dry mixture. Mix just until combined—overmixing develops gluten, resulting in tough donuts. The batter should be thick but scoopable, similar to muffin batter.
Temperature Check: Preheat your oven to 350°F (175°C) during this step so it’s ready when the batter is done.
5. Fill and Bake
Lightly grease your donut pan with nonstick spray or butter. Transfer the batter into a piping bag or large zip-top bag with a corner snipped off. Pipe the batter into each cavity, filling about ⅔ full to allow for rising. Bake for 10–12 minutes, or until the donuts spring back when lightly touched and a toothpick inserted comes out clean. Let them cool in the pan for 5 minutes, then transfer to a wire rack.
6. Coat with Cinnamon Sugar
While the donuts are still warm but not hot, brush each one lightly with melted butter. In a shallow bowl, combine ½ cup granulated sugar with 1 teaspoon cinnamon. Roll each donut in the sugar mixture until fully coated. Serve immediately for the best texture—this is the ultimate moment to enjoy your homemade Apple Cider Donuts.
If you’re craving that fresh-baked experience but prefer to buy, search for Apple Cider Donuts near me to find local bakeries or farmers’ markets offering artisanal versions. Many orchards and specialty shops prioritize using fresh-pressed cider in their recipes.
Nutritional Benefits & Advantages
While donuts are an indulgent treat, using real apple cider provides some surprising benefits. Apple cider is rich in antioxidants called polyphenols, which combat oxidative stress and support heart health. It also contains small amounts of vitamin C and potassium. By reducing the cider, you concentrate these nutrients—though remember, moderation is key. Compared to fried donuts, baked versions like this one contain significantly less fat and fewer calories. The buttermilk adds probiotics when unpasteurized, and the cinnamon helps stabilize blood sugar levels by improving insulin sensitivity. For a healthier twist, use whole wheat pastry flour for half the all-purpose flour, boosting fiber content without sacrificing tenderness.
Tips Variations & Cooking Advice
Flavor Variations
– Maple Glaze: Swap the cinnamon-sugar coating for a glaze made with 1 cup powdered sugar, 2 tablespoons maple syrup, and 1 tablespoon milk.
– Spiced Cranberry: Fold ½ cup dried cranberries and ¼ teaspoon ginger into the batter.
– Chai Spice: Replace cinnamon and nutmeg with 1 teaspoon chai spice blend and use brown sugar instead of white.
Dietary Adaptations
– Gluten-Free: Use a high-quality 1:1 gluten-free flour blend. Add 1 teaspoon xanthan gum if your blend lacks it.
– Dairy-Free: Substitute butter with vegan butter and buttermilk with unsweetened almond milk mixed with 1 tablespoon apple cider vinegar.
Cooking Methods
– Deep-Frying: For classic fried donuts, heat oil to 350°F (175°C) and drop teaspoon-sized dough balls for 2–3 minutes per side. This yields a crispier exterior.
– Air Fryer: Air fry at 325°F (163°C) for 6–8 minutes, flipping halfway through. Uses barely any oil.
Portion Changes
– Mini Donuts: Use a mini donut pan and reduce baking time to 6–8 minutes.
– Donut Holes: Roll the batter into small balls and bake on a parchment-lined sheet for 8–10 minutes.
Common Mistakes to Avoid
– Skipping the cider reduction: Raw cider adds too much liquid, resulting in gummy, dense donuts. Reduced cider concentrates the flavor for the perfect moisture balance.
– Overmixing the batter: This activates gluten, making donuts tough and rubbery. Mix until just combined—a few lumps are okay.
– Baking at the wrong temperature: An oven thermometer is essential; being off by even 25°F can lead to uneven doneness or a dry product.
– Coating while too hot: If donuts are scorching, the coating sugar melts and becomes sticky. Let them cool for 5 minutes after removing from the pan.
– Using stale cider: Always use fresh apple cider without preservatives for the best flavor. Check the expiration date—oxidized cider can taste flat or yeasty.
Storage & Meal Prep Tips
Refrigeration
Store fully cooled, uncoated donuts in an airtight container at room temperature for up to 3 days. If already coated, they’ll stay fresh for 2 days—after that, the sugar may dissolve.
Freezing
For longer storage, freeze uncoated donuts in a single layer on a baking sheet, then transfer to a freezer-safe bag. They’ll keep for up to 3 months. To reheat, thaw at room temperature for 30 minutes, then warm in a 300°F (150°C) oven for 5 minutes. Coat with fresh cinnamon sugar after reheating.
Reheating
For the best texture, microwave individual donuts for 10–15 seconds or bake in a toaster oven at 350°F (175°C) for 3–5 minutes. This revives the soft interior and slightly crisp edge.
Meal Prep Tip
Reduce the apple cider and measure all dry ingredients the night before. In the morning, you can have fresh donuts ready in under 30 minutes.
Conclusion
There’s something truly magical about biting into a warm, cinnamon-dusted Apple Cider Donuts made from scratch. By reducing the cider and using simple techniques, you create a treat that outshines any store-bought version. Whether you enjoy them for breakfast with a hot coffee or as a seasonal dessert, these donuts capture the essence of autumn. Don’t forget to explore local options by searching for Apple Cider Donuts near me for those days you need a quick fix. We’d love to see your results—share your photos on social media and tag us. Happy baking!
FAQs
Q: Can I make these donuts vegan?
A: Absolutely. Replace eggs with 2 tablespoons of flaxseed meal mixed with 6 tablespoons water (let sit 5 minutes). Use vegan butter and buttermilk alternatives listed above.
Q: Why did my donuts come out dense?
A: Likely overmixing the batter or failing to reduce the apple cider properly. Ensure you reduce the cider to exactly ½ cup and mix only until combined.
Q: How do I get a shiny glaze instead of cinnamon sugar?
A: Whisk together 1 cup powdered sugar, 2 tablespoons apple cider (non-reduced), and ½ teaspoon vanilla. Dip the cooled donuts and let set for 15 minutes.
Q: Can I use apple juice instead of cider?
A: Apple juice lacks the tannins and complexity of cider, resulting in a milder flavor. If using juice, add ¼ teaspoon apple cider vinegar for acidity.
Q: How long do the donuts stay fresh after coating?
A: Coated donuts are best within 24 hours. After that, the sugar may absorb moisture and become sticky. Store in an airtight container to slow this process.