Proven way to grow Three Bean Salad
Learn the secret to planting and harvesting a delicious Three Bean Salad!
Green Beans
Kidney Beans
Black Beans
Red Onion
Cherry Tomatoes
Balsamic Vinegar
Olive Oil
Salt
Plant the green beans in your garden or planter.
Boil the kidney beans and black beans until tender.
Chop the red onion and cherry tomatoes into small pieces.
Mix the beans, onion, and tomatoes in a bowl.
Add balsamic vinegar, olive oil, and salt to the salad.
Serve and enjoy your freshly grown Three Bean Salad!
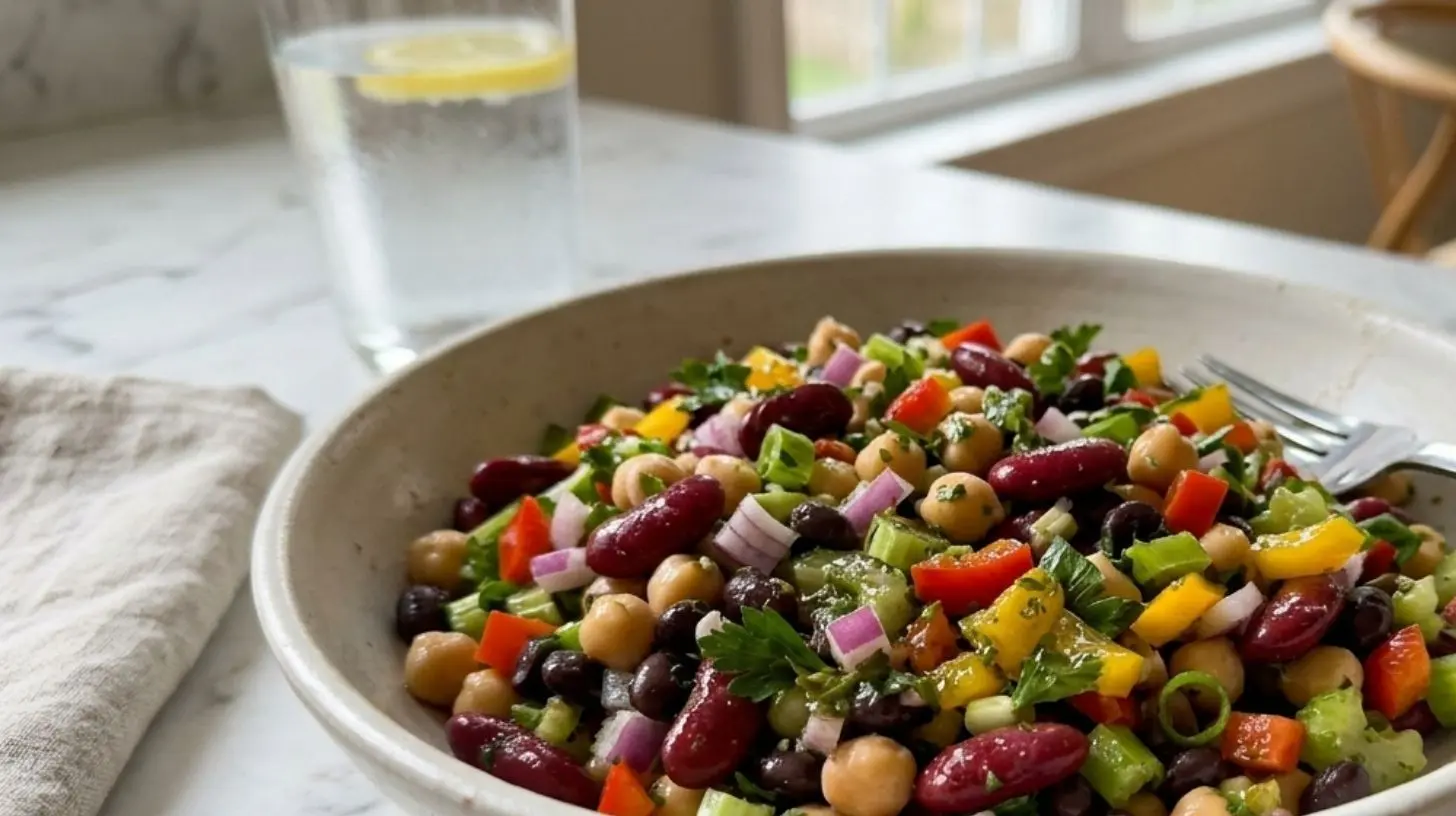
The Ultimate Guide to a Flavorful Three Bean Salad That Transforms Meal Prep
Are you tired of bland, lifeless salads that leave you hungry an hour later? Imagine a dish that is not only a powerhouse of plant-based protein but also bursts with tangy, herbaceous flavor and a satisfying crunch—all while lasting days in your fridge. This is the magic of a perfectly balanced bean salad. Preparing it at home gives you total control over the ingredients, allowing you to ditch the preservatives and excess sugar found in store-bought versions while saving money. Whether you are looking for a healthy weight loss companion or a hearty side for your next barbecue, mastering this recipe will change your meal prep game. Today, we dive deep into creating the perfect Three Bean Salad and the equally beloved Classic Three Bean Salad.
Ingredients & Kitchen Tools
To build layers of flavor and texture, gather the following components. Each item plays a specific role in balancing the dish.
Ingredients:
– Canned kidney beans (1 can, drained & rinsed): Adds a creamy texture and earthy, robust flavor.
– Canned garbanzo beans (chickpeas, 1 can, drained & rinsed): Provides a nutty taste and firm bite.
– Canned green beans (1 can, drained & rinsed): Offers a fresh, vegetal snap that contrasts the soft legumes.
– Red onion (1/2 cup, finely diced): Gives a sharp, pungent kick that mellows as it marinates.
– Red bell pepper (1/2 cup, diced): Adds sweetness and vibrant color.
– Apple cider vinegar (1/4 cup): The acidic backbone for the vinaigrette.
– Olive oil (3 tablespoons): Carries the flavors and adds richness.
– Granulated sugar or honey (2 tablespoons): Balances the acidity with a touch of sweetness.
– Dijon mustard (1 teaspoon): Acts as an emulsifier for the dressing and adds a tangy depth.
– Salt, black pepper, and dried oregano (to taste): Seasoning base.
Kitchen Tools:
– Large mixing bowl
– Chef’s knife & cutting board
– Measuring spoons & cups
– Whisk or jar with tight-fitting lid
– Colander for rinsing beans
Optional Substitutions:
– Swap green beans for fresh haricots verts (blanched).
– Replace sugar with maple syrup or agave for a vegan option.
– Use red wine vinegar instead of apple cider for a sharper flavor.
Prep Time & Cooking Schedule
Total Time: 15 minutes prep + 30 minutes to 2 hours marinating time.
This recipe requires zero cooking, making it an ideal hot-weather dish. The active preparation time is only 15 minutes, but the real magic happens during the resting phase. The salad needs at least 30 minutes to allow the beans to absorb the vinaigrette. For peak flavor, prepare it the night before. The salad consistently tastes better the next day after an overnight rest in the refrigerator.
Step-by-Step Instructions
Achieving a balanced Three Bean Salad requires proper technique, not just throwing ingredients in a bowl. Follow these steps for optimal texture and taste.
1. Prepare the Beans: Open all three cans. Rinse the kidney beans, garbanzo beans, and green beans in a colander under cool running water. This removes excess sodium and metallic canning liquid. Shake off excess water thoroughly.
2. Chop the Vegetables: Dice the red onion and red bell pepper into uniform, small pieces (about 1/4 inch). This ensures every forkful has a consistent balance of crunch and flavor.
3. Build the Dressing: In a small bowl or jar, combine apple cider vinegar, olive oil, sweetener (sugar or honey), Dijon mustard, salt, pepper, and dried oregano. Whisk vigorously or seal the jar and shake until the mustard and oil are fully emulsified. Tip: Taste the dressing now—it should be punchy and slightly tangier than you think necessary, as it will mellow on the beans.
4. Combine and Toss: Place the rinsed beans and chopped vegetables into a large mixing bowl. Pour the dressing over the top. Use a large spoon or spatula to gently fold the mixture, ensuring all beans and vegetables are coated. Temperature control note: Do not use warm beans; ensure they are cold from rinsing to prevent a mushy texture.
5. Marinate: Cover the bowl with plastic wrap or a lid. Refrigerate for at least 30 minutes. For the most robust flavor in your Classic Three Bean Salad, stir the salad once halfway through the marinating time to redistribute the dressing.
Nutritional Benefits & Advantages
This salad is a nutritional powerhouse, making it a cornerstone of smart meal prep. The combination of legumes provides a complete amino acid profile when paired with grains, but even alone, these beans offer significant protein and fiber. This macro combination promotes satiety and stabilizes blood sugar, which is critical for energy management.
The apple cider vinegar adds acetic acid, which may aid in digestion and glycemic control. The olive oil provides heart-healthy monounsaturated fats. Eating a bowl of this Three Bean Salad as a side dish can help you feel full longer and curb cravings for processed snacks, supporting a balanced dietary lifestyle.
Tips Variations & Cooking Advice
– Flavor Variation: Add 1/4 cup of chopped fresh parsley or basil just before serving for a burst of freshness.
– Ingredient Swap: Replace the green beans with steamed, snap peas for a sweeter, crisper texture.
– Dietary Adaptation: The recipe is naturally dairy-free, gluten-free, vegan, and vegetarian. For a lower sodium version, use “no-salt-added” canned beans.
– Portion Change: This recipe doubles exceptionally well. Use a 1:1:1 ratio for the three beans and simply scale the dressing ingredients for a crowd.
Common Mistakes to Avoid
1. Skipping the Rinse: Unrinsed beans turn your salad into a murky, salty mess. Always rinse thoroughly to control sodium and remove the starchy canning liquid.
2. Underseasoning the Dressing: The vinaigrette must be bold. Beans have a mild flavor and are dense, so they require a potent dressing. If your dressing tastes flat, add more vinegar or salt.
3. Serving Immediately: The salad needs time to blend. If you serve it immediately, the flavors will be disjointed. Trust the 30-minute minimum rest period.
4. Using a Metal Bowl for Marinating: While not catastrophic, glass or ceramic bowls are preferred because metal can sometimes impart a slight metallic taste to acidic marinades over extended periods.
Storage & Meal Prep Tips
– Refrigeration: Store the salad in an airtight container in the refrigerator for up to 5 days. The flavor improves over the first 24 hours.
– Freezing: Not recommended. The texture of the beans and vegetables degrades significantly upon thawing, becoming mushy and watery.
– Reheating: This salad is served cold or at room temperature. Do not reheat. If it becomes too cold, let it sit on the counter for 10 minutes before serving.
– Maintaining Texture: If the salad seems dry after a few days, drizzle with a splash of fresh olive oil and vinegar and toss again. The dressing is absorbed by the beans over time.
Conclusion
Mastering a Three Bean Salad is about balancing textures and flavors while respecting the ingredient’s need to rest. The combination of creamy kidney beans, nutty garbanzos, and crisp green beans, shackled by a tangy vinaigrette, creates a dish that is greater than the sum of its parts. Whether you stick strictly to the classic ingredients to create a Classic Three Bean Salad or spice it up with additional herbs, this recipe offers versatility, nutrition, and incredible convenience. Now, open your pantry, grab those cans, and prepare a week’s worth of perfect salad. Share your version and tag us—happy cooking!
FAQs
Q: Can I use dry beans instead of canned?
A: Yes, but you must cook them first. Use 3/4 cup of dry beans per can (about 2 cups cooked). Ensure you cook them until tender but not mushy, then cool completely before dressing.
Q: My salad tastes bland. What went wrong?
A: Likely two issues: insufficient salt in the dressing or not enough marinating time. Add an extra pinch of salt and a splash of vinegar, stir well, and let it sit for another 30 minutes.
Q: Can I add fresh green beans instead of canned?
A: Absolutely. Blanch fresh green beans in boiling salted water for 2 minutes, then plunge into an ice bath. This preserves their vibrant color and crunch. Proceed with the recipe as written.
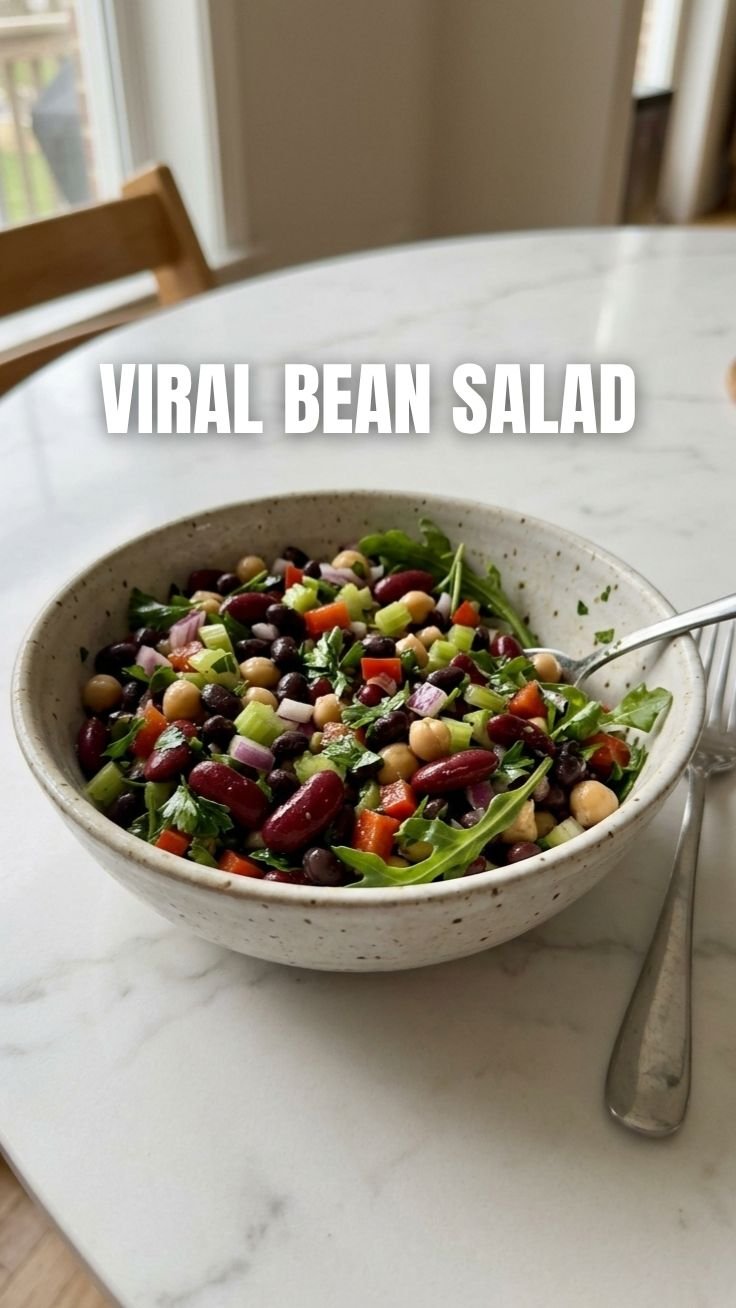
Q: How can I make this a main dish salad?
A: Increase the protein and add bulk. Add one can of black beans for extra fiber, toss in 1/2 cup of crumbled feta cheese, and serve over a bed of arugula or quinoa.
Q: The dressing separated after being in the fridge—is it safe?
A: Yes, this is normal. The mustard emulsion breaks down over time. Simply pull the salad out, let it sit for 5-10 minutes, and stir vigorously to redistribute the dressing before serving.
Proven way to grow Three Bean Salad
Equipment
- large bowl
- small bowl
- whisk
Ingredients
Salad
- 15 ounce green beans canned, drained and rinsed
- 15 ounce wax beans canned, drained and rinsed
- 15 ounce kidney beans canned, drained and rinsed
- 0.5 red onion thinly sliced
Dressing
- 0.33 cup apple cider vinegar
- 0.25 cup olive oil
- 2 tablespoons sugar
- 1 teaspoon Dijon mustard
- 0.5 teaspoon salt
- 0.25 teaspoon black pepper
- 1 garlic clove, minced
Instructions
Preparation
- In a large bowl, gently combine the drained and rinsed green beans, wax beans, kidney beans, and thinly sliced red onion.
- In a separate small bowl, whisk together the apple cider vinegar, olive oil, sugar, Dijon mustard, salt, black pepper, and minced garlic until the sugar is fully dissolved and the dressing is well combined.
Assembly
- Pour the prepared dressing over the bean mixture in the large bowl; toss gently to ensure all ingredients are evenly coated.
- Cover the bowl and refrigerate the salad for at least 30 minutes, or preferably for a few hours, to allow the flavors to meld before serving.