Best way to grow Hatch Green Chile in 7 days
Grow your own delicious Hatch Green Chile at home in just one week!
Hatch Green Chile Seeds
Potting Soil
Water
Sunlight
Plant the Hatch Green Chile seeds in a pot filled with potting soil.
Water the soil regularly to keep it moist.
Place the pot in a sunny spot where it can get plenty of sunlight.
Watch your Hatch Green Chile plant grow over the next 7 days!
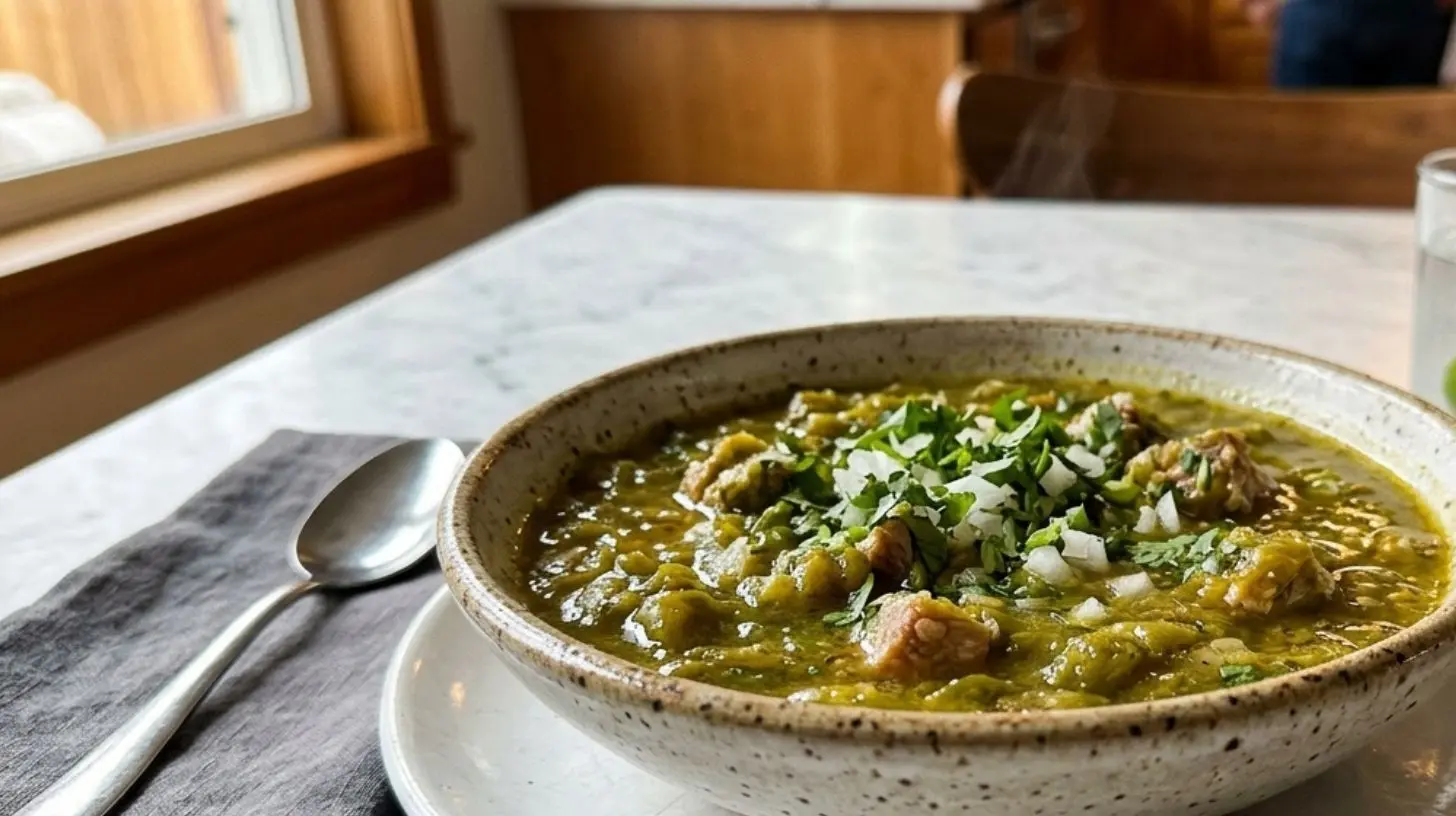
Authentic Hatch Green Chile Beef Enchiladas: A Flavorful Southwestern Classic
Have you ever wondered what makes a plate of enchiladas truly unforgettable? The answer often lies in the chile. When you prepare beef enchiladas at home using real, roasted Hatch Green Chile, you unlock a depth of smoky, earthy heat that no canned sauce can replicate. This recipe not only saves you money but also lets you control every layer of flavor. Whether you are a seasoned home cook or a beginner, mastering this dish will elevate your repertoire of Green Chile Recipes. Let’s dive into the process and see why this Southwestern staple deserves a permanent spot in your kitchen.
Ingredients & Kitchen Tools
Ingredients
– Beef chuck (2 lbs) – A well-marbled cut that shreds beautifully after slow cooking.
– Hatch green chiles (1 lb) – Fresh roasted, peeled, and chopped; substitutes: Anaheim or poblano.
– Yellow onion (1 large) – Adds sweetness; shallots can work in a pinch.
– Garlic cloves (4) – Fresh minced is best; use 1 tsp garlic powder if needed.
– Corn tortillas (12) – Traditional and gluten-free; flour tortillas can be used but alter texture.
– Shredded cheddar or Monterey Jack (2 cups) – For topping; any melting cheese works.
– Tomato sauce (15 oz) – Base of the enchilada sauce; use crushed tomatoes for chunkier sauce.
– Ground cumin (2 tsp) – Essential for warmth; substitute 1 tsp smoked paprika.
– Salt & black pepper – To taste.
– Vegetable oil (2 tbsp) – For frying tortillas; avocado oil is a great alternative.
– Beef broth (1 cup) – Low-sodium preferred; chicken broth is fine.
Kitchen Tools & Utensils
– Large skillet or sauté pan
– Medium saucepan
– 9×13 baking dish
– Mixing bowls
– Tongs
– Chef’s knife & cutting board
– Measuring spoons & cups
– Aluminum foil for covering
Optional Substitutions
– Gluten-free – Use certified corn tortillas and check broth labels.
– Dairy-free – Omit cheese or use vegan shreds.
– Lower fat – Use lean beef sirloin and reduce cheese to 1 cup.
Prep Time & Cooking Schedule
Total active time: 30 minutes | Cook time: 45 minutes | Resting time: 5 minutes
Start the beef filling first – it can simmer while you prepare the sauce and tortillas. If using pre-roasted chiles, you save about 10 minutes. Plan to have all components ready before assembling to avoid rushing. This recipe serves 6–8 people comfortably.
Step-by-Step Instructions
1. Prepare the beef filling. In a large skillet, heat 1 tbsp oil over medium-high heat. Sear the beef chuck (cut into 2-inch chunks) until browned on all sides, about 4 minutes. Remove beef, reduce heat to medium, and add chopped onion. Cook 3 minutes until translucent. Add garlic and cook 30 seconds. Return beef to skillet, add 1 cup beef broth, 1 tsp cumin, and salt/pepper. Cover and simmer on low for 30 minutes, or until beef shreds easily. Shred with two forks.
2. Toast the chiles. In the same skillet, dry-roast the chopped Hatch Green Chile for 2 minutes until fragrant. Set aside half for the sauce and half for the filling.
3. Make the enchilada sauce. In a medium saucepan, combine tomato sauce, 1 cup water, 1 tsp cumin, half the roasted chiles, and salt. Simmer 10 minutes. Taste and adjust seasoning – you can add a pinch of sugar to balance acidity.
4. Soften the tortillas. In the same skillet (now empty), heat remaining 1 tbsp oil. Quickly fry each corn tortilla for 15 seconds per side until pliable. Drain on paper towels. This prevents cracking during assembly.
5. Assemble. Preheat oven to 375°F (190°C). Spread ½ cup sauce on the bottom of the baking dish. Place 2–3 tablespoons shredded beef and a spoonful of remaining chiles onto each tortilla. Roll tightly and place seam-side down. Repeat until dish is full.
6. Top and bake. Pour remaining sauce evenly over enchiladas. Sprinkle cheese on top. Bake uncovered for 20 minutes, then broil for 2 minutes for a bubbly golden crust. Let rest 5 minutes before serving.
Tip: For a saucier dish, add an extra ½ cup of sauce. If the beef seems dry, stir in 2 tablespoons of the sauce before rolling. This method also works beautifully in many Green Chile Recipes, like slow-cooker soups or casseroles.
Nutritional Benefits & Advantages
Beef enchiladas with Hatch green chiles offer a balanced meal. One serving (two enchiladas) provides approximately 380 calories, 25 g protein, 18 g fat, and 30 g carbohydrates. The chiles are rich in vitamin C and capsaicin, which may boost metabolism and reduce inflammation. Beef contributes iron and B12 for energy. Using corn tortillas keeps the dish gluten-free, and the recipe can be easily adapted for lower sodium by using no-salt-added broth. Compared to restaurant versions, homemade enchiladas have about 40% less sodium and no preservatives.
Tips Variations & Cooking Advice
– Flavor variations – Add ½ teaspoon smoked paprika or chipotle powder for extra smokiness. A dash of Mexican oregano (1 tsp) brightens the sauce.
– Alternative cooking methods – Use the slow cooker: brown beef, then cook with broth and chiles on low 6 hours. Shred and proceed. Or try an Instant Pot: sauté, then pressure cook on high 20 minutes.
– Portion changes – For a crowd, double all ingredients and use a larger baking dish (10×15). For a lighter version, swap shredded beef for black beans and zucchini.
– Dietary adaptations – Vegetarian: replace beef with sautéed mushrooms and bell peppers. Dairy-free: omit cheese or use plant-based shreds (melted with a little broth). Keto: use low-carb tortillas (wraps made from almond flour) and increase cheese.
Common Mistakes to Avoid
– Overfilling tortillas – Too much filling leads to bursting. Use 2–3 tablespoons max per tortilla.
– Skipping the tortilla softening step – Dry corn tortillas crack when rolled. A quick fry in hot oil (or a dip in warm sauce) prevents breakage.
– Using pre-grated cheese – Store-bought shreds contain anti-caking agents that prevent smooth melting. Grate your own for best results.
– Underseasoning the sauce – Taste the sauce before assembling; it should be bold with cumin and chile. If flat, add salt or a splash of lime juice.
– Overcooking the beef – Simmer only until shreddable. Overcooked beef becomes dry and stringy.
Storage & Meal Prep Tips
– Refrigeration – Store leftover enchiladas in an airtight container for up to 4 days. Keep sauce separate if possible to avoid sogginess.
– Freezing – Assemble enchiladas completely, but do not bake. Wrap dish tightly with foil and freeze for up to 3 months. Thaw overnight in the fridge, then bake as directed (add 10 minutes).
– Reheating – For best texture, reheat in a 350°F oven covered with foil for 15 minutes. Microwave in 30-second bursts if short on time, but the tortillas may become soft.
– Meal prep – Cook beef and sauce up to 3 days in advance. Roast and chop chiles ahead. Store components separately until assembly day.
Conclusion
By now, you have all the tools to create restaurant-worthy beef enchiladas at home, anchored by the distinctive heat and flavor of Hatch Green Chile. This single ingredient transforms a simple dish into a memory, and it pairs perfectly with other Green Chile Recipes you might want to explore. Whether you serve these enchiladas for a weeknight dinner or a festive gathering, the combination of tender beef, smoky chiles, and melted cheese never fails. I encourage you to try this recipe and share your results – tag a photo or leave a comment below. And if you loved it, check out more Southwestern favorites on our site.
FAQs
1. Can I use canned Hatch green chiles instead of fresh?
Yes, canned chiles are a convenient alternative. Use one 4-oz can (drained) for the sauce and one for the filling. Note that canned chiles are milder and have a softer texture; you may want to add a pinch of cayenne for extra heat.
2. Why did my enchiladas become soggy?
Sogginess usually results from too much sauce or not frying the tortillas long enough. Use only enough sauce to coat – about 2 cups total for a 9×13 dish – and ensure tortillas are lightly crispy before rolling.
3. How can I make the sauce spicier?
Add ½ teaspoon crushed red pepper flakes or a minced serrano pepper when cooking the sauce. Alternatively, mix in a tablespoon of hot sauce (like Cholula) before simmering.
4. Can I substitute chicken for beef?
Absolutely. Use 2 lbs boneless skinless chicken thighs. Simmer in broth with chiles for 20 minutes until cooked through, then shred. Follow the same assembly steps. This works perfectly with the linked Green Chile Recipes style.
5. How long do these enchiladas stay fresh in the refrigerator?
Properly stored in an airtight container, they stay fresh for 4 days. Reheat in the oven or microwave. For longer storage, freeze before baking as described in the storage section.
Best way to grow Hatch Green Chile in 7 days
Equipment
- Starter pots
- Grow light
- Watering can
Ingredients
Main Ingredients
- - Hatch Green Chile seeds High-germination variety
- - Starter pots Biodegradable preferable
- - Potting mix Well-draining, nutrient-rich
- - Grow light Full spectrum LED
- - Water Filtered or distilled
- - Liquid plant fertilizer Low dosage, balanced NPK
Instructions
Growing Steps
- Plant the Hatch Green Chile seeds directly into starter pots filled with high-quality potting mix.
- Place the planted pots under a full-spectrum LED grow light, ensuring they receive 16-18 hours of light daily.
- Maintain consistent soil moisture by watering with filtered water when the top inch of soil feels dry.
- Apply a very diluted liquid plant fertilizer once on day 3 or 4 to provide essential nutrients.
- Monitor the seedlings closely for any signs of growth and adjust light or water as needed.