Proven way to grow perfect Focaccia Bread
Learn how to make delicious and fluffy focaccia bread from scratch.
Flour
Yeast
Olive Oil
Rosemary
Salt
Water
Mix flour, yeast, salt, and water in a bowl.
Knead the dough until smooth and elastic.
Let the dough rise in a warm place for 1 hour.
Preheat the oven to 400°F (200°C).
Brush the dough with olive oil and sprinkle rosemary on top.
Bake for 25-30 minutes until golden brown.
How to Make Perfect Homemade Focaccia Bread: Simple Italian Recipe
Have you ever wondered what makes authentic Italian bread so utterly irresistible? The answer often lies in the perfect Focaccia Bread – that beautiful, olive oil-infused flatbread with a golden crust and tender interior. Creating this Artisan Focaccia at home might seem intimidating, but with the right guidance, you’ll be baking like an Italian grandmother in no time. Let’s dive into this centuries-old bread tradition that brings Mediterranean flavors right to your kitchen.
Ingredients & Kitchen Tools
For the Dough:
– 4 cups all-purpose flour (bread flour works even better for chewier texture)
– 2¼ teaspoons active dry yeast (1 standard packet)
– 2 teaspoons salt (preferably kosher or sea salt)
– 2 tablespoons olive oil, plus extra for coating and topping
– 1¾ cups warm water (around 110°F/43°C)
– 1 tablespoon honey or sugar (to feed the yeast)
For Topping:
– 3-4 tablespoons high-quality extra virgin olive oil
– 1-2 tablespoons flaky sea salt
– 2-3 sprigs fresh rosemary (leaves removed)
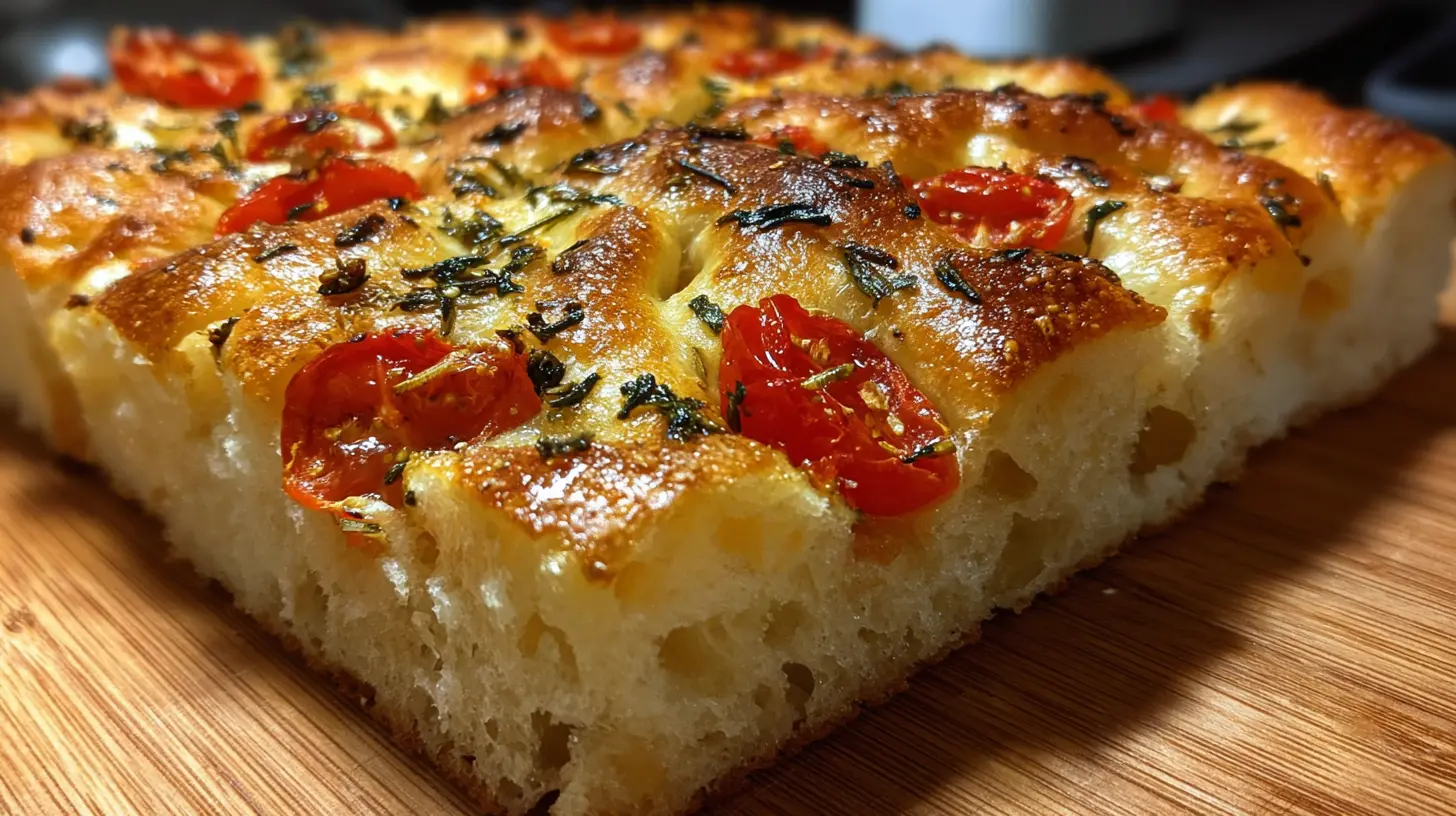
– Optional: cherry tomatoes, olives, thinly sliced onions, or garlic cloves
Kitchen Tools:
– Large mixing bowl
– Wooden spoon or stand mixer with dough hook
– 9×13 inch baking pan or sheet
– Plastic wrap or clean kitchen towel
– Measuring cups and spoons
– Fingertips (truly your best tool for dimpling the dough!)
Prep Time & Cooking Schedule

– Prep Time: 20 minutes
– Rising Time: 2-3 hours total (includes first rise and pan rise)
– Baking Time: 20-25 minutes
– Total Time: Approximately 3-4 hours (mostly hands-off)
This recipe requires planning ahead for proper rising, but most of the time is passive. The actual hands-on work is minimal, making it perfect for a lazy weekend baking project.
Step-by-Step Instructions
1. Activate the yeast: In a small bowl, combine warm water and honey or sugar. Sprinkle the yeast over the top and let it sit for 5-10 minutes until foamy.
2. Make the dough: In a large bowl, combine flour and salt. Pour in the yeast mixture and olive oil. Mix with a wooden spoon until a shaggy dough forms.
3. Knead the dough: Turn onto a floured surface and knead for 5-7 minutes until smooth and elastic. Alternatively, use a stand mixer with a dough hook for 4-5 minutes on medium speed.
4. First rise: Place the dough in an oiled bowl, cover with plastic wrap or a damp towel, and let rise in a warm spot until doubled in size (about 1-1.5 hours).
5. Prepare the pan: Generously coat your baking pan with 2-3 tablespoons of olive oil. This Focaccia Bread should have a gloriously oily bottom that creates a beautiful crust.
6. Shape the dough: Gently stretch the dough into the prepared pan, trying to maintain as much air as possible. If it resists, let it rest for 10 minutes, then continue stretching.
7. Second rise: Cover the pan and let the dough rise for another 45-60 minutes until puffy.
8. Create the signature dimples: Preheat your oven to 425°F (220°C). Using your fingertips, press deep indentations all over the Artisan Focaccia dough, pushing all the way to the bottom of the pan without breaking through.
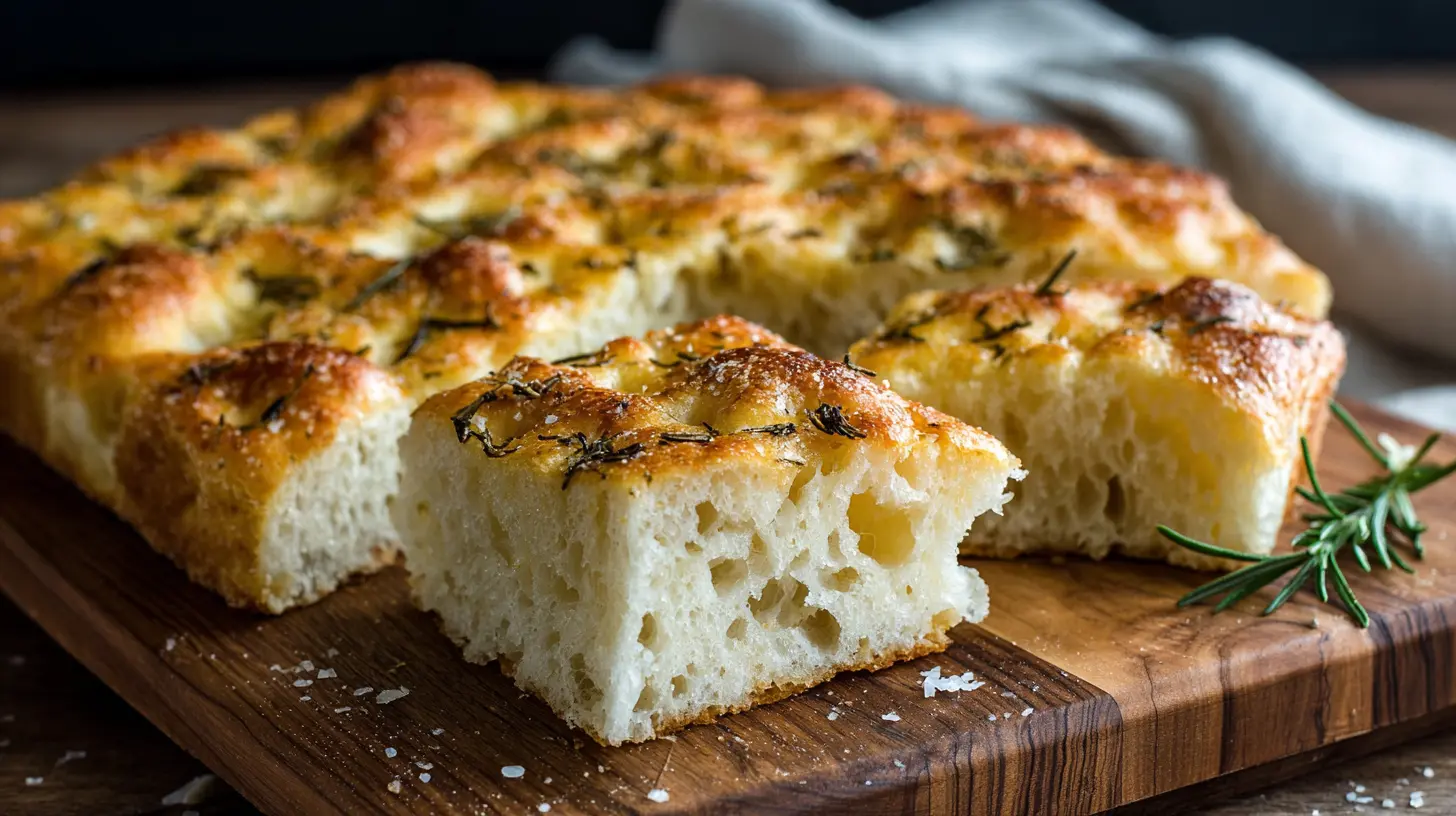
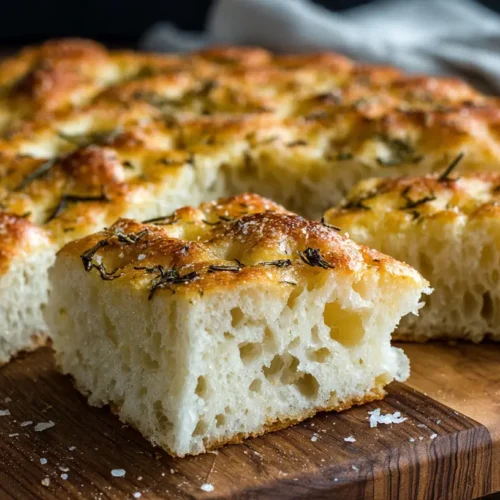
9. Add toppings: Drizzle with remaining olive oil, making sure it pools slightly in the dimples. Sprinkle with sea salt, rosemary, and any additional toppings.
10. Bake: Place in the preheated oven for 20-25 minutes until the top is golden brown.
11. Cool slightly: Let cool in the pan for 5 minutes, then transfer to a wire rack. Serve warm or at room temperature.
Nutritional Benefits & Advantages
Focaccia provides complex carbohydrates for sustained energy. The olive oil delivers heart-healthy monounsaturated fats and antioxidants. Rosemary contains compounds with anti-inflammatory properties. When made at home, you control the sodium levels and avoid preservatives found in commercial breads.
Tips, Variations & Cooking Advice
– Herb variations: Try thyme, sage, or oregano instead of rosemary
– Mediterranean toppings: Add sun-dried tomatoes, caramelized onions, or crumbled feta
– Whole grain option: Substitute up to half the flour with whole wheat for added fiber
– Garlic-infused: Add minced garlic to the olive oil before drizzling
– Sweet variation: Omit herbs and top with sliced grapes, fig, and honey for dessert focaccia
Common Mistakes to Avoid

1. Skimping on olive oil: Focaccia needs generous oil for authentic flavor and texture
2. Over-kneading: This destroys the air bubbles that create the perfect interior
3. Rushing the rise: Give the yeast time to work its magic for proper flavor development
4. Shallow dimpling: Press deeply to create the characteristic crevices that hold oil and toppings
5. Under-salting: Don’t be shy with the salt, it’s a key flavor component
Storage & Meal Prep Tips
Focaccia is best enjoyed the day it’s made but can be stored at room temperature, wrapped in a clean kitchen towel, for up to 2 days. For longer storage, slice and freeze in an airtight container for up to 3 months. Reheat frozen slices directly in a 350°F oven for 5-7 minutes for that just-baked taste.
Conclusion
Mastering homemade Focaccia Bread opens up a world of Italian culinary traditions right in your kitchen. The simple ingredients transform through patience and technique into something truly special. Whether you’re serving it alongside pasta, using it for sandwiches, or simply enjoying it with a drizzle of good olive oil, this Artisan Focaccia will quickly become a staple in your baking repertoire. The satisfaction of pulling your own golden, aromatic bread from the oven is unmatched – and your family will be begging for encores.
FAQs
Can I make focaccia dough ahead of time?
Yes! You can refrigerate the dough after the first rise for up to 24 hours. This actually improves flavor development. Let it come to room temperature before the final shaping.
Why is my focaccia dense instead of airy?
This could be from over-kneading, not enough rising time, or flour with insufficient protein content. Try bread flour and handle the dough gently to preserve air bubbles.
Can I make focaccia without a stand mixer?
Absolutely! Hand-kneading works perfectly and gives you better control over the dough’s texture and development.
Is focaccia gluten-free?
Traditional focaccia contains wheat flour, but you can experiment with gluten-free flour blends specifically designed for bread baking, though texture will differ.
What’s the difference between focaccia and pizza dough?
Focaccia typically has a higher hydration level and more olive oil incorporated into the dough, resulting in a softer, more open crumb structure compared to pizza dough.
Proven way to grow perfect Focaccia Bread
Equipment
- Large bowl
- Plastic wrap
- 9x13 inch baking pan
- Wire rack
Ingredients
Dough
- 2 cups warm water
- 2.25 teaspoons active dry yeast
- 1 teaspoon granulated sugar
- 4 cups all-purpose flour
- 2 teaspoons salt
- 0.25 cup olive oil plus more for drizzling
Topping
- 2 sprigs fresh rosemary chopped
- 1 teaspoon flaky sea salt
Instructions
Preparation
- In a large bowl, dissolve yeast and sugar in warm water, then let it sit for 5-10 minutes until foamy.
- Stir in flour, salt, and olive oil until a shaggy dough forms.
- Cover the bowl with plastic wrap and let the dough rise in a warm place for 1-1.5 hours, or until doubled in size.
Baking
- Preheat your oven to 400°F (200°C) and drizzle a generous amount of olive oil into a 9x13 inch baking pan.
- Gently transfer the dough to the prepared pan, stretching it to fit and pressing your fingers into the dough to create dimples.
- Drizzle with more olive oil, sprinkle with fresh rosemary and flaky sea salt, then bake for 20-25 minutes until golden brown.
- Let the focaccia cool in the pan for a few minutes before transferring it to a wire rack to cool completely, then slice and serve.