
Quick way to grow: 6 Layer Christmas Cookie Lasagna No-Bake
A fun and colorful dessert with layers of cookies and cream.
Chocolate chip cookies
Vanilla pudding
Red and green food coloring
Whipped cream
Layer chocolate chip cookies at the bottom of the dish.
Spread a layer of vanilla pudding on top of the cookies.
Add a few drops of red and green food coloring to the next layer of pudding.
Repeat the layers of cookies and pudding.
Top with a layer of whipped cream.
Christmas Cookie Lasagna No-Bake: A Festive Holiday Dessert
Have you ever wanted a show-stopping holiday dessert that requires no oven time? This Christmas Cookie Lasagna No-Bake dessert is the answer to your holiday entertaining prayers. With layers of cookies, cream, and festive flavors, it’s the perfect alternative to traditional Christmas baking. Similar to a No-Bake Christmas Trifle, this layered treat is easy to prepare ahead of time, allowing you to focus on other holiday preparations. The stunning visual presentation makes it an Instagram-worthy centerpiece for your dessert table.
Ingredients & Kitchen Tools
For the cookie layers:
– 2 packages (14 oz each) holiday Oreo cookies – regular Oreos with red cream work perfectly
– 2 packages (8 oz each) cream cheese, softened – ensure this is at room temperature for easy mixing
– 1/3 cup granulated sugar – adds just the right sweetness
– 1 teaspoon vanilla extract – pure extract is recommended for best flavor
For the pudding layer:
– 2 packages (3.4 oz each) instant vanilla pudding mix – white chocolate flavor works beautifully too
– 3 cups cold milk – whole milk creates the richest texture
– 1 teaspoon peppermint extract – adjust to taste preference
For topping:
– 2 cups heavy whipping cream – chilled for best whipping results
– 1/4 cup powdered sugar – helps stabilize the whipped cream
– 1 teaspoon vanilla extract – enhances the flavor profile
– 1 cup crushed candy canes – for festive color and flavor
– 1/2 cup mini chocolate chips – adds texture contrast
– Christmas sprinkles – for decorative flair
Kitchen tools:
– 9×13-inch glass baking dish – clear sides showcase the beautiful layers
– Electric mixer – hand or stand mixer works
– Rubber spatula – for folding and spreading layers
– Mixing bowls – various sizes needed
– Food processor or ziploc bag – for crushing cookies
– Measuring cups and spoons – for precise measurements
Prep Time & Cooking Schedule
Total prep time: 30 minutes
Chilling time: Minimum 4 hours, preferably overnight
This dessert requires no actual cooking, but plan to make it at least 4 hours before serving to allow proper setting time. For best results, prepare this dessert the day before your gathering. The flavors meld beautifully overnight, creating a more cohesive taste experience. The active preparation takes about 30 minutes, making this an efficient use of your holiday cooking time.
Step-by-Step Instructions
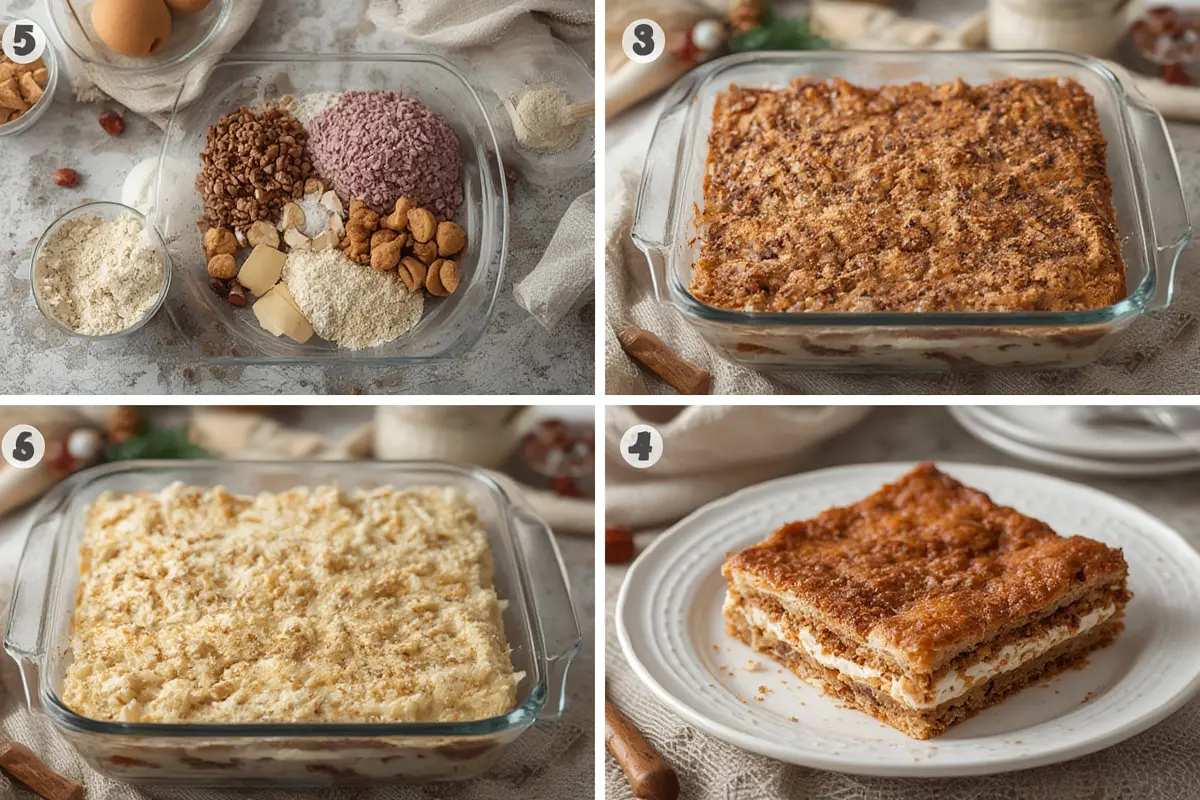
1. Prepare the cookie crust: Set aside 8-10 whole Oreo cookies for decoration. In a food processor, pulse remaining cookies until they form fine crumbs. Reserve 1 cup of crumbs for topping. Press the remaining cookie crumbs firmly into the bottom of your 9×13 dish to form the base layer.
2. Create the cream cheese layer: In a large bowl, beat softened cream cheese, sugar, and vanilla until smooth and fluffy (about 3 minutes). Spread this mixture evenly over the cookie crust.
3. Mix the pudding layer: In a separate bowl, whisk together pudding mix, cold milk, and peppermint extract for 2 minutes until it begins to thicken. Pour and spread this over the cream cheese layer. This Christmas Cookie Lasagna No-Bake really comes together beautifully when the layers are distinct, similar to how a No-Bake Christmas Trifle showcases its components.
4. Refrigerate briefly: Allow the dessert to chill for 15-20 minutes while preparing the topping.
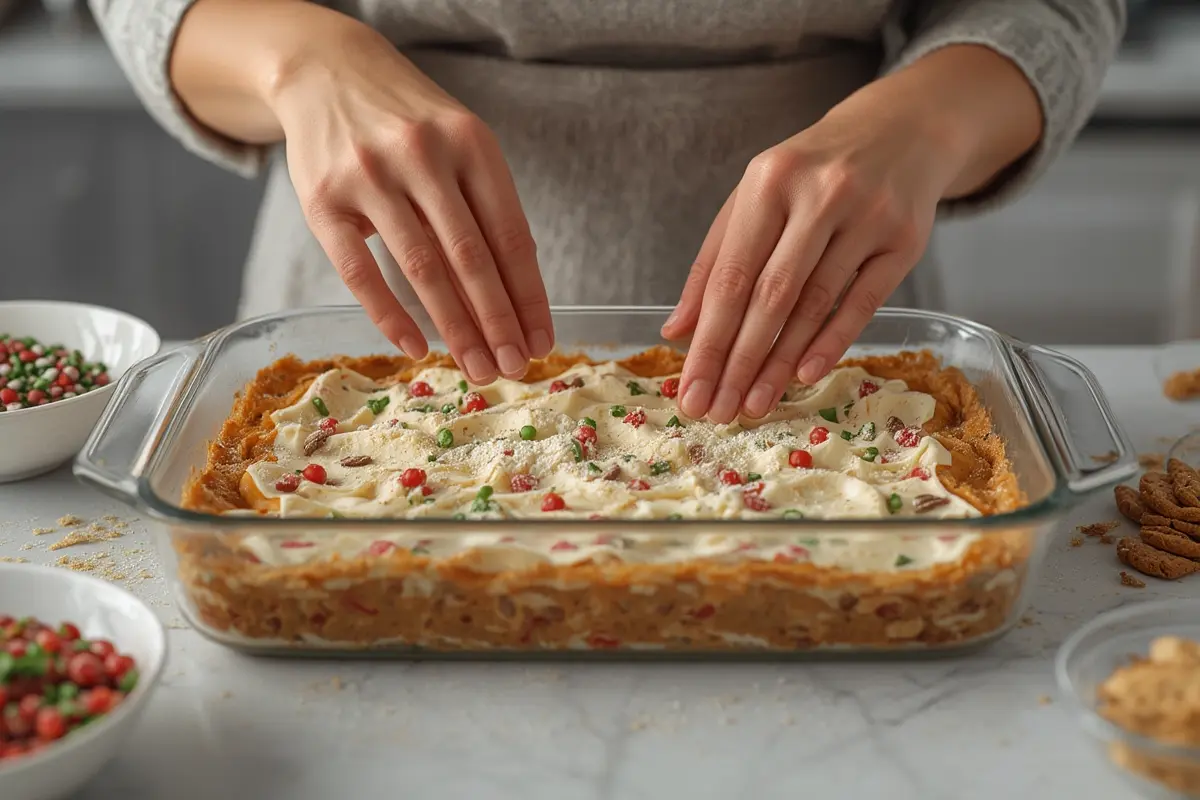
5. Make the whipped cream topping: Beat the cold heavy cream, powdered sugar, and vanilla until stiff peaks form. Spread this over the pudding layer.
6. Add festive finishing touches: Sprinkle reserved cookie crumbs, crushed candy canes, mini chocolate chips, and Christmas sprinkles over the whipped cream. Arrange saved whole cookies decoratively on top.
7. Chill thoroughly: Cover with plastic wrap and refrigerate for at least 4 hours or overnight.
Nutritional Benefits & Advantages
While this dessert is definitely an indulgent treat, it does offer some nutritional benefits. The dairy components provide calcium and protein, while the dark chocolate in the cookies contains antioxidants. This dessert can be portion-controlled easily by cutting smaller squares, allowing everyone to enjoy a taste without overindulging during the holiday season.
Tips, Variations & Cooking Advice
– Flavor variations: Substitute mint chocolate cookies for regular Oreos for an extra minty flavor.
– Lighter version: Use light cream cheese and sugar-free pudding mix to reduce calories.
– Chocolate lovers: Add a layer of chocolate ganache between the pudding and whipped cream.
– Nut option: Sprinkle crushed pistachios for a green Christmas color accent.
– Make-ahead: This dessert actually improves with time, making it perfect for prepare up to 2 days in advance.
Common Mistakes to Avoid
1. Rushing the chilling time: Insufficient refrigeration results in runny layers that don’t set properly.
2. Using warm cream cheese: This creates lumps in your mixture. Always ensure cream cheese is fully softened.
3. Overmixing the pudding: Follow package instructions exactly; overmixing can prevent proper setting.
4. Using room temperature whipping cream: Always start with cold cream for the best volume and stability.
5. Spreading layers roughly: Take time to spread each layer evenly for the most attractive presentation.
Storage & Meal Prep Tips
This dessert will keep well in the refrigerator for up to 5 days. Cover tightly with plastic wrap to prevent it from absorbing other food odors. While freezing is possible, the texture of the whipped cream may change upon thawing, so refrigeration is preferred. For the freshest appearance, add the candy cane pieces and sprinkles just before serving if preparing more than a day in advance.
Conclusion
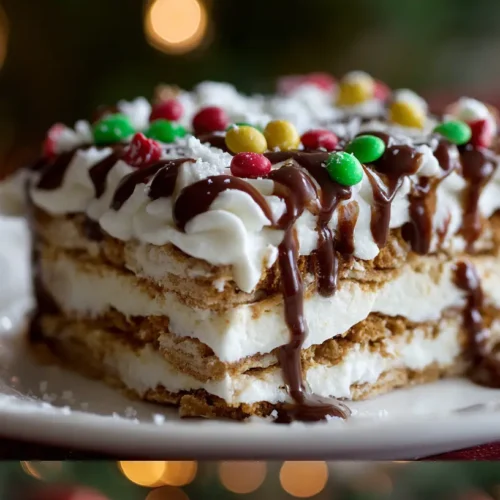
This Christmas Cookie Lasagna No-Bake dessert is truly the perfect holiday treat for busy hosts who want to impress without spending hours in the kitchen. The beautiful layers and festive colors create a dessert that’s as beautiful as it is delicious. Much like a No-Bake Christmas Trifle, it allows you to create something spectacular with minimal effort. Make this your signature holiday dessert this year – your family and guests will be begging for the recipe!
FAQs
Can I make this dessert gluten-free?
Yes, simply substitute the Oreo cookies with your favorite gluten-free chocolate sandwich cookies. The rest of the ingredients are naturally gluten-free.
How far in advance can I make this dessert?
For best results, make it 1-2 days before serving. The flavors meld beautifully with time, and the dessert holds its structure well.
Can I use different pudding flavors?
Absolutely! Chocolate, white chocolate, or cheesecake pudding flavors work wonderfully in this recipe.
My whipped cream deflated after a day. What happened?
For more stability, try adding 1-2 tablespoons of unflavored gelatin (bloomed and cooled) to your whipped cream, or use stabilized whipped topping instead.
Can I make individual servings for a party?
Yes! Layer the ingredients in clear plastic cups or mason jars for beautiful individual portions that are perfect for buffet-style serving.
Quick way to grow: 6 Layer Christmas Cookie Lasagna No-Bake
Equipment
- 9x13 inch pan
- Mixing bowls
- Electric mixer
- Whisk
Ingredients
Crust
- 28 wafers Oreo cookies, crushed
- 1/2 cup Unsalted butter, melted
Cream Cheese Layer
- 8 oz Cream cheese, softened
- 1 cup Powdered sugar
- 1/4 cup Milk
- 8 oz Whipped topping, thawed
Pudding Layer
- 2 packages Instant vanilla pudding mix
- 3 cups Milk
- Green food coloring optional
Topping
- 8 oz Whipped topping
- Christmas sprinkles for decoration
- Red and green M&M's for decoration
Instructions
Preparation
- Combine crushed Oreo cookies and melted butter, then press the mixture into the bottom of a 9x13 inch pan to form the crust.
- Beat softened cream cheese, powdered sugar, and 1/4 cup milk until smooth, then gently fold in 8 ounces of whipped topping.
Assembly
- Spread the cream cheese mixture evenly over the Oreo crust, forming the second layer.
- In a separate bowl, whisk together instant vanilla pudding mix and 3 cups of milk for 2 minutes, adding green food coloring if desired.
- Pour the pudding over the cream cheese layer, spreading it evenly as the third layer.
- Cover the pudding layer with remaining crushed Oreo cookies, then add another layer of whipped topping.
- Decorate the top with Christmas sprinkles, red and green M&M's, or other festive candies.
Chilling
- Refrigerate the lasagna for at least 4 hours, or preferably overnight, to allow it to set.