Chocolate Chip Cookie Garden
We will grow chocolate chip cookies in 7 days!
Chocolate Chips
Flour
Butter
Sugar
Eggs
Plant chocolate chips in soil in a pot.
Water the soil every day to keep it moist.
Place the pot in a sunny spot to help cookies grow.
Harvest your chocolate chip cookies after 7 days.
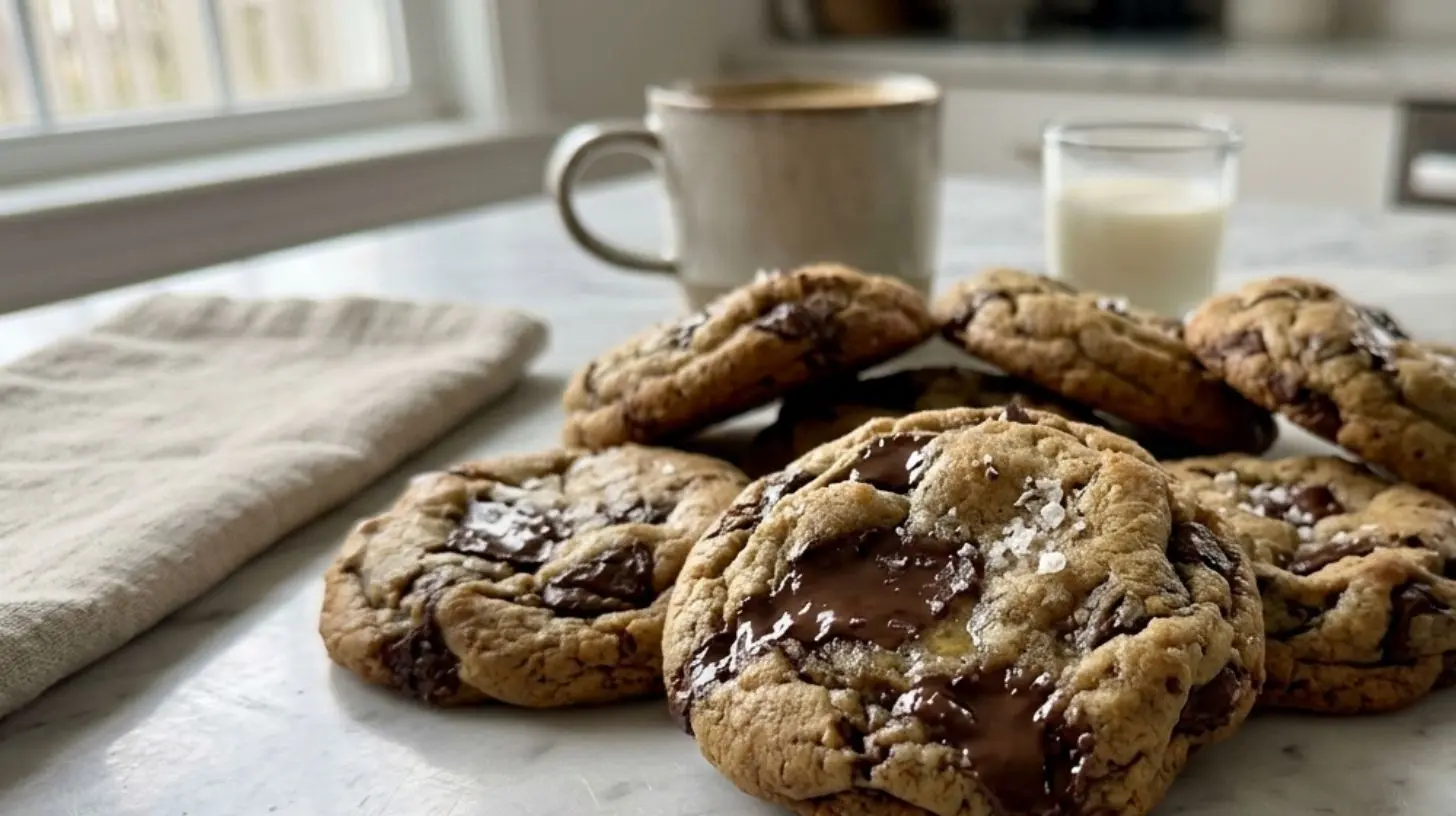
The Ultimate Guide to Perfectly Chewy Chocolate Chip Cookies
Have you ever wondered why bakery-style cookies taste so much better than most homemade versions? The secret isn’t a special ingredient or expensive equipment—it’s a combination of proper technique and understanding the science behind baking. Mastering the classic Chocolate Chip Cookies at home not only saves money but also lets you customize every batch to your taste. Whether you prefer crispy edges with soft centers or uniformly chewy treats, this guide will help you bake consistently excellent cookies. The perfect Chocolate Chip Cookie Recipe starts with quality ingredients and ends with warm, melt-in-your-mouth results.
—
Ingredients & Kitchen Tools
Dry Ingredients
– All-purpose flour (2 ¼ cups) – Provides structure; spoon and level for accuracy
– Baking soda (1 tsp) – Leavening agent for spread and lift
– Salt (1 tsp) – Balances sweetness and enhances chocolate flavor
Wet Ingredients
– Unsalted butter (1 cup, softened) – Adds richness; use room temperature for proper creaming
– Granulated sugar (¾ cup) – Promotes spread and crisp edges
– Brown sugar (¾ cup, packed) – Adds moisture and chewiness from molasses
– Large eggs (2) – Bind ingredients; use room temperature for better emulsion
– Vanilla extract (2 tsp) – Enhances overall flavor profile
Add-ins
– Semi-sweet chocolate chips (2 cups) – Classic choice; dark or milk chocolate works too
Essential Tools
– Stand mixer or hand mixer – For proper creaming
– Large mixing bowls – At least two for wet and dry ingredients
– Baking sheets – Light-colored aluminum prevents over-browning
– Parchment paper or silicone mats – Non-stick surface; eliminates greasing
– Cookie scoop (1.5 tbsp) – Ensures uniform size and even baking
– Cooling rack – Prevents soggy bottoms
Optional Substitutions
– Gluten-free: Use 1:1 gluten-free flour blend plus ¼ tsp xanthan gum
– Dairy-free: Substitute vegan butter sticks (not spreadable tubs)
– Egg-free: Use ¼ cup unsweetened applesauce per egg
—
Prep Time & Cooking Schedule
– Prep Time: 20 minutes
– Chill Time: 30 minutes (minimum) – crucial for preventing excessive spread
– Bake Time: 10–12 minutes per batch
– Total Time: Approximately 1 hour
Why chill the dough? Cold butter solidifies the fat, slowing spread and yielding thicker, chewier cookies. If you’re short on time, 15 minutes in the freezer works in a pinch. This schedule yields about 36 cookies using a standard 1.5-tablespoon scoop. Plan accordingly for gatherings—double the batch and freeze half the dough balls for later.
—
Step-by-Step Instructions
1. Preheat oven to 375°F (190°C) – Line two baking sheets with parchment paper.
2. Cream butter and sugars – Beat softened butter with both sugars on medium speed for 2–3 minutes until light and fluffy. Scrape down bowl sides halfway through.
3. Add eggs and vanilla – Beat in eggs one at a time, then vanilla. Mix just until combined to avoid over-aeration.
4. Whisk dry ingredients – In a separate bowl, combine flour, baking soda, and salt.
5. Gradually add dry mixture – Add to wet ingredients in three additions, mixing on low until barely combined—streaks of flour are okay.
6. Fold in chocolate chips – Use a spatula to incorporate chips gently. Overmixing develops gluten, making cookies tough.
7. Chill the dough – Cover bowl and refrigerate for at least 30 minutes. This step elevates any Chocolate Chip Cookie Recipe by preventing flat cookies.
8. Portion and shape – Scoop rounded tablespoons (about 1.5 tbsp each) onto prepared sheets, spacing 2 inches apart.
9. Bake in batches – Bake 10–12 minutes. Edges should be golden, centers still soft and puffy. The famous Chocolate Chip Cookies achieve perfect texture when pulled at this stage—they continue baking on the hot sheet.
10. Cool on sheet for 5 minutes – Transfer to rack to finish cooling.
Pro tip: For bakery-style appearance, press a few extra chips onto warm cookies immediately after removing from oven.
—
Nutritional Benefits & Advantages
While cookies are an indulgence, this recipe offers some redeeming qualities. Dark chocolate chips contain flavonoids—antioxidants linked to heart health. Using high-quality butter provides fat-soluble vitamins A, D, E, and K. Brown sugar contributes small amounts of minerals like calcium and potassium from molasses.
Compared to store-bought versions, homemade cookies contain no preservatives, artificial flavors, or hydrogenated oils. You control sugar levels—reduce by ¼ cup without sacrificing structure. For a fiber boost, substitute ½ cup whole wheat pastry flour for an equal amount of all-purpose flour. Portion control is easier when baking fresh: freeze individual dough balls for single-serving treats. Additionally, the psychological benefit of baking—reducing stress and promoting mindfulness—adds intangible value to every batch.
—
Tips Variations & Cooking Advice
Flavor Variations
– Brown butter version: Melt butter until golden brown, then cool to room temperature before creaming
– Sea salt finish: Sprinkle flaky sea salt on cookies before baking
– Nutty twist: Add ½ cup toasted walnuts or pecans with chocolate chips
– Double chocolate: Replace ¼ cup flour with unsweetened cocoa powder
Dietary Adaptations
– Gluten-free: Use certified gluten-free flour blend plus ¼ tsp xanthan gum
– Vegan: Replace butter with vegan sticks, eggs with flax eggs (1 tbsp flaxmeal + 2.5 tbsp water per egg)
– Low sugar: Use coconut sugar or reduce total sugar to 1 cup
Cooking Methods
– Convection oven: Reduce temperature to 350°F and bake 1-2 minutes less
– Air fryer: Bake at 320°F for 6-8 minutes in a lined basket
– Microwave mug cookie: 1 tbsp dough, microwave 30 seconds for single serving
Texture Control
– Chewier cookies: Use ½ cup bread flour + ½ cup all-purpose
– Crispier cookies: Replace 2 tbsp brown sugar with granulated; flatten dough balls before baking
– Thicker cookies: Increase flour by 2 tbsp and chill dough overnight
—
Common Mistakes to Avoid
| Mistake | Solution |
|———|———-|
| Cookies spread too thin | Chill dough sufficiently; butter must be cool. Reduce butter temperature or add 2 tbsp extra flour |
| Dry or crumbly texture | Overmixing develops excess gluten. Stop mixing when flour disappears. Measure flour correctly by spooning and leveling |
| Burnt bottoms | Use light-colored baking sheets. Avoid dark non-stick pans. Bake on middle rack |
| Raw centers | Scoop uniformly. If centers remain doughy after cooling, reduce dough size next batch |
| Flat, greasy cookies | Butter too warm or over-creamed. Chill dough thoroughly. Use unsalted butter to control moisture |
| Cookies stick to pan | Always line with parchment paper or silicone mat. Avoid wax paper or foil |
Temperature check: If your kitchen is warm (above 75°F), butter softens faster. Work quickly and return unused dough to refrigerator between batches.
—
Storage & Meal Prep Tips
Room Temperature Storage
– Airtight container – Keeps cookies fresh for 3–4 days
– Add bread slice – Absorbs excess moisture and maintains chewiness
– Layer with parchment – Prevents cookies from sticking together
Freezing Instructions
– Baked cookies: Freeze in single layer on sheet tray, then transfer to freezer bag. Thaw at room temperature 10 minutes before serving
– Unbaked dough balls: Portion onto parchment-lined tray, freeze solid (1 hour), then transfer to labeled bag. Bake directly from frozen—add 1–2 minutes to bake time
– Shelf life: Frozen dough maintains quality for 3 months; baked cookies freeze well for 1 month
Reheating Methods
– Oven: 300°F for 5 minutes (crisps edges, warms centers)
– Microwave: 10–15 seconds (restores gooey texture)
– Air fryer: 300°F for 3 minutes
Unexpected storage tip: Store cookies with an apple slice in the container to reintroduce moisture after 2 days—replace apple daily.
—
Conclusion
Perfecting homemade cookies comes down to understanding how each ingredient and technique affects the final result. From properly creaming butter to chilling dough before baking, these steps transform simple components into golden, chewy treasures. Whether you follow a classic Chocolate Chip Cookies method or adapt the Chocolate Chip Cookie Recipe for dietary needs, the principles remain the same: quality ingredients, careful technique, and patience during chilling. The Chocolate Chip Cookies from this approach deliver consistent, crowd-pleasing results every time. Understanding this Chocolate Chip Cookie Recipe empowers you to experiment confidently with variations. Try these methods tonight—your kitchen will smell amazing, and your family will thank you. Share your batch photos in the comments below or explore our holiday cookie collection for more inspiration.
—
FAQs
1. Can I substitute margarine for butter?
Margarine contains more water and less fat than butter, leading to flatter, spread-out cookies. For best texture, use butter. If dairy-free is required, choose vegan butter sticks (not tub margarine) for closest results.
2. Why did my cookies turn out cakey?
Cakey cookies result from too much flour or over-beating eggs and sugar. Reduce flour by 2 tablespoons next time, and avoid beating eggs more than 30 seconds after adding. Baking powder (not soda) also produces cakier texture—check your container.
3. How do I make cookies stay soft longer?
Add 2 tablespoons of cornstarch to your flour mixture—it tenderizes gluten. Store cookies with a slice of white bread in the container; replace bread every 2 days. Avoid over-baking (pull cookies when edges are just golden, centers still soft).
4. Can I use all brown sugar instead of white?
Yes, but expect denser, chewier cookies with deeper molasses flavor. They’ll spread less and stay moist longer. Reduce brown sugar to 1 ¼ cups total if omitting granulated entirely.
5. My cookies always burn on the bottom—what’s wrong?
Dark or non-stick baking sheets absorb more heat. Switch to light-colored aluminum sheets. Place an empty baking sheet on the lower rack to deflect heat. Alternatively, double-pan by nesting one sheet inside another for insulation.
Best way to grow Chocolate Chip Cookies in 7 Days
Equipment
- Baking sheets
- Parchment paper
- Mixing bowls (small and large)
- Whisk
- Electric mixer (handheld or stand)
- Measuring cups and spoons
- Spatula
- Wire rack
Ingredients
Dry Ingredients
- 2 1/4 cups all-purpose flour
- 1 teaspoon baking soda
- 1 teaspoon salt
Wet Ingredients
- 1 cup unsalted butter, softened
- 3/4 cup granulated sugar
- 3/4 cup packed brown sugar
- 2 large eggs
- 1 teaspoon vanilla extract
Mix-ins
- 2 cups chocolate chips
Instructions
Preparation
- Preheat your oven to 375°F (190°C) and line baking sheets with parchment paper, then set them aside.
- Whisk together the flour, baking soda, and salt in a small bowl and reserve for later.
Mixing
- Cream together the softened butter, granulated sugar, and brown sugar in a large bowl until the mixture is light and fluffy.
- Beat in the eggs one at a time, ensuring each is fully incorporated before adding the next, then stir in the vanilla extract.
- Gradually add the dry ingredient mixture to the wet ingredients, mixing until just combined.
- Fold in the chocolate chips evenly throughout the dough.
Baking
- Drop rounded tablespoons of cookie dough onto the prepared baking sheets, spacing them about 2 inches apart.
- Bake for 9-11 minutes, or until the edges are golden brown and the centers are still slightly soft.
- Let the cookies cool on the baking sheets for a few minutes before transferring them to a wire rack to cool completely.