
Fudgy Lotus Biscoff Cookie Butter Brownies
Learn how to make deliciously fudgy brownies with Lotus Biscoff Cookie Butter.
Butter
Sugar
Eggs
Flour
Lotus Biscoff Cookie Butter
Chocolate Chips
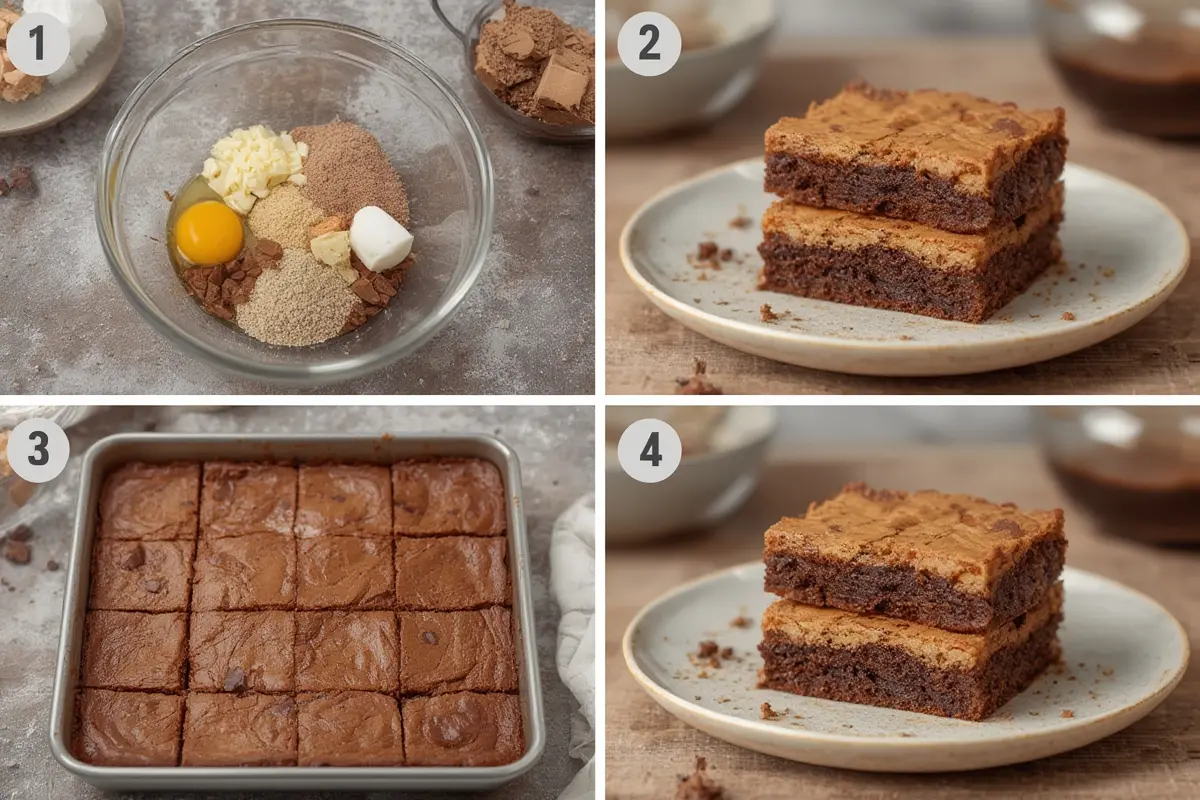
Preheat oven to 350°F.
Melt butter and mix with sugar in a bowl.
Add eggs one at a time and mix well.
Stir in Lotus Biscoff Cookie Butter until combined.
Fold in flour and chocolate chips.
Pour batter into a greased baking pan.
Bake for 25-30 minutes or until a toothpick comes out clean.
Indulgent Fudgy Lotus Biscoff Cookie Butter Brownies for Dessert Lovers
Have you ever craved a dessert that combines the irresistible caramelized flavor of Lotus Biscoff with the rich decadence of fudgy brownies? These Fudgy Lotus Biscoff Cookie Butter Brownies will transform your dessert experience into something truly extraordinary. The perfect balance of chocolatey goodness and speculoos cookie butter creates a mouthwatering treat that’s surprisingly simple to make at home. This Cookie Butter Brownie Recipe elevates traditional brownies to new heights with its unique flavor profile and irresistible texture.
Ingredients & Kitchen Tools
For the brownies:
– 1 cup (226g) unsalted butter
– 2 cups (340g) semi-sweet chocolate chips – use high-quality for best flavor
– 1 cup (200g) granulated sugar
– 1 cup (220g) brown sugar, packed – adds moisture and caramel notes
– 4 large eggs, room temperature
– 2 teaspoons vanilla extract
– 1 cup (125g) all-purpose flour
– 1/2 cup (42g) unsweetened cocoa powder
– 1 teaspoon salt
– 3/4 cup (220g) Lotus Biscoff cookie butter – the star ingredient
For the swirl topping:
– 1/2 cup (150g) additional Lotus Biscoff cookie butter
– 8-10 Lotus Biscoff cookies, crushed – for garnish
Kitchen tools:
– 9×13 inch baking pan
– Parchment paper
– Mixing bowls (large and medium)
– Whisk and rubber spatula
– Microwave-safe bowl or double boiler
– Measuring cups and spoons
– Toothpick or cake tester
Prep Time & Cooking Schedule
Total time: 1 hour 15 minutes
– Prep time: 20 minutes
– Baking time: 35-40 minutes
– Cooling time: 15-20 minutes (minimum)
Plan to make these brownies at least 1-2 hours before serving to allow proper cooling time for the perfect fudgy texture. The batter comes together quickly, but patience during cooling is crucial for that ideal chewy consistency.
Step-by-Step Instructions
1. Preheat and prepare: Set your oven to 350°F (175°C). Line your 9×13 baking pan with parchment paper, leaving some overhang for easy removal after baking.
2. Melt chocolate and butter: In a microwave-safe bowl or double boiler, gently melt the butter and chocolate chips together, stirring every 30 seconds until smooth and completely melted. Allow to cool slightly.
3. Mix wet ingredients: In a large bowl, whisk together granulated and brown sugars. Add eggs one at a time, whisking well after each addition. Stir in vanilla extract.
4. Combine with chocolate: Pour the melted chocolate-butter mixture into the egg mixture and whisk until completely incorporated.
5. Add dry ingredients: Sift in flour, cocoa powder, and salt. Fold gently with a spatula until just combined – overmixing can make your Fudgy Lotus Biscoff Cookie Butter Brownies tough.
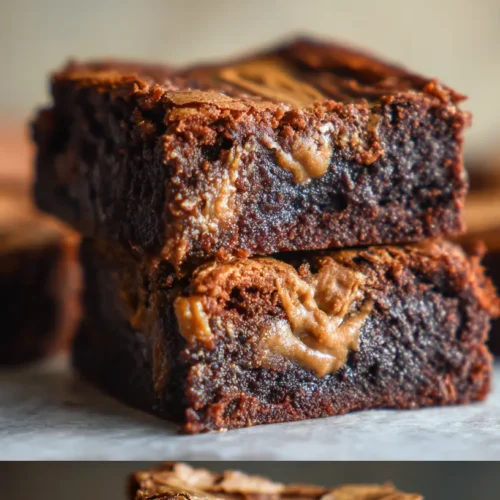
6. Add cookie butter: Gently fold in 3/4 cup of Lotus Biscoff cookie butter until partially combined, leaving some streaks for visual appeal.
7. Transfer and create swirls: Pour batter into the prepared pan. Heat the remaining 1/2 cup cookie butter in the microwave for 15-20 seconds to soften, then dollop over the brownie batter. Use a knife to create beautiful swirls throughout the Cookie Butter Brownie Recipe batter.
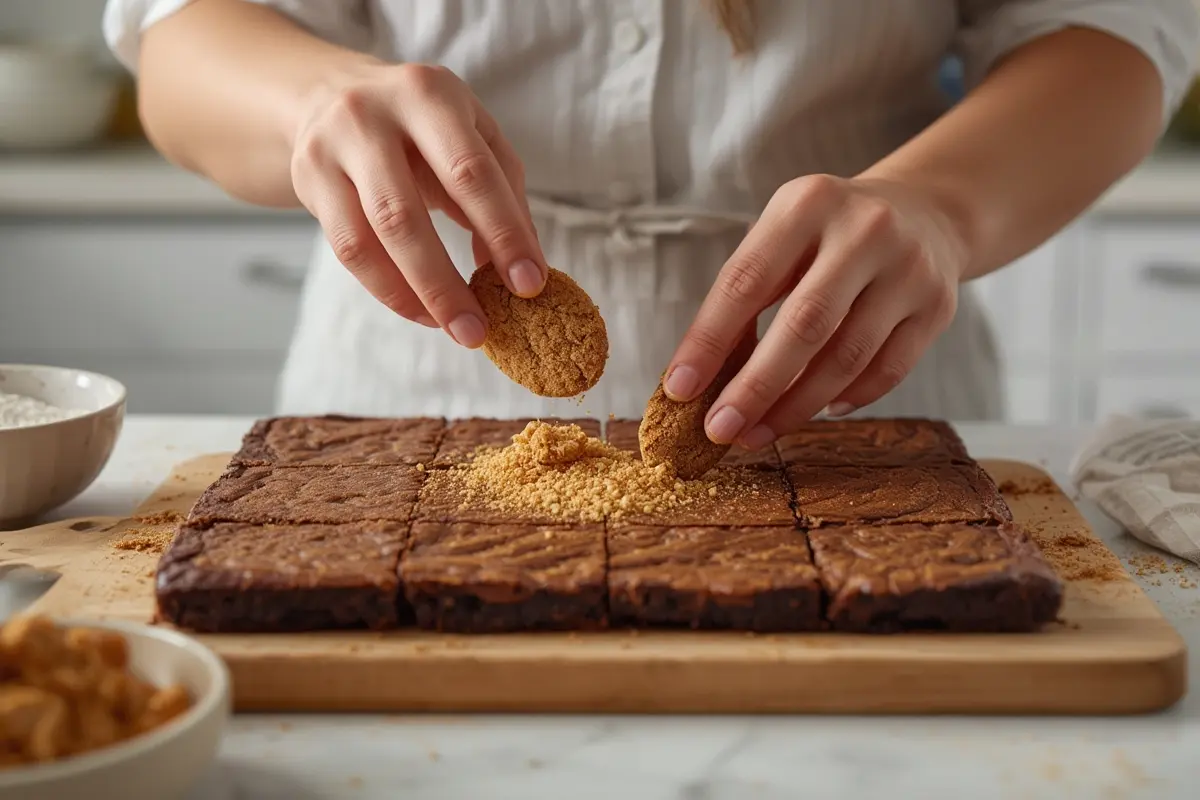
8. Add cookie crunch: Sprinkle crushed Lotus Biscoff cookies over the top.
9. Bake: Place in the preheated oven for 35-40 minutes. The center should be set but still slightly jiggly for fudgy texture.
10. Cool: Allow brownies to cool completely in the pan before lifting out with parchment paper and cutting into squares.
Nutritional Benefits & Advantages
While these brownies are undeniably an indulgent treat, they do offer some nutritional benefits. The dark chocolate contains antioxidants, while eggs provide protein and essential vitamins. When enjoyed in moderation, this dessert can be part of a balanced approach to eating that includes occasional treats. For a lighter version, you can reduce sugar slightly without compromising texture.
Tips, Variations & Cooking Advice
– Texture control: For fudgier brownies, bake for the minimum time. For cakier brownies, add an additional 5 minutes.
– Flavor variations: Try adding 1/2 cup of chopped nuts, white chocolate chips, or a teaspoon of espresso powder.
– Dietary adaptations: Use gluten-free flour blend and gluten-free Biscoff-style cookies for a gluten-free version.
– Serving suggestion: Warm slightly before serving and top with a scoop of vanilla ice cream.
– Thickness adjustment: Use an 8×8 inch pan for ultra-thick brownies (increase baking time by 10-15 minutes).
Common Mistakes to Avoid
1. Overbaking: The number one enemy of fudgy brownies! Remember they continue cooking slightly after removal from the oven.
2. Overmixing: Stir just until ingredients are combined to avoid tough brownies.
3. Not cooling properly: Cutting warm brownies results in messy edges. Allow full cooling for clean cuts.
4. Incorrect temperature ingredients: Using cold eggs can cause the melted chocolate to seize. Ensure eggs are at room temperature.
5. Substituting ingredients: The ratio of chocolate to flour is crucial for texture – maintain this balance if making substitutions.
Storage & Meal Prep Tips
– Counter storage: Store in an airtight container at room temperature for up to 3 days.
– Refrigeration: Keep in the refrigerator for up to 1 week. Allow to come to room temperature before serving for best texture.
– Freezing: Wrap individual brownies in plastic wrap, then aluminum foil, and freeze for up to 3 months.
– Thawing: Unwrap completely before thawing at room temperature to avoid condensation making them soggy.
– Refreshing: Warm slightly in the microwave (10-15 seconds) to revive the gooey texture.
Conclusion
These Fudgy Lotus Biscoff Cookie Butter Brownies offer a perfect marriage of rich chocolate and the distinctive caramelized spice flavor of Biscoff cookies. By following our detailed instructions and avoiding common pitfalls, you’ll create a dessert that’s sure to impress family and friends alike. This Cookie Butter Brownie Recipe deserves a special place in your dessert rotation. Don’t forget to share your creations on social media and experiment with the variations to make this recipe uniquely yours!
FAQs
Can I use crunchy cookie butter instead of smooth?
Yes! Crunchy cookie butter adds an extra textural element that works beautifully in these brownies.
How can I tell when my brownies are perfectly baked?
A toothpick inserted 1 inch from the edge should come out with a few moist crumbs, but not wet batter. The center should still be slightly jiggly.
Can I double this recipe?
Absolutely! Use two 9×13 pans rather than one larger pan to maintain the correct thickness and baking time.
Is there a non-dairy alternative for this recipe?
Yes, you can substitute the butter with plant-based butter and use dairy-free chocolate chips for a non-dairy version.
Why did my cookie butter sink to the bottom?
If your batter was too warm when adding the cookie butter, it can sink. Make sure your chocolate mixture has cooled slightly before proceeding.
How to grow 5 Fudgy Lotus Biscoff Cookie Butter Brownies
Equipment
- 8x8 inch baking pan
- large bowl
- small saucepan (optional)
- whisk
- microwave-safe bowl
- knife or skewer
- wire rack
Ingredients
Brownie Batter
- 1/2 cup unsalted butter
- 1 cup granulated sugar
- 1/2 cup packed light brown sugar
- 2 large eggs
- 1 tsp vanilla extract
- 3/4 cup all-purpose flour
- 1/2 cup unsweetened cocoa powder
- 1/4 tsp salt
Biscoff Swirl
- 1/2 cup Lotus Biscoff cookie butter
Instructions
Preparation
- Preheat your oven to 350°F (175°C) and grease and flour an 8x8 inch baking pan. This ensures the brownies don't stick and bake evenly.
Brownie Batter
- Melt the butter in a microwave-safe bowl or small saucepan. In a large bowl, whisk together the melted butter, granulated sugar, and brown sugar until smooth.
- Beat in the eggs one at a time, then stir in the vanilla extract. In a separate bowl, combine the flour, cocoa powder, and salt, then gradually add the dry ingredients to the wet ingredients.
- Mix until just combined, being careful not to overmix the batter. This helps to keep your brownies fudgy and not too cake-like.
Assembly and Baking
- Pour half of the brownie batter into the prepared baking pan and spread evenly. Warm up the Lotus Biscoff cookie butter slightly in the microwave to make it easier to swirl.
- Dollop spoonfuls of the warmed cookie butter over the brownie batter. Pour the remaining brownie batter over the cookie butter layer and spread gently.
- Use a knife or skewer to gently swirl the cookie butter into the brownie batter, creating a marble effect. Bake for 25-30 minutes.
- Check for doneness by inserting a toothpick into the center; it should come out with moist crumbs, not wet batter.
- Allow the brownies to cool completely in the pan on a wire rack before slicing and serving. This allows them to set properly and makes for cleaner cuts.