Best way to grow Hot Dogs in just 30 days
Learn how to make delicious hot dogs in just 30 days!
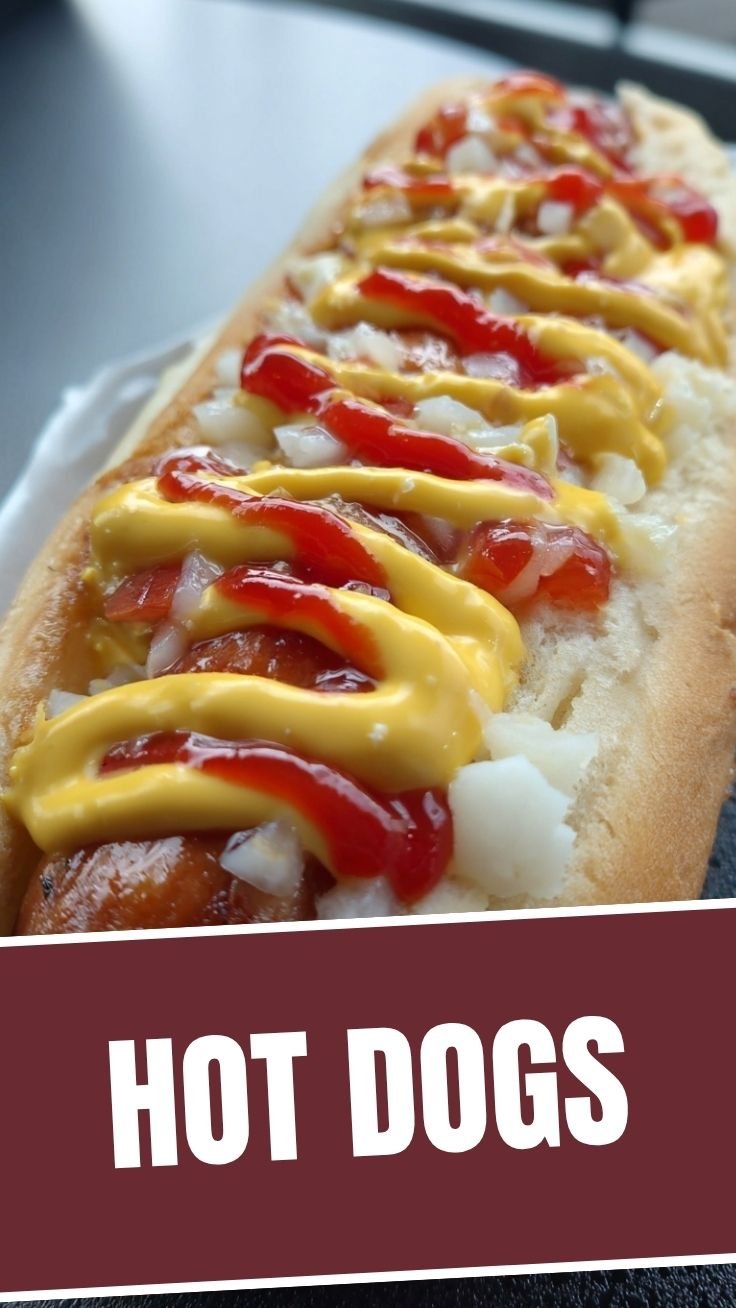
Hot Dogs
Buns
Ketchup
Mustard
Onions
Plant hot dog seeds in a sunny spot.
Water the hot dog plant daily.
Pick ripe hot dogs from the plant.
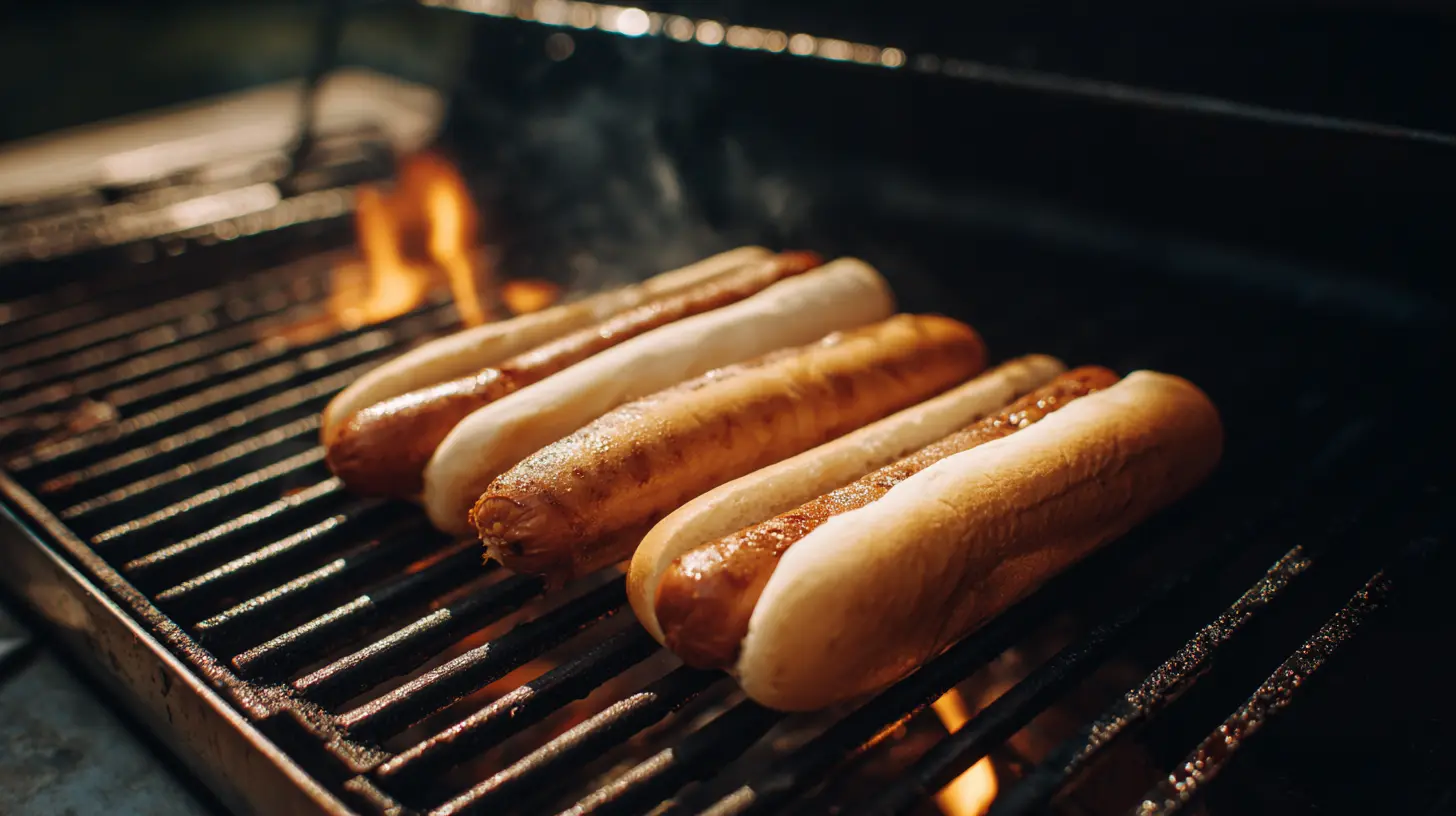
Grill the hot dogs until they're cooked.
Toast buns on the grill.
Place hot dogs in buns and add toppings.
Ultimate Homemade Chili Dogs: A Classic Comfort Food Recipe
There’s something irresistibly comforting about biting into a perfectly prepared Hot Dogs topped with savory homemade chili. This American classic has been a beloved staple at backyard barbecues, sporting events, and family dinners for generations. The combination of a juicy Frankfurter nestled in a soft bun and smothered with rich, spicy chili creates a flavor experience that’s hard to beat. Why settle for mediocre concession stand versions when you can create this iconic comfort food at home with quality ingredients and personalized flavors?
Ingredients & Kitchen Tools
For the Chili:
– 1 pound ground beef (80/20 for best flavor)
– 1 medium onion, finely diced
– 2 cloves garlic, minced
– 1 tablespoon chili powder
– 1 teaspoon cumin
– 1/2 teaspoon oregano
– 1/4 teaspoon cayenne pepper (adjust to taste)
– 1 can (15 oz) tomato sauce
– 1 tablespoon brown sugar
– Salt and pepper to taste
For Assembly:
– 8 high-quality beef frankfurters
– 8 hot dog buns (preferably split-top)
– 1 cup shredded cheddar cheese
– 1/2 cup diced white onions
– Yellow mustard to taste
– Optional toppings: jalapeños, sour cream, sliced avocado
Kitchen Tools:
– Large skillet or saucepan
– Wooden spoon
– Measuring spoons and cups
– Grill, grill pan, or pot for cooking hot dogs
– Tongs for handling frankfurters
– Serving platter
Prep Time & Cooking Schedule
Prep Time: 15 minutes
Cook Time: 30 minutes
Total Time: 45 minutes
Servings: 8 chili dogs
The beauty of this recipe is that the chili can be made ahead of time, allowing the flavors to deepen. If you’re planning for a gathering, prepare the chili up to two days in advance and simply reheat before serving. This timing flexibility makes it perfect for entertaining.
Step-by-Step Instructions
1. Make the chili: Heat a large skillet over medium heat. Add the ground beef and break it apart with a wooden spoon. Cook until no pink remains, about 5-7 minutes.
2. Develop flavors: Add the diced onions to the browned meat and cook until translucent, about 3-4 minutes. Stir in the garlic and cook for another minute until fragrant.
3. Season the mixture: Add the chili powder, cumin, oregano, and cayenne pepper. Stir to coat the meat mixture evenly with spices and cook for 1 minute to toast the spices and release their aromas.
4. Create the sauce: Pour in the tomato sauce and add the brown sugar. Stir well to combine all ingredients. Reduce heat to low and simmer for at least 15 minutes to allow flavors to meld. Season with salt and pepper to taste.
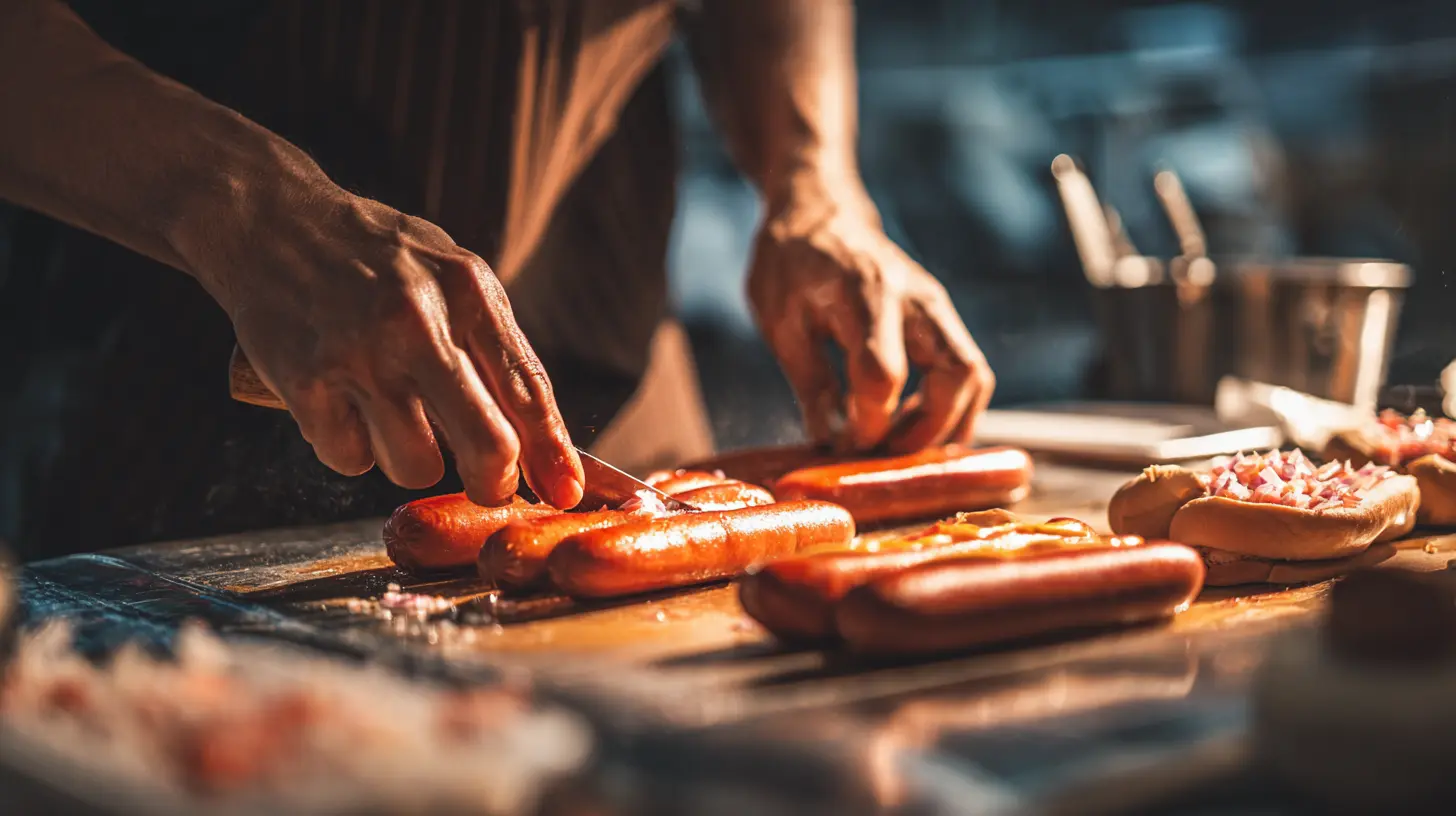
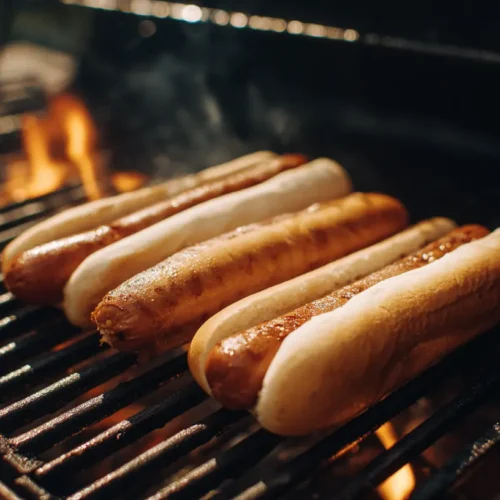
5. Prepare the Hot Dogs: While the chili simmers, cook your Frankfurter according to your preferred method—grilling provides the best flavor, but boiling or pan-frying works well too. Cook until heated through and showing light grill marks if applicable.
6. Toast the buns: For an extra touch, lightly butter the inside of your hot dog buns and toast them until golden brown.
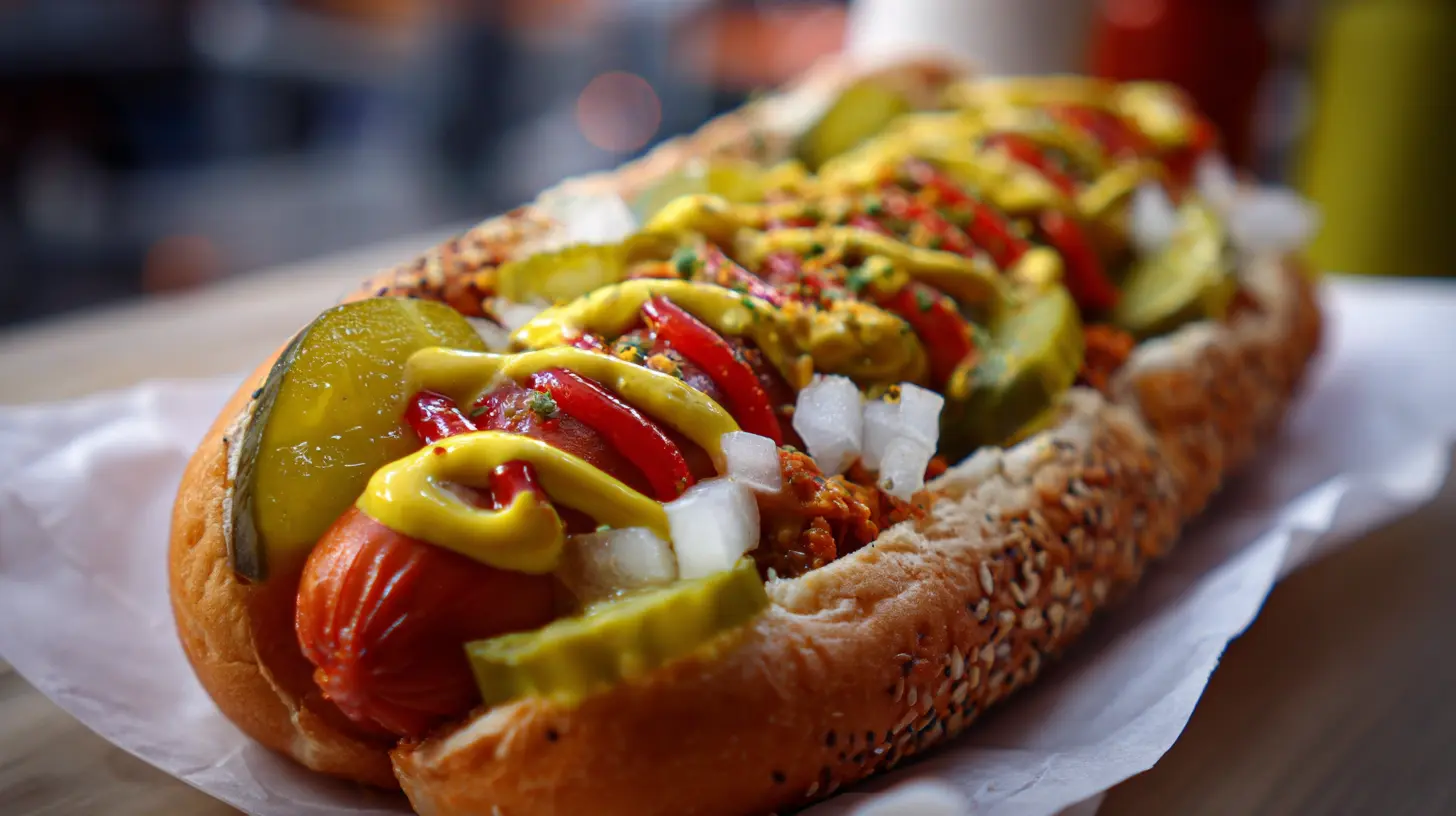
7. Assemble: Place each hot dog in a bun, spoon the warm chili over the top, and garnish with shredded cheese, diced onions, and mustard as desired.
Nutritional Benefits & Advantages
While chili dogs are certainly an indulgence, they do offer some nutritional benefits. The beef provides protein and iron, essential for muscle maintenance and oxygen transport. Using lean beef (90/10) can reduce the fat content while maintaining flavor. The tomato sauce in the chili contains lycopene, a powerful antioxidant linked to reduced risk of certain cancers and heart disease.
Tips, Variations & Cooking Advice
– Meat alternatives: Substitute ground turkey or plant-based meat for the beef in the chili for a lighter option.
– Spice level adjustment: Customize the heat by adjusting the cayenne pepper or adding hot sauce.
– Veggie boost: Add finely diced bell peppers or grated carrots to the chili for added nutrition.
– Regional variations: Try a Cincinnati-style chili with cinnamon and chocolate, or a Texas-style version with no beans and extra heat.
– Bun options: Experiment with pretzel buns, brioche rolls, or whole wheat alternatives for different flavor profiles.
Common Mistakes to Avoid
1. Overcooking the frankfurters: This leads to split casings and dry texture. Cook just until heated through and slightly plump.
2. Watery chili: If your chili seems too thin, continue simmering uncovered to reduce, or add 1 teaspoon of cornstarch mixed with water.
3. Under-seasoning: Taste the chili before serving and adjust seasoning as needed—flavors can mellow during cooking.
4. Cold buns: Serving hot dogs in cold buns creates temperature contrast. Always warm or toast your buns.
5. Unstable assembly: Build your chili dog on a plate with edges to contain inevitable spills and prevent messy eating.
Storage & Meal Prep Tips
The chili can be refrigerated for up to 3 days in an airtight container or frozen for up to 3 months. To reheat, thaw overnight in the refrigerator if frozen, then warm in a saucepan over medium-low heat, stirring occasionally. Add a splash of water if the chili seems too thick.
Cooked hot dogs can be refrigerated for up to 4 days but are best enjoyed freshly prepared. For meal prep, store components separately and assemble just before eating to prevent soggy buns.
Conclusion
Mastering homemade chili dogs allows you to elevate a simple comfort food into a memorable meal. The combination of a perfectly cooked Hot Dogs and scratch-made chili creates a flavor profile that surpasses any stadium concession. The versatility of this classic dish means you can adapt your Frankfurter creation to suit any palate or dietary preference. Whether for a casual family dinner or your next backyard gathering, these homemade chili dogs are sure to impress and satisfy.
FAQs
Can I make the chili with beans?
Yes! Add one 15 oz can of drained and rinsed kidney or pinto beans during the last 5 minutes of cooking for a heartier chili.
What’s the best way to cook hot dogs for optimal flavor?
Grilling provides the best smoky flavor and appealing grill marks. If indoor cooking, a cast-iron grill pan can achieve similar results.
Can I prepare everything in advance for a party?
Absolutely. Make the chili up to two days ahead, then keep it warm in a slow cooker. Cook the frankfurters just before serving.
How can I make this recipe keto-friendly?
Use keto-friendly hot dog buns or wrap the frankfurters in lettuce leaves. Ensure your chili has no added sugar and limit the onions.
What beverages pair well with chili dogs?
Cold beer, root beer, or lemonade complement the savory, spicy flavors perfectly. For wine lovers, a light Zinfandel works surprisingly well.
Best way to grow Hot Dogs in just 30 days
Equipment
- Planter or Garden Bed
- Small Trowel
- Watering Can / Spray Bottle
- Garden Gloves
Ingredients
Basic Hot Dog Growing Medium
- 4 packets Hot Dog Seeds (imaginary)
- 5 cups Enriched Soil (for humor)
- 2 cups Water
Growth Accelerant (for humor)
- 1 teaspoon Liquid Smoke
- 1 tablespoon Optional: Ketchup Fertilizer Add for a tangy zest during growth
Harvesting Tools (for humor)
- 1 Small Trowel
- 1 Garden Gloves For protection from imaginary hot dog thorns
Instructions
Planting the Hot Dog Seeds
- Prepare the soil by mixing enriched soil with water, ensuring it's moist but not waterlogged. Plant each packet of imaginary hot dog seeds about an inch deep and six inches apart in a spacious planter or garden bed.
Daily Care and Watering
- Water the planted seeds daily, keeping the soil consistently damp as if tending to real plant sprouts. Mist the soil surface lightly each morning to maintain an optimal growing environment.
Application of Growth Accelerant
- After two weeks, gently apply liquid smoke around the base of each planted "hot dog seedling" to enhance its imaginary growth. Optionally, for a tangy zest, mix ketchup fertilizer with water and apply every other day.
Monitoring and Harvesting
- Over the next two weeks, observe the rapid "growth" of your hot dogs, imagining them plumping up and turning a vibrant, cooked-sausage color. After 30 days, metaphorically harvest your fully "grown" hot dogs using a small trowel and garden gloves, then celebrate your imaginary agricultural success.