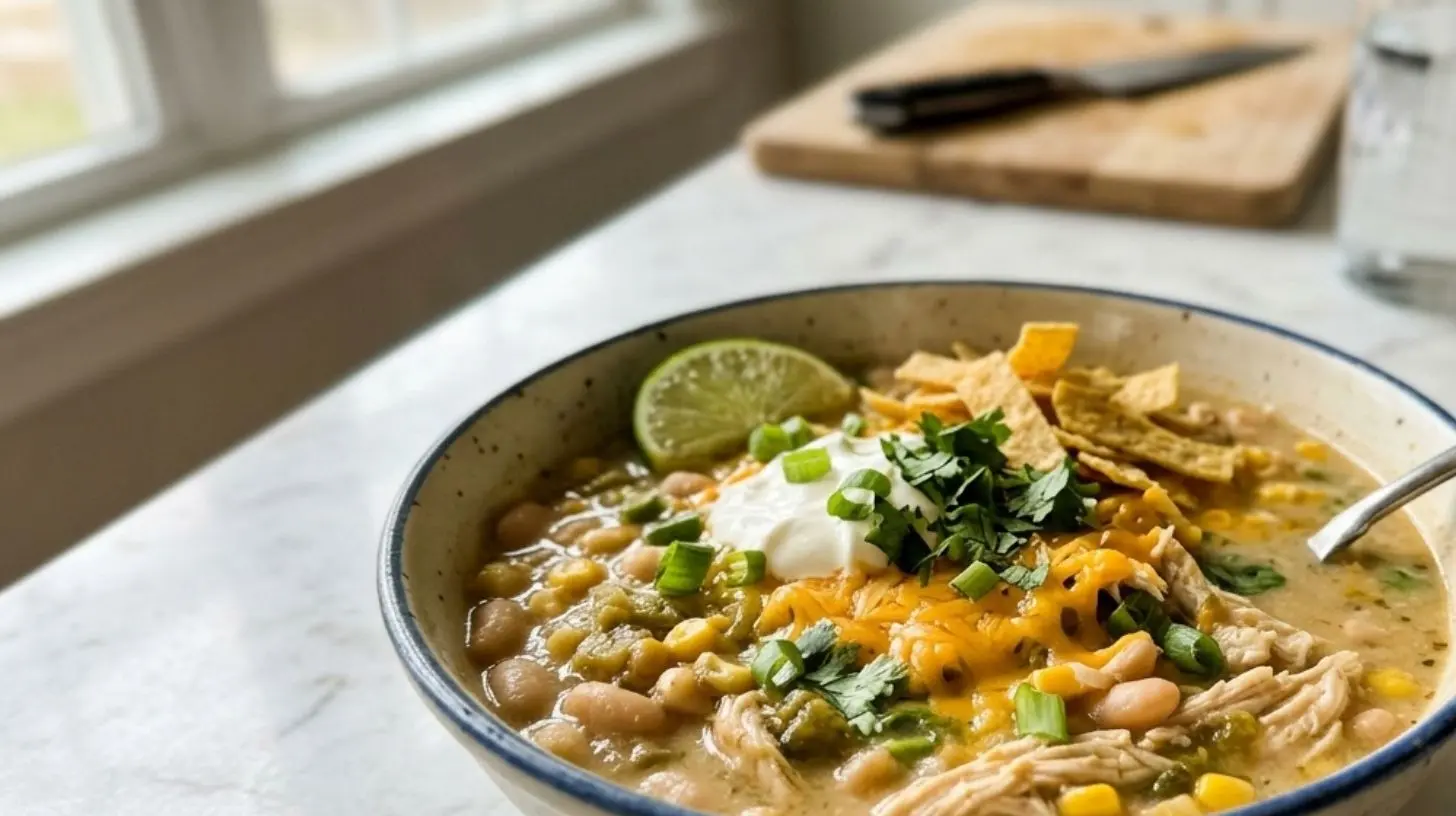
White Chicken Chili
A delicious and comforting chili perfect for any occasion.
Chicken
White beans
Onion
Garlic
Chicken broth
Cumin
Salt
Dice the onion and mince the garlic.
Cook the chicken in a pot until it's no longer pink.
Add the onion and garlic to the pot and cook until softened.
Stir in the white beans, chicken broth, cumin, and salt.
Simmer for 20 minutes, stirring occasionally.
Serve hot and enjoy your delicious White Chicken Chili!
The Ultimate Guide to Making the Best White Chicken Chili at Home
Have you ever wondered why restaurant-style white chicken chili tastes so incredibly comforting yet complex? The secret isn’t a fancy technique—it’s about balancing creamy richness with bold, earthy spices and tender chicken. Learning to prepare this soul-warming dish at home not only saves you money but gives you complete control over ingredients, spice levels, and dietary needs. Whether you’re craving a hearty weeknight dinner or a show-stopping game-day bowl, mastering this white chicken chili recipe will transform your home cooking. In this guide, we’ll walk through every step, from ingredient selection to storage, ensuring your chili is thick, flavorful, and unforgettable.
Ingredients & Kitchen Tools
Ingredients
– Boneless, skinless chicken breasts (1.5 lbs): Shredded for tender bites; substitutes include boneless thighs (more flavor) or pre-cooked rotisserie chicken.
– Great Northern or cannellini beans (2 cans, drained): Creamy, mild beans that thicken the chili naturally. Navy beans work too.
– White corn (1 can, drained): Adds sweetness and texture; frozen corn is an excellent substitute.
– Chicken broth (4 cups): Low-sodium preferred to control saltiness.
– Yellow onion (1 medium, diced): Aromatics base.
– Garlic (4 cloves, minced): Fresh garlic elevates flavor significantly.
– Green chiles (1 can, 4 oz diced): Mild heat; use fire-roasted for smokiness.
– Ground cumin (2 tsp): Earthy warmth essential for chili depth.
– Dried oregano (1 tsp): Mediterranean herb that complements beans.
– Smoked paprika (1 tsp): Adds subtle smokiness.
– Cayenne pepper (½ tsp, optional): For heat lovers.
– Heavy cream or sour cream (½ cup): Creates the signature creamy texture.
– Monterey Jack cheese (1 cup, shredded): Melty and mild; substitute with pepper jack for extra kick.
– Fresh cilantro (¼ cup, chopped): Bright garnish.
– Lime juice (2 tbsp): Acidity to balance richness.
– Salt and black pepper: To taste.
Kitchen Tools
– Large Dutch oven or heavy-bottomed pot: Holds heat evenly.
– Wooden spoon or spatula: For stirring.
– Cutting board and sharp knife: Essential for dicing vegetables.
– Measuring spoons and cups: Precision matters.
– Immersion blender or potato masher (optional): For thicker consistency.
– Can opener: Multipurpose.
– Serving bowls and ladle: Presentation matters.
Prep Time & Cooking Schedule

Total Time: 45 minutes to 1 hour
Prep Time: 15 minutes (chop vegetables, drain cans, measure spices)
Cook Time: 30 minutes (active simmering)
Resting Time: 5 minutes before serving (flavors meld beautifully)
Tip: If using dried beans, soak them overnight and extend cook time by 1 hour. For busy weeknights, prep all vegetables and measure spices the night before.
Step-by-Step Instructions
1. Sauté the Aromatics
Heat 2 tablespoons of olive oil in your Dutch oven over medium heat. Add diced onion and cook for 4 minutes until translucent. Stir in minced garlic and cook for 1 minute until fragrant. Temperature control: Medium heat prevents burning garlic, which turns bitter.
2. Bloom the Spices
Add ground cumin, dried oregano, smoked paprika, and cayenne (if using). Stir constantly for 30 seconds. This step releases essential oils and deepens the flavor of your white chicken chili. Texture cue: You should smell the spice’s aroma immediately.
3. Cook the Chicken
Nestle the chicken breasts into the pot, then pour in chicken broth. Bring to a gentle boil, then reduce heat to low, cover, and simmer for 15–18 minutes until the chicken reaches 165°F internal temperature. Remove chicken to a plate and shred with two forks when cool enough to handle.
4. Build the Chili Base
Add drained white beans, white corn, and diced green chiles to the broth. Stir well. If you prefer a thicker chili, use an immersion blender to pulse 1–2 times until the mixture slightly thickens. Seasoning adjustment: Taste and add salt (start with ½ tsp) and black pepper.
5. Finish and Simmer
Return shredded chicken to the pot. Stir in heavy cream (or sour cream) and shredded Monterey Jack cheese. Simmer uncovered for 10 minutes, stirring occasionally. The chili should coat the back of a spoon. Flavor cue: The cheese should be fully melted and the chili slightly thickened.
6. Final Touches
Remove from heat. Stir in fresh lime juice. Ladle into bowls and garnish with fresh cilantro, extra cheese, or a dollop of sour cream. For an extra kick, serve with crushed tortilla chips or a side of crusty bread. If you enjoy a bolder heat, try this Spicy White Chicken Chili variation by adding an extra ½ teaspoon of cayenne or a diced jalapeño with the onions.
Nutritional Benefits & Advantages
This white chicken chili is a nutritional powerhouse. Chicken provides lean protein for muscle repair and satiety, while white beans deliver soluble fiber that supports digestive health and helps stabilize blood sugar. The use of green chiles adds vitamin C and capsaicin, which may boost metabolism. Heavy cream and cheese offer calcium and vitamin D, but the dish can be adapted for lower-fat diets using Greek yogurt or evaporated milk. The combination of cumin and oregano also provides antioxidant properties, making this a anti-inflammatory meal option. Unlike heavy meat-based chilis, this version is lighter yet still protein-dense—perfect for balanced nutrition without sacrificing flavor.
Tips Variations & Cooking Advice
– Flavor variations: Add a teaspoon of chipotle powder for smoky heat; stir in a splash of beer for depth; or top with diced avocado for creaminess.
– Ingredient swaps: Replace chicken with shredded pork shoulder or tofu for a vegetarian version (use vegetable broth). Substitute cream cheese for heavy cream for tangier richness.
– Alternative cooking methods: Use a slow cooker—sauté aromatics first, then cook on low for 4–6 hours with raw chicken, adding dairy and cheese during the last 30 minutes. For Instant Pot, sauté in the pot, then pressure cook chicken for 10 minutes.
– Dietary adaptations: For gluten-free, use certified gluten-free broth and skip flour-based thickeners. Dairy-free: use full-fat coconut milk instead of cream and omit cheese, or use dairy-free cheese.
– Portion changes: Double the recipe for a crowd; freeze half before adding dairy for longer shelf life.
Common Mistakes to Avoid
1. Overcooking the chicken: Boiling too long makes chicken dry and stringy. Use a thermometer and remove at 165°F.
2. Adding dairy too early: Cream and cheese can curdle if boiled at high heat. Always add them at the end, on low heat, and stir gently.
3. Skipping the spice bloom: Adding spices directly to liquid without sautéing reduces their potency. Always bloom them in hot oil first.
4. Using unrinsed canned beans: The starchy liquid can make chili gummy. Rinse and drain for best texture.
5. Under-seasoning: White chili needs more salt than expected because beans and dairy absorb seasoning. Taste and adjust at the end—try adding a pinch of salt with the lime juice.
Storage & Meal Prep Tips
Refrigeration: Cool chili completely, then store in an airtight container for up to 4 days. Reheat gently on the stovetop over medium-low heat, adding a splash of broth or milk if too thick. Avoid boiling to preserve creaminess.
Freezing: Chili freezes beautifully but best without dairy. Cool, omit heavy cream and cheese, then freeze in portion-sized containers for up to 3 months. When ready, thaw overnight in the fridge, reheat, then stir in fresh cream and cheese before serving. Or freeze the fully made chili—texture may change slightly but flavor remains.
Reheating: For single servings, use a microwave on 70% power in 30-second intervals, stirring between. For large batches, reheat on the stove over low heat, stirring often, until steaming.
Conclusion
Creating a memorable bowl of white chicken chili at home is simpler than you think when you follow these detailed steps. From blooming spices to the perfect creamy finish, you now have the tools to customize this dish to your taste—whether you prefer a mild family-friendly version or a Spicy White Chicken Chili that wakes up your taste buds. The beauty of this recipe lies in its adaptability: swap proteins, adjust heat, or make it dairy-free, all while keeping that rich, satisfying character. I encourage you to try this recipe this week, experiment with your favorite toppings, and share your results with friends—they’ll be asking for your secret. And if you love comfort food classics, explore our other chili recipes for even more cozy inspiration.
FAQs
1. Can I use canned chicken instead of fresh?
Yes, but fresh chicken provides better texture and flavor. If using canned, shred and add during the last 5 minutes of cooking to prevent mushiness.
2. My chili is too thin. How do I thicken it?
Make a cornstarch slurry (1 tbsp cornstarch + 2 tbsp cold water) and stir into simmering chili for 2 minutes. Alternatively, mash one cup of beans against the pot side.
3. Can I make this white chicken chili vegetarian?
Absolutely! Omit chicken, replace chicken broth with vegetable broth, and double the beans. For protein, add extra white beans or cubed firm tofu sautéed until golden.
4. How do I tone down the spiciness in a Spicy White Chicken Chili?
Add a tablespoon of sugar or honey, mix in more heavy cream, or serve with plain Greek yogurt on top. Removing seeds from chiles also reduces heat.
5. Does this chili freeze well with the cheese?
It freezes okay but may separate slightly upon reheating. For best results, freeze without dairy, then add fresh cheese and cream after thawing.