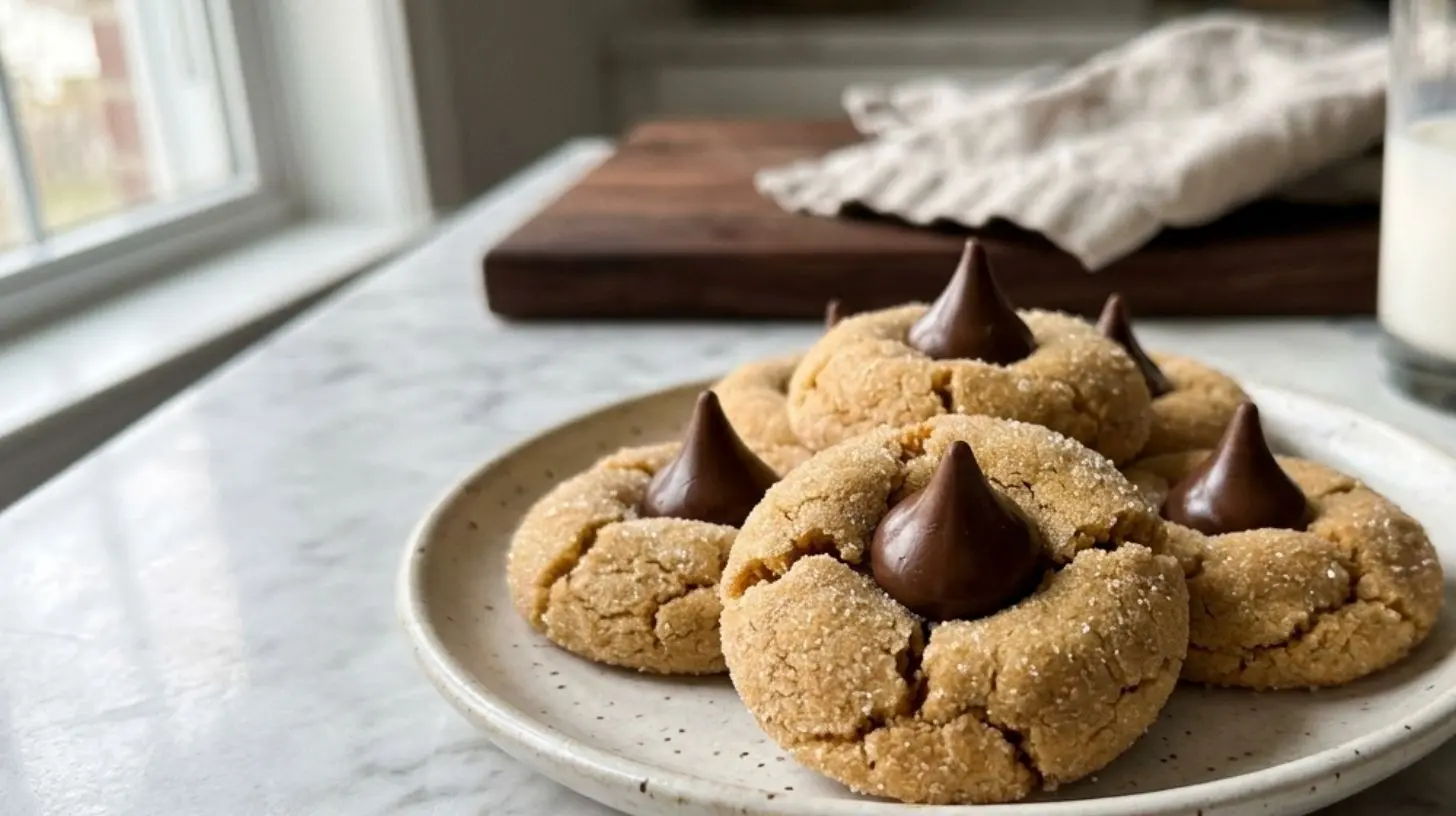
Quick way to grow 25 Peanut Butter Blossoms
Learn how to whip up a batch of delicious Peanut Butter Blossoms in no time!
Flour
Sugar
Peanut Butter
Egg
Chocolate Kisses
Baking Powder
Preheat the oven to 350°F.
Mix flour, sugar, peanut butter, egg, and baking powder in a bowl.
Form dough into small balls and roll in sugar.
Bake for 10-12 minutes until slightly golden.
Press a chocolate kiss into the center of each cookie.
Perfect Your Baking: The Ultimate Guide to Irresistible Peanut Butter Blossoms
Have you ever bitten into a cookie that instantly transported you back to childhood holiday gatherings? That’s exactly what happens with Peanut Butter Blossoms—the iconic combination of soft, chewy peanut butter cookies topped with a chocolate kiss that creates pure nostalgic magic. While store-bought versions exist, preparing this classic treat at home offers unparalleled freshness, customizable sweetness, and the incredible aroma that fills your kitchen. Whether you’re a seasoned baker or a complete beginner, mastering these cookies will elevate your baking game and impress everyone who takes a bite.
—
Ingredients & Kitchen Tools
Ingredients
– 1/2 cup unsalted butter (softened) – Use room-temperature butter for proper creaming; salted butter works if you reduce added salt.
– 1/2 cup creamy peanut butter – Natural peanut butter may alter texture; stick with processed brands for stability.
– 1/2 cup granulated sugar (plus extra for rolling) – Provides structure and sweetness.
– 1/2 cup packed brown sugar – Adds moisture and depth of flavor.
– 1 large egg – Binds ingredients together; flax egg works for vegan versions.
– 1 teaspoon vanilla extract – Enhances overall flavor profile.
– 1 3/4 cups all-purpose flour – Substitute with gluten-free 1:1 blend if needed.
– 1 teaspoon baking soda – Ensures proper rise and spread.
– 1/2 teaspoon salt – Balances sweetness; omit if using salted peanut butter.
– 24-30 Hershey’s Kisses (unwrapped) – Milk chocolate is classic; dark chocolate or caramel-filled varieties work beautifully.
Kitchen Tools
– Electric mixer (hand or stand) – Essential for proper creaming; whisk works manually but requires more effort.
– Mixing bowls (medium and large) – Use stainless steel or glass for best results.
– Baking sheets – Light-colored metal sheets prevent over-browning.
– Parchment paper or silicone baking mat – Ensures easy release and even baking.
– Cookie scoop (1.5 tablespoon size) – Ensures uniform cookies for even baking.
– Cooling rack – Critical for proper texture development.
– Measuring cups and spoons – Accuracy matters in baking.
—
Prep Time & Cooking Schedule

| Phase | Time | Notes |
|——-|——|——-|
| Prep Time | 20 minutes | Includes gathering ingredients, creaming butter and sugars, mixing dough |
| Chill Time | 30 minutes (recommended) | Prevents excessive spreading; can skip if dough seems firm |
| Baking Time | 8-10 minutes per batch | Bake until edges are lightly golden; centers will appear slightly underdone |
| Cooling & Kiss Insertion | 5 minutes (immediately after baking) | Press kisses gently while cookies are warm but not hot |
| Total Time | ~1 hour | Perfect for an afternoon baking session |
Pro Planning Tip: Make the dough up to 48 hours in advance and refrigerate. This actually improves flavor development and makes the cookies easier to shape.
—
Step-by-Step Instructions
1. Preheat your oven to 375°F (190°C). Line two baking sheets with parchment paper or silicone mats.
2. Cream the fats and sugars – In a large bowl, beat the softened butter, creamy peanut butter, granulated sugar, and brown sugar together until light and fluffy (about 2-3 minutes). Scrape down sides as needed. This step is crucial for creating air pockets that yield tender cookies.
3. Add wet ingredients – Beat in the egg and vanilla extract until fully combined. The mixture should look smooth and glossy.
4. Combine dry ingredients – In a separate bowl, whisk together the flour, baking soda, and salt.
5. Form the dough – Gradually add the dry mixture to the wet mixture on low speed, mixing just until no flour streaks remain. Overmixing develops gluten, resulting in tough cookies.
6. Shape and coat – Using a cookie scoop, form 1.5-tablespoon portions of dough. Roll each ball between your palms until smooth, then roll in granulated sugar until fully coated. Place 2 inches apart on prepared baking sheets. The key to perfect Peanut Butter Blossoms is ensuring each ball is uniformly sized—this guarantees even baking and a professional appearance.
7. Chill (optional but recommended) – Refrigerate shaped dough balls for 30 minutes. This step prevents spreading and ensures tall, puffy cookies that hold their shape when you add the kisses.
8. Bake – Bake one sheet at a time for 8-10 minutes, rotating halfway through. The cookies should look puffy with lightly browned edges and slightly soft centers. A common mistake with peanut butter cookies is overbaking—remove them when centers appear just set but still soft.
9. Add the kisses – Remove from oven and immediately press one chocolate kiss firmly into the center of each cookie. If the cookie cracks slightly, gently smooth the edges with your finger.
10. Cool completely – Transfer to a wire rack and let cool for at least 15 minutes before serving. The chocolate will firm up as the cookies cool, creating that signature contrast of warm peanut butter and cool chocolate.
—
Nutritional Benefits & Advantages
These Peanut Butter Blossoms offer more than just incredible taste—they provide surprising nutritional value:
– Protein boost – Each cookie contains approximately 3-4 grams of protein from peanut butter, helping stabilize blood sugar and provide sustained energy.
– Healthy fats – Peanut butter delivers monounsaturated fats that support heart health when consumed in moderation.
– Mood-enhancing properties – The combination of tryptophan (from peanuts) and phenylethylamine (from chocolate) naturally elevates mood.
– Portion control – Individual cookie portions make it easier to enjoy a sweet treat without overindulging.
– Customizable nutrition – Easily adapt recipes to reduce sugar or incorporate whole wheat flour for added fiber.
—
Tips, Variations & Cooking Advice
Flavor Variations
– Cinnamon Sugar Coating – Add 1 teaspoon cinnamon to the rolling sugar for warm spice notes.
– Double Chocolate – Use chocolate peanut butter and dark chocolate kisses for intense cocoa flavor.
– Salted Caramel – Press a caramel-filled chocolate kiss into slightly cooled cookies for gooey centers.
Dietary Adaptations
– Gluten-Free – Substitute all-purpose flour with a quality 1:1 gluten-free baking blend (add 1/4 teaspoon xanthan gum if blend doesn’t contain it).
– Dairy-Free – Use vegan butter and dairy-free chocolate kisses; ensure peanut butter is dairy-free certified.
– Lower Sugar – Reduce granulated sugar to 1/3 cup and brown sugar to 1/3 cup; use sugar-free chocolate kisses.
Cooking Method Tips
– Convection vs. Conventional – If using convection, reduce temperature to 350°F and check cookies at 7 minutes.
– High Altitude Adjustments – Increase flour by 2 tablespoons and decrease sugar by 1 tablespoon to prevent spreading.
—
Common Mistakes to Avoid
| Mistake | Solution |
|———|———-|
| Cookies spread too thin | Chill dough for 30 minutes; ensure butter isn’t too soft; measure flour correctly using spoon-and-level method |
| Kisses fall off after cooling | Press kisses immediately after baking while cookies are warm; don’t overbake or cookies become too firm to bond |
| Dry, crumbly texture | Don’t overmix after adding flour; ensure proper fat-to-flour ratio; check oven temperature accuracy |
| Burnt bottoms | Use light-colored baking sheets; avoid over-greasing pans; place rack in center of oven |
| Uneven baking | Use uniform dough ball sizes; rotate pans halfway through baking; don’t overcrowd sheet |
—
Storage & Meal Prep Tips
Room Temperature Storage
– Store cooled cookies in an airtight container with layers separated by parchment paper.
– Keep at room temperature for up to 5 days.
– Add a slice of bread to the container to absorb excess moisture and maintain softness.
Freezer Instructions
– Unbaked dough – Shape into balls, flash freeze on a baking sheet for 1 hour, then transfer to freezer bags. Bake directly from frozen, adding 1-2 minutes to bake time.
– Baked cookies – Freeze without kisses for up to 3 months. Add fresh kisses after thawing for best texture.
Reheating
– Microwave a single cookie for 8-10 seconds to restore that fresh-from-the-oven experience.
– For larger batches, warm in a 300°F oven for 3-5 minutes.
—
Conclusion
Creating Peanut Butter Blossoms at home transforms a simple cookie into a memorable experience—from the joyful process of shaping dough to the gratifying moment you press that chocolate kiss into a warm, freshly baked cookie. The beauty of this recipe lies in its perfect balance: the nutty, slightly salty foundation of peanut butter cookies paired with the rich, melting sweetness of chocolate. Whether you’re baking for holiday cookie exchanges, birthday celebrations, or simply to satisfy a craving, this recipe delivers consistently delicious results every time. We’d love to see your creations—share your photos and tag us, or leave a comment below with your favorite variation. Happy baking!
—
FAQs
1. Can I use natural peanut butter instead of processed?
Yes, but expect slightly different results. Natural peanut butter has more oil separation, which can cause cookies to spread more and become greasier. If using natural peanut butter, stir it thoroughly and consider refrigerating the dough for 45-60 minutes before baking.
2. Why did my chocolate kisses melt completely?
If you press kisses into cookies that are too hot (fresh from the oven), or if you bake the cookies too long, the kisses may fully melt. Wait 1-2 minutes after pulling from the oven before pressing kisses, and ensure cookies aren’t overbaked.
3. Can I make these cookies ahead for a party?
Absolutely! Prepare the dough up to 48 hours ahead and refrigerate. Alternatively, bake the cookies completely (without kisses), freeze until needed, then thaw, warm slightly, and press kisses in just before serving for maximum freshness.
4. How do I get perfectly round cookies without cracks?
Roll the dough balls very smooth before coating in sugar. If cracks appear after pressing the kiss, use your finger to gently smooth the edges while the cookie is still warm. Chilling the dough also minimizes cracking.
5. What’s the best substitute for Hershey’s Kisses?
Try chocolate chips (press into dough before baking), Rolos for caramel-filled centers, or even peanut butter cups chopped into small pieces. For a festive twist, use candy cane kisses during the holiday season.