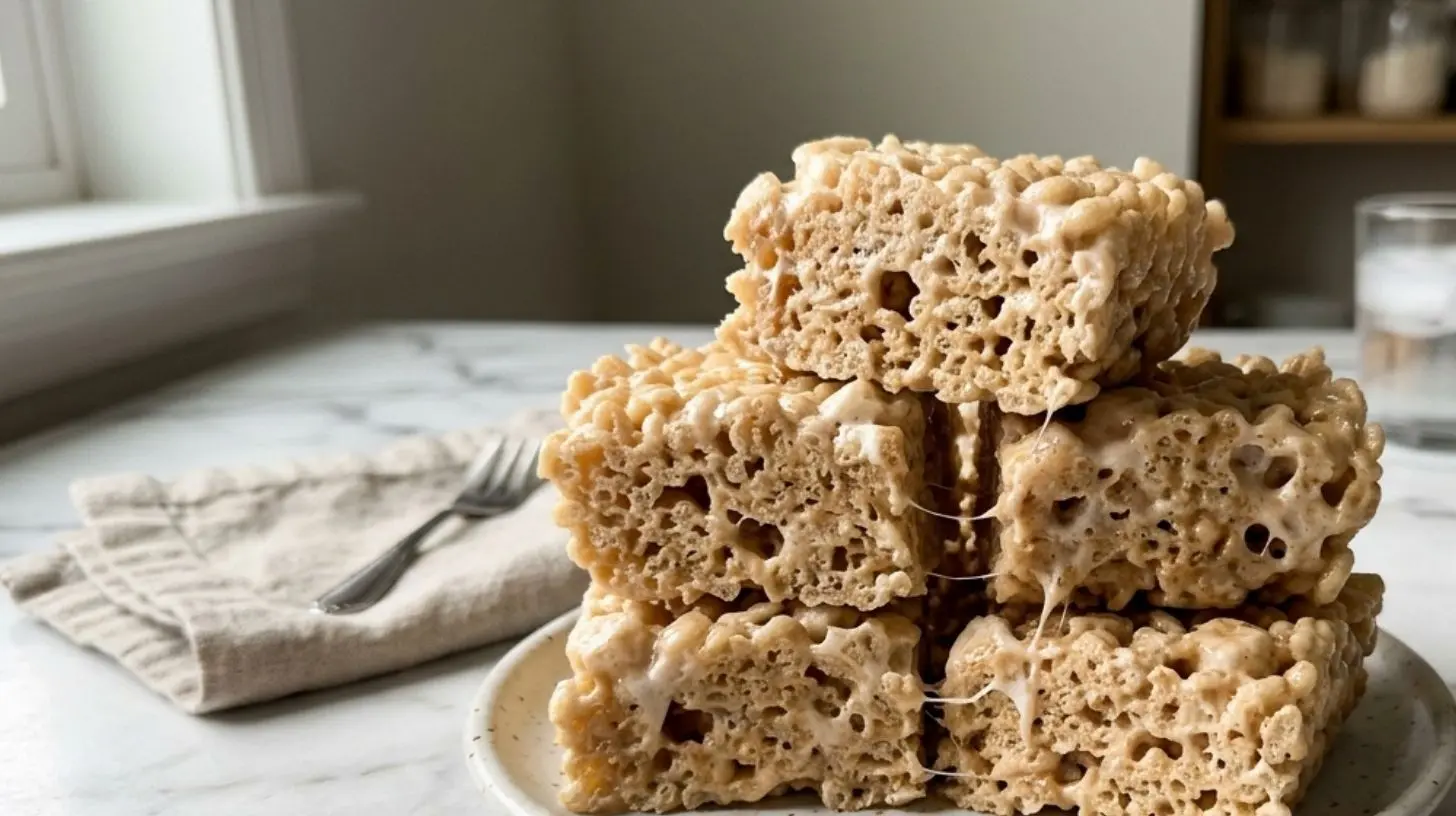
Quick way to grow a perfect batch of Rice Krispie Treats
Learn how to make the perfect Rice Krispie Treats in no time!
Butter
Marshmallows
Rice Krispies Cereal
Melt butter in a large pot over low heat.
Add marshmallows and stir until melted.
Remove from heat and stir in Rice Krispies.
Press mixture into a greased pan and let cool.
The Ultimate Guide to Perfectly Gooey Rice Krispie Treats
Have you ever bitten into a store-bought Rice Krispie Treats bar only to find it rock-hard and disappointingly stale? There’s nothing quite like the homemade version—crispy, buttery, and melt-in-your-mouth soft. Preparing these classic no-bake desserts at home not only guarantees freshness but also allows you to control the texture and sweetness. Whether you’re a busy parent looking for a quick treat or a home baker craving nostalgia, mastering this simple recipe will save you money and impress everyone. In this comprehensive guide, you’ll discover how to create perfect Rice Krispie squares every single time, with tips to avoid common pitfalls and elevate your snack game.
—
Ingredients & Kitchen Tools
Before you start, gather these essential items. Each plays a critical role in achieving that signature chewy-crunchy balance.
Required Ingredients
– 3 tablespoons unsalted butter – Use high-quality butter for richness; salted butter works if you reduce added salt later.
– 1 package (10 oz) marshmallows – Standard size works best; mini marshmallows melt faster and more evenly.
– 6 cups crispy rice cereal – The classic brand ensures consistent crunch; generic alternatives may become soggy.
– 1/4 teaspoon vanilla extract – Optional but amplifies flavor; use pure extract for best results.
– Pinch of salt – Balances sweetness; omit if using salted butter.
Kitchen Tools
– Large non-stick saucepan (4-quart) – Prevents sticking and scorching.
– Silicone spatula – Resists melting and helps fold gently.
– 9×13-inch baking dish – Grease with butter or line with parchment for easy removal.
– Measuring cups and spoons – Accuracy is key for texture.
– Sharp knife – Cuts clean squares without crushing.
Optional Substitutions
– Vegan version: Use plant-based butter and vegan marshmallows (check labels for gelatin).
– Flavor twist: Add 1/2 cup melted chocolate chips or peanut butter after melting marshmallows.
—
Prep Time & Cooking Schedule
Understanding timing ensures stress-free preparation and perfect results.
– Prep time: 5 minutes (measure ingredients, grease dish)
– Cook time: 10 minutes (melt butter and marshmallows, combine with cereal)
– Cooling time: 30 minutes at room temperature (or 15 minutes in the fridge)
– Total time: 45 minutes
Tip: Prepare all ingredients before heating—once the marshmallows melt, you must work quickly. Set a timer to avoid over-mixing, which can make the treats dense.
—
Step-by-Step Instructions
Follow these precise steps for foolproof Rice Krispie Treats that are neither too hard nor too sticky.
1. Prepare your pan: Grease a 9×13-inch dish generously with butter or line with parchment paper. Leave overhang for easy lifting.
2. Melt butter: In a large non-stick saucepan over low heat, melt 3 tablespoons of butter completely. Do not brown—it can alter flavor.
3. Add marshmallows: Pour in the marshmallows and stir constantly with the silicone spatula until fully melted and smooth. Remove from heat immediately.
4. Incorporate flavorings: Stir in vanilla extract and a pinch of salt if desired.
5. Fold in cereal: Add the crispy rice cereal in two batches. Gently fold using a chopping motion—avoid stirring in circles, which crushes the cereal.
6. Press into pan: Transfer mixture to the prepared dish. Lightly wet your hands or spatula with water to prevent sticking, then press evenly. Do not compact too hard or the final Rice Krispie Treats will be tough.
7. Cool and cut: Let rest for 30 minutes. Use a sharp knife to cut into squares. For clean edges, wipe the knife between cuts.
Pro tip: Check the temperature of your marshmallow mixture—if it becomes too cool, the Rice Krispie squares will be difficult to shape. Work while the mixture is still warm but not hot.
—
Nutritional Benefits & Advantages
While these treats are indulgent, they offer surprising benefits when made at home.
– Energy boost: The simple carbohydrates in marshmallows provide quick energy, making this a great pre-workout or post-school snack.
– Portion control: Homemade versions contain fewer preservatives than store-bought, and you can adjust sugar levels.
– Low-fat option: Compared to many baked goods, this recipe uses minimal butter—only 3 tablespoons for the whole batch.
– Gluten-free potential: When using certified gluten-free cereal, this dessert becomes safe for those with celiac disease.
– Kid-friendly: Children can help measure and fold, fostering kitchen confidence and family bonding.
—
Tips Variations & Cooking Advice
Experiment with these ideas to customize your Rice Krispie squares for any occasion.
Flavor Variations
– Salted caramel: Drizzle caramel sauce on top before pressing, then sprinkle flaky sea salt.
– Chocolate-dipped: Dip cooled squares halfway into melted dark chocolate and decorate with sprinkles.
– Peanut butter swirl: Melt 1/2 cup peanut butter with the marshmallows for a nutty twist.
Dietary Adaptations
– Dairy-free: Use coconut oil instead of butter and dairy-free marshmallows.
– Low-sugar: Substitute half the marshmallows with sugar-free alternatives (texture may vary).
– Vegan: Confirm all ingredients are plant-based; some marshmallows avoid gelatin.
Cooking Advice
– Microwave shortcut: Combine butter and marshmallows in a microwave-safe bowl; heat in 30-second bursts, stirring between each.
– Double batch: Multiply ingredients by 1.5 for a thicker treat—use a 9×13-inch or larger pan.
– Texture control: For extra crunch, slightly under-melt the marshmallows so some remain in small pieces.
—
Common Mistakes to Avoid
Even experienced cooks can face issues. Here’s how to prevent them.
– Overheating the marshmallows: Too much heat makes them rubbery. Remove from heat as soon as they become smooth.
– Compacting too hard: Pressing with too much force creates dense, hard Rice Krispie Treats. Use light, even pressure.
– Adding cereal too early: If the marshmallow mixture is too hot, the cereal becomes soggy. Wait 30 seconds after removing from heat.
– Using stale cereal: Always check expiration dates; fresh cereal ensures optimum crunch.
– Skipping the grease: Without greasing the spatula or hands, the mixture sticks and tears when pressing.
—
Storage & Meal Prep Tips
Proper storage keeps these treats fresh for days.
– Room temperature: Place in an airtight container between layers of parchment. They last 2–3 days.
– Refrigeration: Wrapped tightly in plastic wrap, they stay fresh for up to 1 week. Allow to come to room temperature before serving for best texture.
– Freezing: Cut into individual squares, wrap each in plastic, then place in a freezer bag. Thaw at room temperature for 15 minutes. Freeze for up to 3 months.
– Reheating: For a gooey texture, microwave a square for 10–15 seconds. Avoid overheating, as it can harden the cereal.
Meal prep tip: Make these on Sunday for school lunches all week. They also make excellent last-minute party favors.
—
Conclusion
There you have it—a foolproof method for creating the iconic Rice Krispie Treats that are soft, buttery, and bursting with nostalgia. The secret lies in gentle folding, precise temperature control, and avoiding over-compression. Whether you stick to the classic recipe or try a fun variation like peanut butter or chocolate-dipped Rice Krispie squares, this dessert is guaranteed to bring smiles. We encourage you to try this recipe today, share your results on social media, and explore more easy dessert ideas on our site. Homemade has never been this rewarding!
—
FAQs
1. Can I use marshmallow creme instead of marshmallows?
Yes, but the texture will be denser and less fluffy. Use 7 oz of marshmallow creme (one tub) and reduce butter slightly to avoid greasiness.
2. Why did my Rice Krispie squares turn out hard?
This usually happens when the marshmallow mixture is overheated or the treats are pressed too firmly. Next time, melt over low heat and press gently.
3. How can I make this recipe gluten-free?
Use certified gluten-free crispy rice cereal (many brands exist) and ensure all other ingredients are gluten-free.
4. Can I add candy or mix-ins?
Absolutely! Fold in 1/2 cup of chocolate chips, crushed Oreos, or sprinkles after combining the cereal. Add them gently to avoid crushing.
5. How do I cut clean squares without them crumbling?
Use a sharp knife and wipe it clean between cuts. Alternatively, freeze for 10 minutes before cutting for cleaner edges.