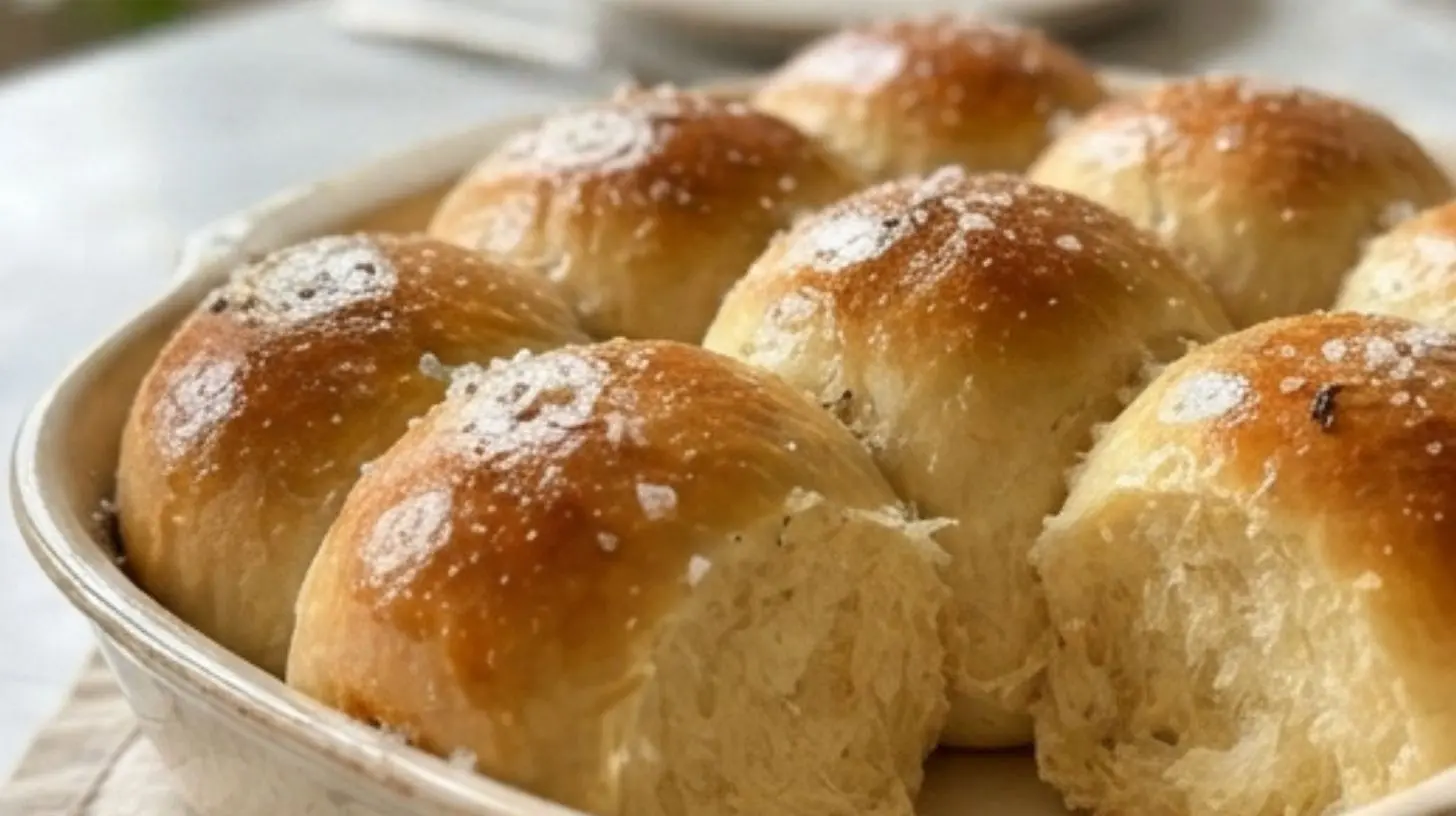
How to Grow 3 Perfect Dinner Rolls
Learn how to make fluffy dinner rolls from scratch!
Yeast
Flour
Butter
Sugar
Salt
Water
Activate the yeast in warm water with sugar.
Combine flour, salt, and melted butter in a bowl.
Knead the dough until smooth and elastic.
Let the dough rise in a warm place for 1 hour.
Shape the dough into 3 rolls and let rise again.
Bake the rolls in the oven until golden brown.
The Ultimate Guide to Soft, Fluffy Dinner Rolls: A Baker’s Secret to Perfection
Have you ever pulled a basket of golden, fluffy Dinner Rolls from the oven and felt like you just won a culinary gold medal? The aroma alone is a reward. Understanding the science behind bread baking is key to recreating that bakery magic at home. Whether you’re a seasoned baker or a complete beginner, mastering this staple is deeply satisfying. Preparing these rolls from scratch isn’t just about saving money; it’s about controlling every ingredient, avoiding preservatives, and customizing the flavor to your exact taste. The result is a warm, pillowy texture that store-bought versions simply cannot replicate. This guide will walk you through every step, ensuring your first batch is a triumph.
Ingredients & Kitchen Tools
Here’s what you’ll need to create these soft, buttery rolls. Each item plays a specific role in the dough’s structure and flavor.
Ingredients:
– 4 cups (500g) all-purpose flour – Provides the protein structure. Bread flour can be substituted for a chewier roll.
– 1 packet (2 ¼ tsp) active dry yeast – The leavening agent. Ensure it’s fresh for proper rise.
– 1 cup (240ml) warm milk (110°F) – Activates the yeast and adds tenderness. Whole milk works best, but 2% or plant-based milk are fine.
– ¼ cup (50g) granulated sugar – Feeds the yeast and adds sweetness.
– 1 large egg – Adds richness and helps with browning.
– ¼ cup (60g) unsalted butter, melted – Creates a soft crumb. Use salted butter if you reduce salt by half.
– 1 tsp salt – Balances flavor and strengthens gluten.
Kitchen Tools:
– Stand mixer with dough hook (or large bowl and wooden spoon)
– Baking sheet (9×13 inch) or round cake pan
– Kitchen scale (for accuracy)
– Instant-read thermometer (to check milk temperature)
– Clean kitchen towel or plastic wrap
Prep Time & Cooking Schedule

Planning is crucial for Dinner Rolls because they require time to develop flavor. Here’s a realistic timeline to help you schedule your baking:
– Prep Time: 20 minutes (mixing and kneading)
– First Rise (Bulk Fermentation): 1 hour to 1 hour 30 minutes (until doubled in size)
– Shaping Time: 15 minutes
– Second Rise (Proofing): 30 to 45 minutes
– Baking Time: 18 to 22 minutes
– Cooling Time: 10 minutes (on the pan, then transfer to a wire rack)
Total Time: Approximately 2 hours 45 minutes. You can prepare the dough the night before and refrigerate it for the first rise, then proceed with shaping and baking the next day.
Step-by-Step Instructions
1. Activate the yeast: In the bowl of your stand mixer, combine warm milk and sugar. Sprinkle the yeast on top and let it sit for 5-10 minutes until frothy. If it doesn’t foam, your yeast is dead—start over.
2. Mix the dough: Add the melted butter, egg, and salt to the yeast mixture. Gradually add the flour, one cup at a time, mixing on low speed until a shaggy dough forms.
3. Knead: Switch to the dough hook and knead on medium speed for 6-8 minutes. The dough should be smooth, elastic, and slightly tacky. For perfect Dinner Rolls, ensure your liquid is around 110°F to activate the yeast without killing it. This is the foundation of successful bread baking.
4. First rise: Place the dough in a greased bowl, cover with a towel, and let it rise in a warm, draft-free spot until doubled.
5. Shape the rolls: Punch down the dough, divide it into 12-15 equal pieces, and shape each into a smooth ball. Place them in a greased 9×13 inch pan, leaving space between each.
6. Second rise: Cover the pan and let the rolls rise again until they are puffy and touching each other.
7. Bake: Brush the tops with melted butter (optional) and bake at 375°F (190°C) for 18-22 minutes, until golden brown. The internal temperature should reach 190°F.
Nutritional Benefits & Advantages
These Dinner Rolls are more than just a side dish—they offer some nutritional value. The combination of milk and butter provides calcium and vitamin A, while the egg adds protein. When made with whole-wheat flour, the fiber content increases significantly. Additionally, homemade rolls allow you to control sugar and salt levels, making them a healthier option compared to many store-bought versions that contain excessive preservatives and high-fructose corn syrup. The slow fermentation process also improves digestibility by breaking down some of the gluten.
Tips, Variations & Cooking Advice
– Herb Rolls: Add 1 tablespoon of dried rosemary or thyme to the dough for a savory twist.
– Cheesy Rolls: Fold in ½ cup of shredded cheddar cheese before the second rise.
– Gluten-free Adaptation: Use a 1:1 gluten-free baking flour blend and add 1 teaspoon of xanthan gum to mimic elasticity.
– Vegan Version: Substitute the milk with almond milk, the egg with a flax egg (1 tbsp ground flaxseed + 3 tbsp water), and the butter with coconut oil.
– Serving Suggestion: Serve with honey butter, garlic butter, or alongside a hearty soup.
Common Mistakes to Avoid
– Killing the yeast: Using milk that’s too hot (above 130°F) will kill the yeast. Always aim for 110°F.
– Over-kneading: While kneading develops gluten, excessive kneading can make the rolls tough. Stop when the dough passes the windowpane test (stretches thin without tearing).
– Under-proofing: If the rolls don’t rise enough, they will be dense. Be patient and let them double in size.
– Skipping the second rise: This step is critical for final fluffiness. Never skip it.
– Opening the oven too early: This causes the rolls to collapse. Wait until at least 15 minutes of baking time.
Storage & Meal Prep Tips
To keep your Dinner Rolls fresh, store them in an airtight container at room temperature for up to 3 days. For longer storage, freeze them in a resealable plastic bag for up to 3 months. To reheat, wrap the rolls in foil and warm them in a 350°F oven for 5-7 minutes. Alternatively, microwave a single roll for 10-15 seconds, but be careful not to overdo it, as it can become rubbery. If you plan to make these ahead, you can freeze the unbaked, shaped rolls on a baking sheet, then transfer them to a freezer bag. When ready to bake, thaw them in the refrigerator overnight, then let them proof at room temperature before baking.
Conclusion
Whether you serve them with soup, as sliders, or alongside a roast, these Dinner Rolls are a testament to the joy of home bread baking. They are soft, buttery, and deeply satisfying. I hope you try this recipe exactly as written, and then feel free to experiment with variations. Share your results in the comments—I’d love to see your golden, puffy creations. Happy baking!
FAQs
1. Can I use all-purpose flour instead of bread flour?
Yes, all-purpose flour works perfectly. For a slightly chewier texture, you can replace 1 cup of all-purpose flour with bread flour.
2. My rolls came out dense. What went wrong?
Dense rolls are usually a sign of under-proofing or dead yeast. Ensure your yeast is fresh and your milk is at the correct temperature. Also, give the dough enough time to double during the first rise.
3. Can I make these rolls dairy-free?
Absolutely. Substitute the milk with a plant-based milk (like oat or almond milk), the butter with a vegan butter stick, and the egg with a flax egg. The texture may be slightly less tender, but they will still be delicious.
4. How do I know when the rolls are fully baked?
The tops should be golden brown, and the internal temperature should read 190°F (88°C) on an instant-read thermometer. You can also tap the bottom of a roll—it should sound hollow.
5. Can I freeze the dough for later use?
Yes. After the first rise, punch down the dough, shape it into rolls, and place them on a baking sheet. Freeze until solid, then transfer to a freezer bag. When ready, thaw in the refrigerator, let them proof, and bake as directed.