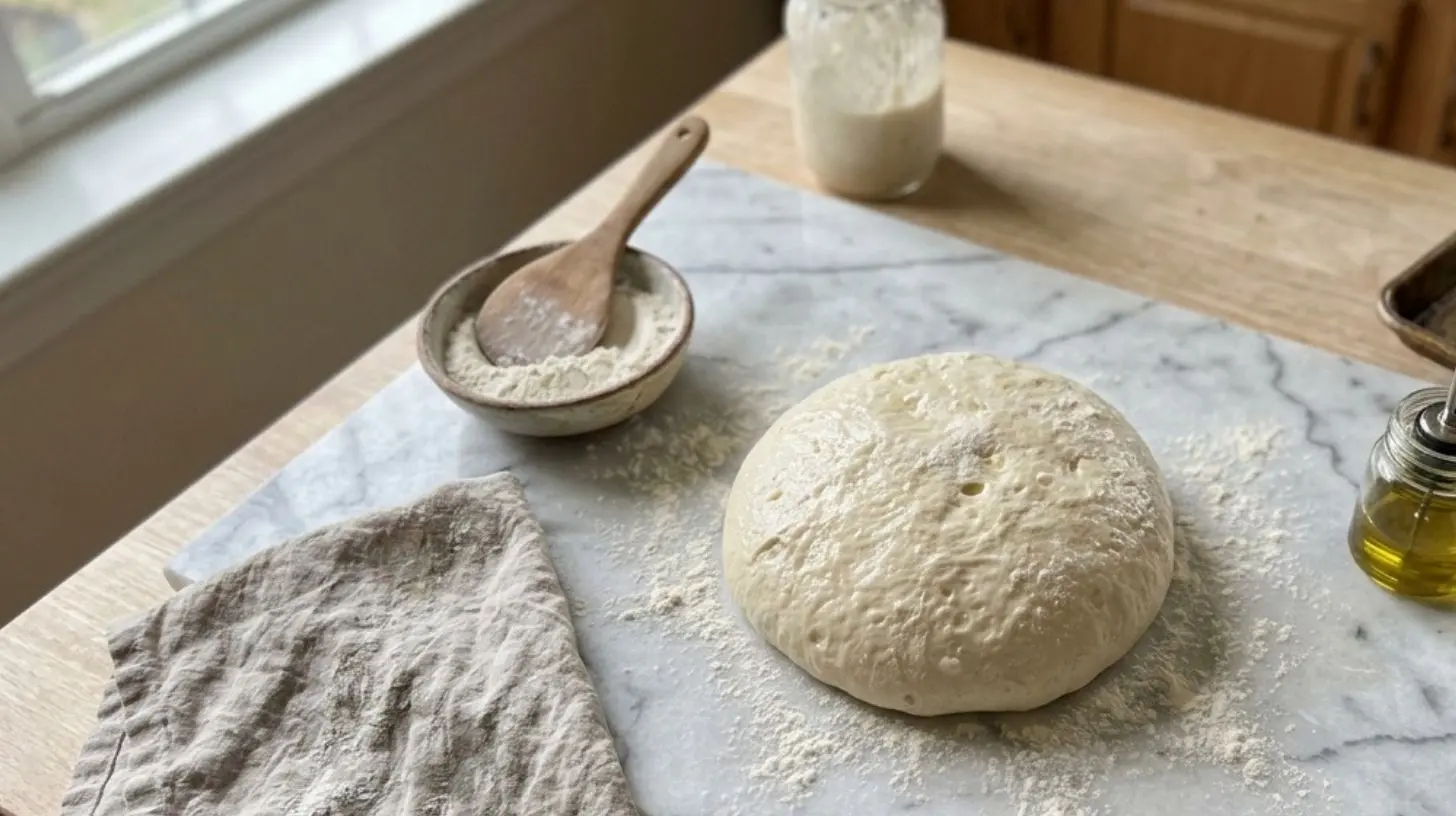
Proven way to grow pizza dough in 1 hour. Pizza Dough
Learn how to make pizza dough rise quickly in just 1 hour.
Warm Water
Yeast
Flour
Sugar
Salt
Dissolve yeast and sugar in warm water and let it sit for 10 minutes.
Mix flour and salt in a large bowl.
Pour the yeast mixture into the flour and mix until combined.
Knead the dough for 5 minutes until smooth and elastic.
Cover the dough and let it rise for 1 hour or until doubled in size.
Your pizza dough is ready to use!
The Ultimate Guide to Perfect Pizza Dough: From Scratch to Slice
Have you ever wondered why pizzeria-style crust is so impossibly crisp yet chewy, with that perfect leopard-spotted char? The secret isn’t a brick oven or a secret ingredient—it’s mastering your Pizza Dough at home. Preparing your own base from scratch isn’t just about saving money; it’s about controlling every variable, from hydration to fermentation, to create a crust that outshines delivery in minutes. Whether you’re a weekend warrior or a weekday warrior, learning to craft this foundation unlocks a world of culinary confidence.
In this data-driven guide, you’ll discover how to turn four basic ingredients into a bakery-worthy base using a proven, no-fail formula. We’ll cover everything from the science of gluten development to pro-level shaping tips, ensuring every batch yields a crust that’s crisp on the outside, airy on the inside, and ready for any topping you crave.
Ingredients & Kitchen Tools
For the Dough:
– All-purpose flour (4 cups / 500g): Balances structure and softness; bread flour (strong flour) works for a chewier texture.
– Warm water (1½ cups / 360ml, 105-115°F / 40-46°C): Critical temperature activates yeast without killing it.
– Active dry yeast (1 packet / 2¼ tsp) OR instant yeast (1¾ tsp): Instant yeast skips proofing.
– Olive oil (2 tbsp): Adds richness and helps browning.
– Sugar (1 tsp): Feeds yeast and promotes browning; omit for savory-detailed crusts.
– Salt (1½ tsp): Enhances flavor and controls fermentation.
– Optional: Semolina or cornmeal for dusting (prevents sticking on peel).
Kitchen Tools:
– Large mixing bowl (stainless steel or glass; avoid plastic for heat retention)
– Digital kitchen scale (most accurate; volume measurements are less reliable)
– Dough scraper or bench knife
– Stand mixer with dough hook (optional but reduces hand-kneading time)
– Spray bottle (for misting oven)
– Pizza stone or steel (highly recommended; baking sheet works too)
– Pizza peel (or inverted baking sheet if no peel)
– Plastic wrap or damp kitchen towel
Prep Time & Cooking Schedule

This recipe operates on two timelines: a 1-hour quick rise or a 24-hour cold fermentation for deeper flavor.
| Stage | Quick Method | Cold Ferment Method |
|——-|————–|———————|
| Mix & Knead | 15 minutes | 15 minutes |
| First Rise | 1 hour (warm spot) | Overnight (refrigerator, 8-24 hours) |
| Rest & Shape | 15 minutes | 30 minutes (bring to room temp) |
| Bake (preheated stone) | 8-12 minutes | 8-12 minutes |
Temperature Control Secret: For a crispier crust, preheat your oven with the stone at 500°F (260°C) for at least 45 minutes. Use an infrared thermometer – the stone should read 475°F (246°C) or higher before launching.
Step-by-Step Instructions
1. Activate yeast (if using active dry): Mix yeast, sugar, and ½ cup warm water. Let stand 5 minutes until foamy. If using instant yeast, skip this – just mix dry yeast with flour.
2. Combine dry ingredients: Whisk flour and salt in a large bowl.
3. Add wet ingredients: Make a well, pour in yeast mixture, remaining water, and olive oil. Stir with a wooden spoon until a shaggy mass forms.
4. Knead (by hand or machine): Turn dough onto a lightly floured surface. Knead for 8-10 minutes (hand) or 5-7 minutes (mixer). Texture cue: The dough should pass the “windowpane test” – stretch a small piece thin enough to see light through without tearing.
5. First rise: Place in an oiled bowl, cover, and let double in size (1 hour warm, or overnight in fridge).
6. Divide and shape: Gently deflate dough. Divide into 2-4 balls (depending on desired pizza size). Cover with plastic wrap and rest 15 minutes.
7. Shape the base: Using your fingertips, press the dough into a disc; then drape over knuckles and gently stretch outward using gravity. Avoid using a rolling pin – it compresses the air bubbles that create your perfect homemade pizza dough structure.
8. Par-bake (optional but recommended): Pre-bake the empty crust at 450°F (232°C) for 3-4 minutes before adding toppings. This prevents a soggy middle from heavy sauces or wet vegetables.
9. Top and bake: Add sauce, cheese, and toppings. Slide onto hot stone. Bake until edges are golden and cheese bubbles (8-12 minutes). Rotate halfway for even browning.
Pro Tip: For optimal oven spring, launch the pizza within 60 seconds of topping – don’t let the dough sit with sauce and cheese, which can create a gummy layer.
Nutritional Benefits & Advantages
A single serving (one 12-inch pizza base, unadorned) provides:
– ~250 calories (varies by flour type)
– 8g protein (from gluten and enriched flour)
– 2g fiber (whole-grain alternative increases this to 6g)
– Low in sugar (<1g) and sodium (varies by salt amount)
This Pizza Dough recipe is naturally low in fat (only 3g from olive oil) and free of preservatives found in store-bought crusts. Using all-purpose flour provides a moderate glycemic response, but substituting with 50% whole wheat flour adds iron, B vitamins, and magnesium. The olive oil content supports heart-healthy monounsaturated fats and aids in absorption of fat-soluble vitamins from toppings.
Tips Variations & Cooking Advice
Flavor Variations:
– Herb-Infused: Add 1 tsp dried oregano or rosemary to the flour.
– Sweet Dough: Increase sugar to 2 tbsp, add ½ tsp cinnamon for dessert pizzas.
– Gluten-Free Version: Use a 1:1 gluten-free flour blend, add 1 tbsp psyllium husk powder to replicate gluten structure. Reduce water by 2-3 tbsp.
– Dairy-Free: This base recipe is inherently dairy-free.
Alternative Cooking Methods:
– Grill: Preheat grill medium-high, shape dough thin, cook directly on grates 2-3 minutes per side before adding toppings.
– Cast Iron Skillet: Press dough into well-oiled 10-inch skillet, par-bake 5 minutes at 400°F (204°C), then add toppings and finish 10-12 minutes.
Texture Adjustments:
– Crispier: Par-bake at 500°F (260°C) for 5 minutes; mist oven with water before baking for better browning.
– Chewier: Use 100% bread flour and extend kneading to 12 minutes.
– Airier: Cold ferment 48 hours; the longer fermentation develops more flavor bubbles.
Common Mistakes to Avoid
1. Working with cold dough: Straight from fridge dough is brittle and won’t stretch without tearing. Always rest 30 minutes at room temperature.
2. Overflouring during shaping: Too much flour makes dough tough and prevents that crisp-creamy chew. Use your work surface lightly – a tiny bit of olive oil works better than flour.
3. Squeezing air bubbles: When placing dough on the peel, carefully transfer bubbles rather than popping them – they’re your crust texture secret.
4. Sans-vented baking: Without par-baking, heavy moisture from sauce (especially if using wet mozzarella) creates a soggy bottom. Always blot fresh mozzarella with paper towels.
5. Undercooking toppings: If using raw meats or pre-cooked vegetables, consider pre-cooking or using a higher oven rack for the first 5 minutes to ensure toppings cook before crust burns.
Storage & Meal Prep Tips
Refrigeration: Cooked pizza keeps up to 3 days in an airtight container. To reheat, place on a preheated pan at 400°F (204°C) for 5 minutes – skip the microwave (which makes crust rubbery).
Freezing: Shape dough into individual balls, wrap tightly in plastic wrap then foil, freeze up to 3 months. Thaw overnight in refrigerator before use. Or freeze fully baked par-baked crust for quick assembly nights.
Maintaining Texture: For best results, store cooked pizza slices separated by parchment paper. Reheat directly from frozen on a hot stone: 8-10 minutes at 400°F (204°C) yields almost-fresh results.
Conclusion
Mastering Pizza Dough from scratch transforms a simple weeknight dinner into a craft. This homemade pizza dough recipe gives you a reliable, versatile foundation that adapts to any schedule – whether you’re doing a quick 1-hour version or an overnight cold ferment. The real magic happens when you understand the dough: how water temperature affects yeast, why windowpane testing matters, and how preheating your stone makes all the difference.
We’ve covered the science, the tools, and the pro tips – from par-baking to avoid soggy centers through flavor variations that span from herb-infused to gluten-free versions. Now it’s your turn: gather your bench scraper, preheat that stone, and get your hands into some dough. Try it tonight, share your crust photos on social media with #HomePizzaPro, and let us know in the comments your favorite topping combination. When you taste that first bite of homemade crust – perfectly crisp with a tender chew – you’ll never order delivery again.
FAQs
1. Can I use whole wheat flour instead of all-purpose?
Yes, substitute up to 50% without altering structure. For 100% whole wheat, increase water by 2-4 tbsp and expect a denser, but equally delicious, nuttier-flavored crust.
2. Why is my dough not rising?
Likely issues: dead yeast (check expiration date), water too hot (above 120°F kills yeast), or insufficient warmth. Place in a slightly warmed oven (100°F / 38°C for 15 minutes, then turn off) or near a sunny window.
3. How do I prevent pizza from sticking to the peel?
Dust with semolina or cornmeal (not flour), not more than 1-2 tablespoons. If using flour, it can gum up on the peel. Also, shake the peel gently before launching – if the pizza doesn’t slide, lift the edge and blow under it.
4. Can I make this dough without a stand mixer?
Absolutely. Hand kneading for 10-12 minutes works perfectly. Use a “slap and fold” technique: slap the dough on the counter, fold over itself, and repeat. The key windowpane test still applies.
5. My pizza crust is always tough – what am I doing wrong?
Usually over-kneading (stop as soon as windowpane passes) or over-flouring during shaping. Use olive oil on your hands instead of flour. Also, ensure you’re not rolling with a pin, which compresses the gluten network.
Proven way to grow pizza dough in 1 hour. Pizza Dough
Equipment
- Large bowl
- Measuring cups and spoons
- Plastic wrap or kitchen towel
Ingredients
Dough
- 3 cups All-purpose flour
- 1 tablespoon Instant dry yeast
- 1 tablespoon Granulated sugar
- 1 teaspoon Salt
- 1 cup Warm water
- 2 tablespoons Olive oil
Instructions
Preparation
- Combine flour, yeast, sugar, and salt in a large bowl. Ensure ingredients are well mixed.
- Slowly add warm water and olive oil to the dry mixture. Mix until a shaggy dough forms.
- Transfer the dough to a lightly floured surface and knead for 5-7 minutes until smooth and elastic.
- Lightly grease a bowl with olive oil, place the dough in it, and turn to coat. Cover the bowl with plastic wrap or a clean kitchen towel.
- Place the covered bowl in a warm spot, like an oven with the light on, for 45 minutes to 1 hour, or until the dough has doubled in size.