How to grow your chicken tenders: 5 easy recipes
Learn 5 fun ways to make tasty chicken tenders.
Chicken breast
Flour
Eggs
Breadcrumbs
Oil
Slice chicken into strips.
Dip chicken in beaten eggs.
Coat chicken in flour.
Roll chicken in breadcrumbs.
Fry chicken in oil until crispy and golden.
Why Homemade Crispy Chicken Tenders Beat Fast Food Every Time
Have you ever wondered why restaurant-style Chicken Tenders always taste better than the frozen ones you buy at the store? The secret lies in the perfect balance of seasoning, coating technique, and cooking temperature. Preparing this iconic dish at home not only saves money but also allows you to control the quality of ingredients. Whether you call them Chicken Tenders or chicken nuggets, mastering this recipe will elevate your home cooking game. In this guide, you’ll learn how to achieve that golden, crispy crust while keeping the meat juicy and tender.
Ingredients & Kitchen Tools
| Ingredient | Quantity | Notes |
|————|———-|——-|
| Boneless skinless chicken breast | 1 lb (4 fillets) | Cut into 1-inch strips |
| All-purpose flour | 1 cup | For the breading base |
| Panko breadcrumbs | 1 cup | Extra crispy texture |
| Eggs | 2 large | Room temperature for better adhesion |
| Buttermilk | ½ cup | Optional, for extra tenderness |
| Salt | 1 tsp | Fine sea salt |
| Black pepper | ½ tsp | Freshly ground |
| Garlic powder | 1 tsp | Avoid clumps by mixing with flour |
| Paprika | 1 tsp | Smoked or sweet |
| Cayenne pepper | ¼ tsp | Adjust to taste |
| Vegetable oil | 3 cups | For deep frying (use neutral oil) |
| Kitchen Tools | | |
| Deep fryer or heavy-bottomed pot | 1 | Cast iron preferred |
| Instant-read thermometer | 1 | Crucial for oil temp |
| Wire rack | 1 | For draining excess oil |
| Tongs | 1 | To avoid burning fingers |
| Optional Substitutions | | |
| Gluten-free flour | 1 cup | Replace all-purpose flour |
| Almond flour | ½ cup | For keto version |
Prep Time & Cooking Schedule
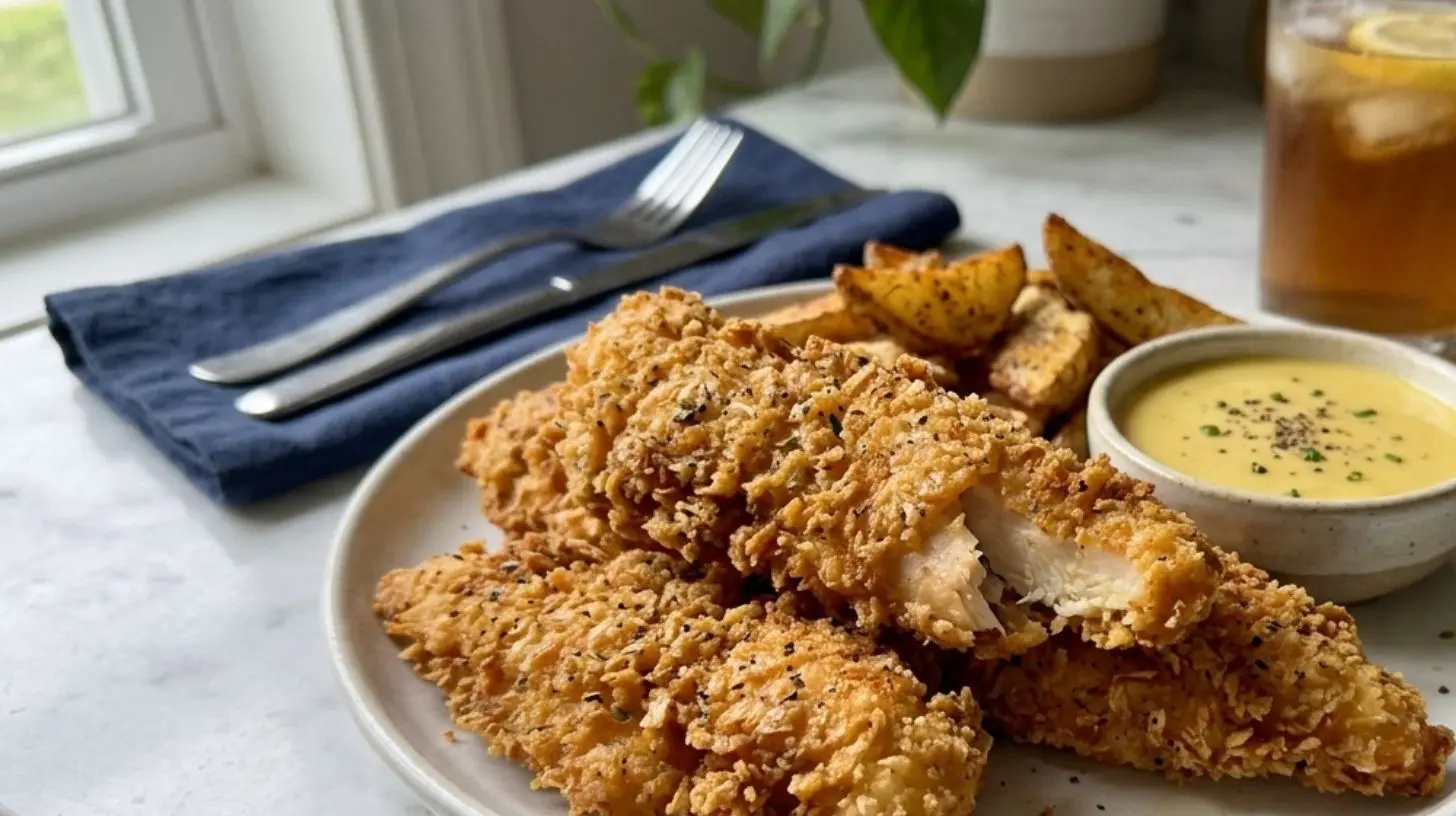
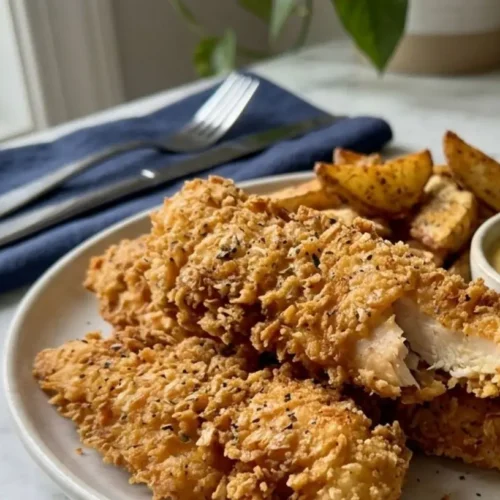
Crispy, golden-brown chicken tenders fresh from the fryer
– Prep Time: 15 minutes (including cutting chicken)
– Marinating Time: 20–30 minutes (in buttermilk for extra tenderness)
– Cooking Time: 6–8 minutes per batch (4 tenders)
– Resting Time: 2 minutes on wire rack (crisps up the coating)
– Total Time: Approximately 40 minutes
Why this schedule matters: Allowing chicken to rest after breading helps the coating adhere better. The marinating time is optional but dramatically improves moisture retention.
Step-by-Step Instructions
1. Prepare the chicken: Cut chicken breasts into 1-inch wide strips. Pat dry with paper towels to remove excess moisture. Season lightly with salt.
2. Set up breading station: In one bowl, mix 1 cup flour, 1 tsp garlic powder, 1 tsp paprika, ½ tsp cayenne, ½ tsp salt, and ¼ tsp black pepper. In a second bowl, whisk 2 eggs with 2 tbsp water. In a third bowl, place 1 cup panko breadcrumbs.
3. Bread the tenders: Dip each chicken strip first into flour, then into egg wash (let excess drip off), and finally into panko. Press gently to ensure even coating. This is where chicken nuggets differ slightly—they are usually smaller and may require less breading.
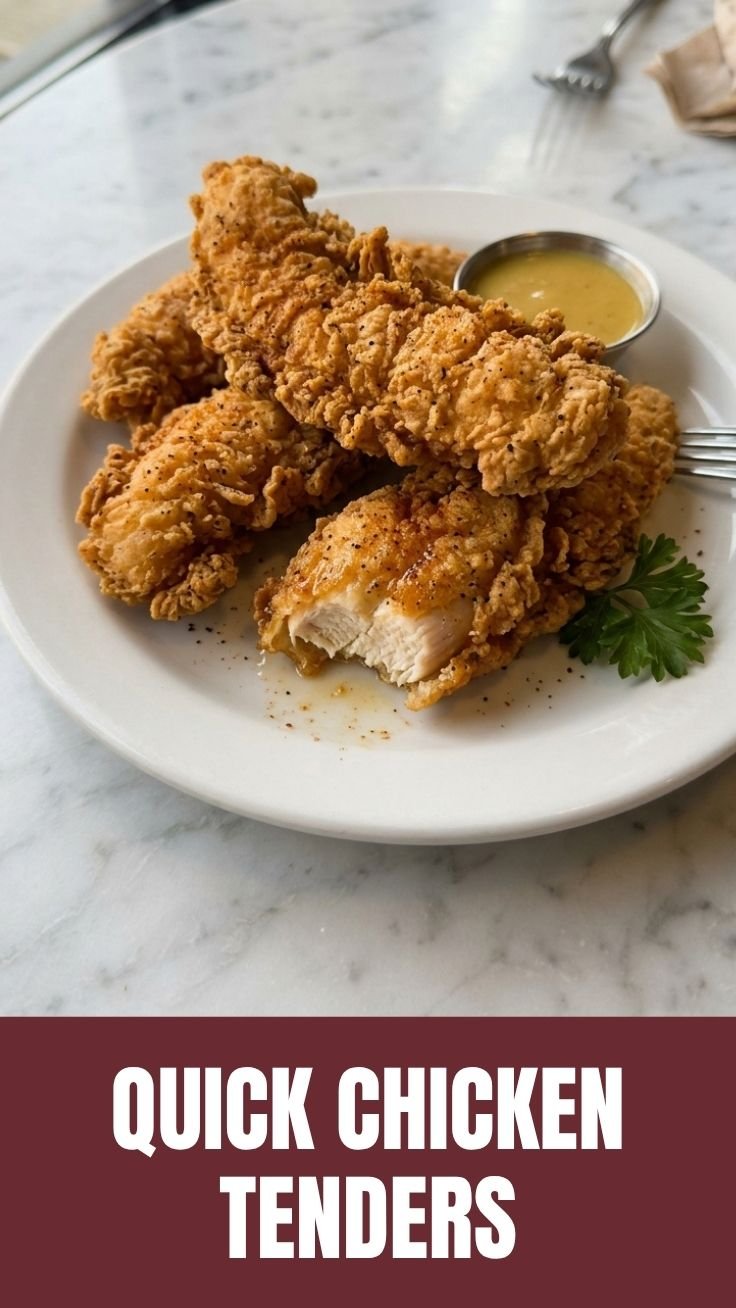
4. Heat the oil: Pour 3 inches of vegetable oil into a heavy pot. Heat to 350°F (175°C). Use a thermometer to maintain this temperature throughout—this ensures proper Chicken Tenders cooking time and prevents greasy results.
5. Fry in batches: Add 4–5 tenders at a time. Cook for 3–4 minutes per side (total 6–8 minutes). Internal temperature should reach 165°F. Avoid overcrowding—this drops oil temperature.
6. Drain and rest: Transfer to a wire rack. Let rest for 2 minutes before serving. This step locks in crunchiness.
Pro Tip: If the coating starts browning too fast, the oil is too hot. If it looks pale after 4 minutes, the oil is too cold. Adjust accordingly.
Nutritional Benefits & Advantages
– High protein content: Each serving of Chicken Tenders provides approximately 25–30g of lean protein, essential for muscle repair and satiety.
– Low in unhealthy additives: Homemade version avoids preservatives, MSG, and excess sodium found in fast-food chicken nuggets.
– Customizable macros: By using almond flour instead of panko, you can reduce carbs while keeping the crispy texture. Serve with a side of steamed vegetables for a balanced meal.
– Heart-healthy fats: Using avocado oil or peanut oil (high smoke point) provides healthier monounsaturated fats compared to hydrogenated oils.
Tips, Variations & Cooking Advice
– Flavor twist: Add 1 tbsp of ranch seasoning mix to the flour for a tangy twist. Try Italian seasoning for herb-forward notes.
– Air fryer method: Preheat to 400°F. Spray tenders with oil. Cook for 10–12 minutes, flipping halfway. This reduces oil needed by 80%.
– Gluten-free adaptation: Use 1:1 gluten-free flour blend. Add 1 tsp xanthan gum to improve adhesion.
– Spicy version: Increase cayenne to 1 tsp or add 2 tbsp of hot sauce to the egg wash.
– Portion control: For chicken nuggets, cut into 1-inch cubes. Adjust cooking time to 4–5 minutes total.
Common Mistakes to Avoid
– Overcrowding the fryer: This causes temperature drop and soggy coating. Fry in small batches.
– Under-seasoning: The flour mixture needs to be boldly seasoned—it dilutes when coating the chicken.
– Skipping the rest step: If you serve immediately, the coating may slide off. Let them rest for 2–3 minutes.
– Using stale oil: Reuse oil only 2–3 times. Old oil produces off-flavors and reduces crispiness.
Storage & Meal Prep Tips
– Refrigeration: Cool completely (within 1 hour). Store in airtight container with paper towel to absorb moisture. Keeps fresh for 3–4 days.
– Freezing: Place cooled tenders on baking sheet, freeze for 1 hour, then transfer to ziplock bag. Lasts for 2 months.
– Reheating: Air fry at 375°F for 4 minutes (restores crispiness), not microwave (makes them rubbery).
– Meal prep: Prepare the breading station and cut chicken ahead of time. Cook only when ready to serve for best texture.
Conclusion
By following this guide, you’ve unlocked the secret to making restaurant-quality Chicken Tenders at home that are far superior to store-bought chicken nuggets. The key takeaways are: maintain proper oil temperature (350°F), don’t skip the resting step, and season your flour boldly. Whether you’re serving them as a main dish or as a snack, this recipe delivers consistent results every time. Try this tonight and share your crispy results on social media—tag us to show off your golden-brown creation!
FAQs
1. Can I use chicken thighs instead of breasts for Chicken Tenders?
Yes, but adjust cooking time slightly. Thighs cook faster (4–5 minutes per side) but stay juicier. Ensure internal temperature reaches 165°F.
2. Why did my breading fall off?
Two reasons: moisture on the chicken (pat dry well) or egg wash too thick (add 1 tbsp water). Also, allow breaded tenders to rest 10 minutes before frying.
3. How do I make chicken nuggets dairy-free?
Replace buttermilk with ½ cup plain yogurt or ½ cup milk + 1 tsp vinegar. Rest for 10 minutes to tenderize.
4. Can I bake instead of fry?
Yes. Bake at 425°F for 15 minutes, flipping halfway. Spray with oil to achieve golden color. Texture will be slightly less crispy.
5. What oil is best for deep frying Chicken Tenders?
Use oils with high smoke point: peanut, avocado, or canola. Avoid olive oil (smokes at 375°F).
How to grow your chicken tenders: 5 easy recipes
Equipment
- Gardening Gloves
- Watering Can
- Sense of Humor
Ingredients
Growth Medium
- a pinch Seeds of Imagination
- 1 cup Fertile Soil of Humor
- 2 cups Water of Creativity
Care Package
- plenty Sunshine of Laughter
- a lifetime supply Patience Sprouts
Instructions
Planting Phase
- Begin by preparing your growth medium, ensuring a good mix of imagination and humor.
- Carefully plant the seeds of imagination into the fertile soil, then add water of creativity.
Nurturing Phase
- Provide ample sunshine of laughter and nurture with patience sprouts regularly.
- Observe daily for signs of tender growth and harvest when fully whimsical.