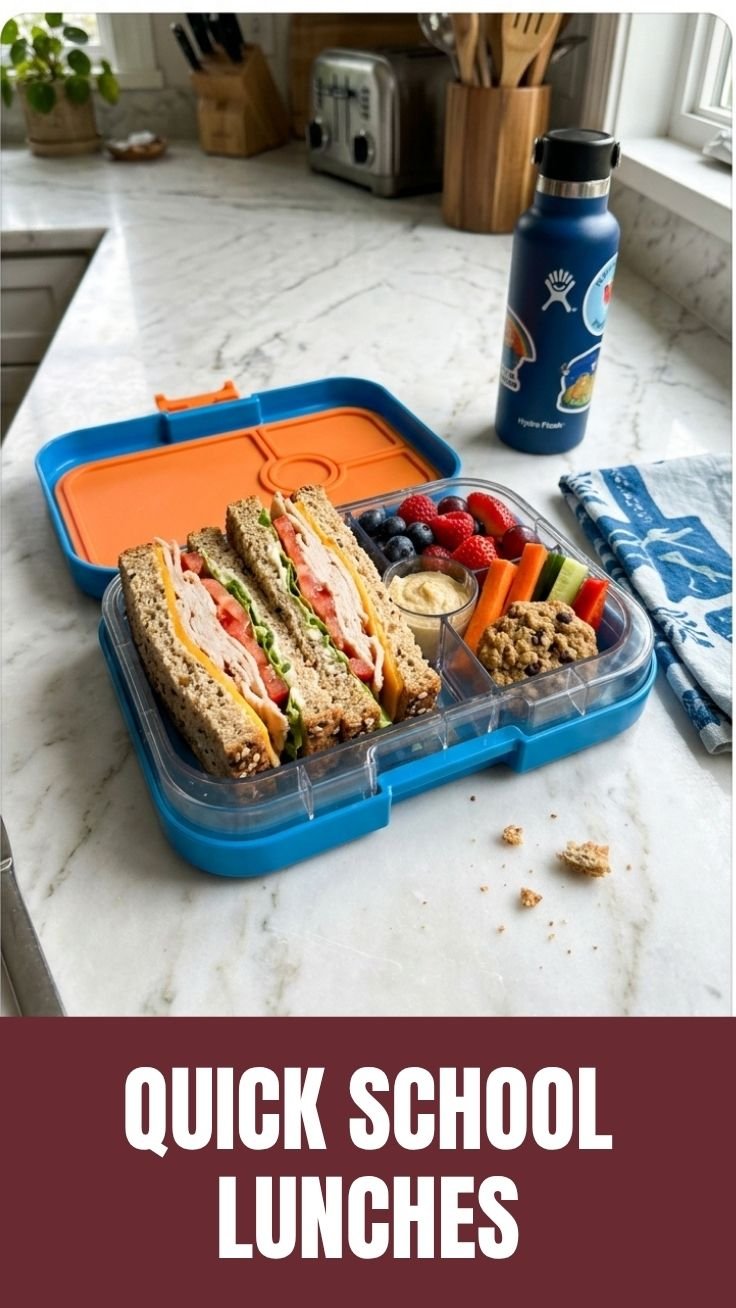
Best way to grow Back-to-School Lunches: 5 Fast Ideas
Learn quick and delicious lunch ideas for school.
Bread
Cheese
Ham
Carrots
Apples
Cut the bread into fun shapes.
Layer cheese and ham on the bread.
Add sliced carrots on the side.
Slice apples for a sweet treat.
The Ultimate Guide to Wholesome School Lunch Ideas Your Kids Will Actually Eat
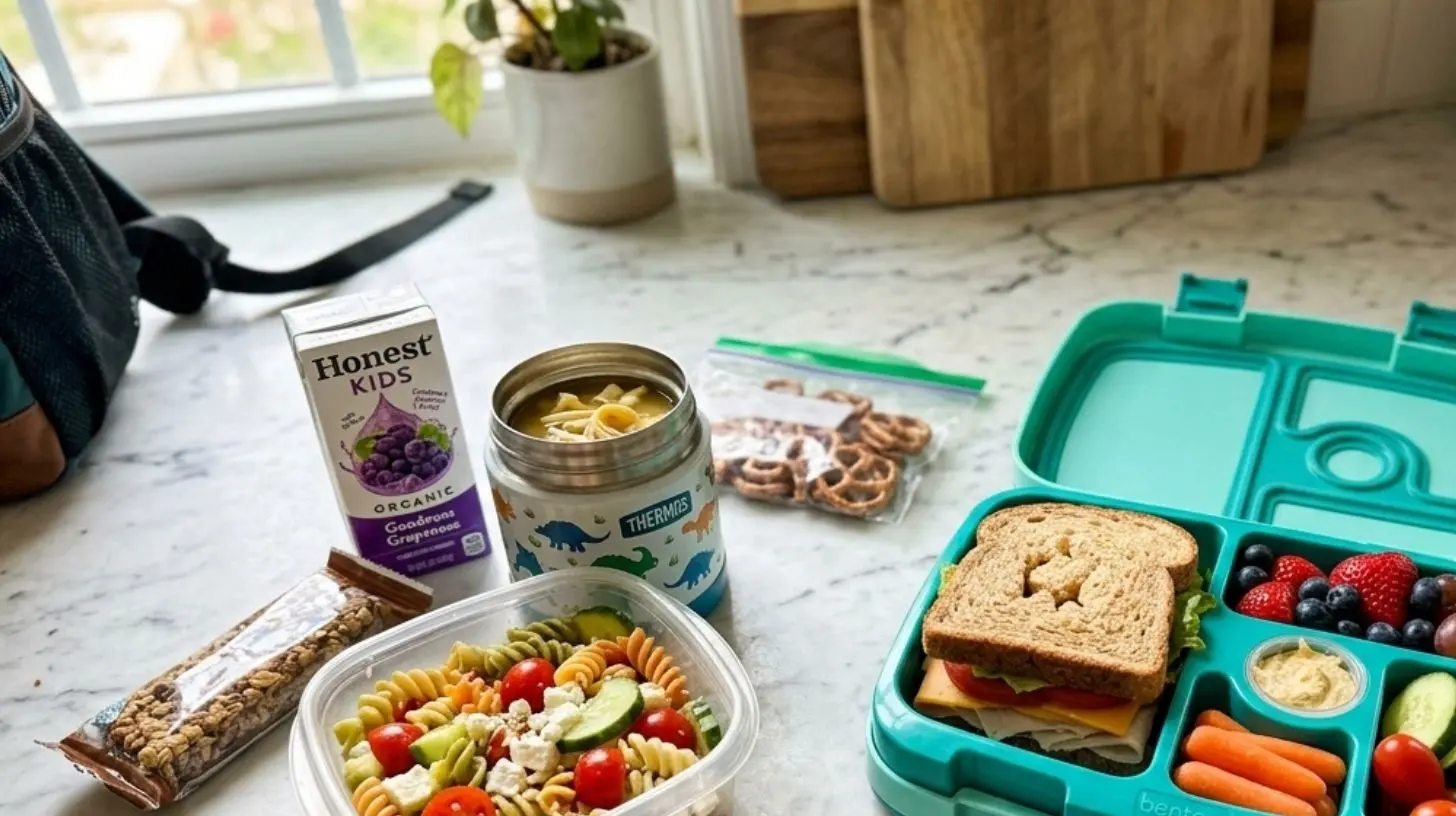
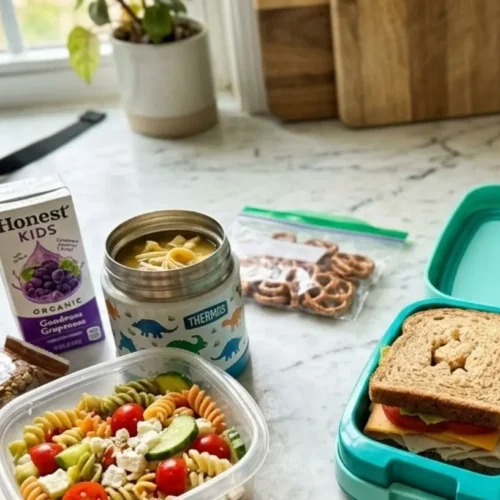
Are you tired of uneaten sandwiches and forgotten fruit coming back in your child’s lunchbox every afternoon? You’re not alone. Preparing meals that are both appealing and nourishing can feel like an uphill battle, but it’s a battle worth fighting. By crafting your own Back-to-School Lunches at home, you control the quality of every ingredient, avoid unnecessary preservatives, and save money in the long run. The key is to focus on building balanced, satisfying meals that offer real fuel for a busy school day. In this guide, we’ll explore how to create vibrant, delicious, and Nutritious Lunches that pack a punch of flavor and energy, turning the lunchbox from a source of stress into a canvas for creativity and wellness.
Ingredients & Kitchen Tools
Before we dive into the assembly process, let’s gather the essentials. This recipe is more of a blueprint; feel free to mix and match based on your child’s preferences and what you have on hand.
Ingredients:
– Protein Base: 2 cups cooked chicken breast, shredded (or canned tuna, hard-boiled eggs, or chickpeas for a vegetarian option).
– Whole-Grain Carrier: 4 large whole-wheat tortillas (or gluten-free wraps, pita pockets, or lettuce cups).
– Crunchy Vegetables: 1 cup shredded carrots, 1/2 cup finely chopped bell peppers (any color), and 1/2 cup diced cucumber. Adds crunch without making the wrap soggy.
– Flavorful Spread: 4 tablespoons hummus (plain or roasted red pepper) or avocado mash mixed with lime juice.
– Creamy Binder: 2 tablespoons plain Greek yogurt (optional, for extra moisture and protein).
– Seasoning: 1/2 teaspoon salt, 1/4 teaspoon black pepper, and 1 teaspoon dried dill or oregano.
– Optional Add-ins: 1/4 cup crumbled feta cheese, 2 tablespoons sunflower seeds, or a handful of baby spinach.
Kitchen Tools:
– Cutting board and sharp chef’s knife for safe chopping.
– Mixing bowl for combining ingredients.
– Spoon or spatula for spreading hummus.
– Plastic wrap or reusable beeswax wraps for secure wrapping.
– Lunchbox containers (Bento-style boxes are ideal) to keep components separate and fresh.
Substitutions:
– For a dairy-free version, skip the feta and Greek yogurt.
– For a nut-free option, use sunflower seed butter instead of hummus (if allergies are a concern) or avocado spread.
– For a low-carb option, swap tortillas for large lettuce leaves (like romaine or butter lettuce).
Prep Time & Cooking Schedule
Efficiency is your best friend when packing lunches. Here’s a realistic timeline:
– Prep Time: 15 minutes (washing, chopping, mixing).
– Assembly Time: 10 minutes (rolling wraps and packing containers).
– Total Active Time: 25 minutes.
– Resting Time: 10 minutes after wrapping (allows flavors to meld and prevents sogginess).
– Best for: Weekly meal prep on Sunday or school mornings.
Pro Tip: If you’re preparing multiple wraps, do it the night before and store them in the fridge. The filling ingredients (protein and veggies) can be prepped up to 2 days in advance and stored in separate airtight containers. This makes assembly a 2-minute task before the bus arrives.
Step-by-Step Instructions
Follow these steps to create wraps that stay fresh, flavorful, and mess-free until lunchtime.
Step 1: Prepare the Spread
In a small bowl, mix your chosen spread (hummus or avocado mash) with a tablespoon of Greek yogurt if using. Add the salt, pepper, and dried dill. Stir until smooth. Pro tip: For a flavor boost, add a squeeze of lemon juice to the avocado to prevent browning.
Step 2: Combine the Filling
In a mixing bowl, combine shredded protein (chicken, tuna, or chickpeas) with the chopped vegetables (carrots, peppers, cucumber). Add half of the seasoned spread to the mixture and toss to coat. Texture cue: The mixture should be moist but not dripping. If it’s too dry, add a teaspoon more yogurt or a dash of olive oil.
Step 3: Assemble the Wrap
Lay a tortilla flat on a clean surface. Spread a thin, even layer of the remaining spread across the center, leaving a 1-inch border around the edges. Place a generous line of filling down the middle of the tortilla, then fold in the sides tightly before rolling from the bottom up. Temperature control: Ensure the filling is cold before rolling to avoid condensation inside the wrap.
Step 4: Secure and Rest
Wrap each rolled tortilla tightly in plastic wrap or a reusable beeswax wrap. Place them seam-side down in the fridge for at least 10 minutes. This allows the ingredients to bond and makes slicing easier. Tip: For younger children, consider cutting the wrap into fun shapes using a cookie cutter (like stars or dinosaurs).
Packing these Back-to-School Lunches as wraps helps control portions and reduces waste. Plus, by layering ingredients correctly, you ensure that every bite of these Nutritious Lunches delivers a balanced mix of protein, fiber, and healthy fats.
Nutritional Benefits & Advantages
This recipe is designed to support a child’s growth, energy levels, and concentration during the school day. Here’s why each component matters:
– Protein (Chicken, Chickpeas, Eggs): Essential for muscle repair and sustained energy. Protein helps slow down the digestion of carbohydrates, preventing the dreaded mid-afternoon sugar crash.
– Whole Grains (Tortillas): Provide complex carbohydrates and fiber, which release energy steadily rather than spiking blood sugar. Fiber also supports digestive health.
– Vegetables (Carrots, Bell Peppers, Cucumber): Rich in vitamins A, C, and antioxidants. The water content in cucumbers adds hydration, which is especially important for kids who forget to drink water.
– Healthy Fats (Avocado, Hummus): Avocados offer monounsaturated fats that support brain development and focus. Hummus provides a dose of iron and plant-based protein.
– Greek Yogurt: Adds probiotics for gut health and extra calcium for strong bones.
Dietary Advantage: This recipe is naturally gluten-free if you choose corn tortillas or lettuce wraps. It’s also low in added sugar, relying on whole, nutrient-dense ingredients to satisfy hunger.
Tips Variations & Cooking Advice
Don’t be afraid to switch things up! Keeping lunchboxes interesting is half the battle.
– Flavor Variations: Swap dill for cilantro and cumin for a Southwestern twist. Add a dash of curry powder for an Indian-inspired vibe. Or use pesto as the spread for an Italian-style wrap.
– Ingredient Swaps: Replace chicken with smoked salmon (for older kids), or try mashed black beans with corn for a vegetarian taco wrap. For crunch, add chopped apples or jicama sticks.
– Alternative Cooking Methods: If you want a warm lunch, assemble the wrap and then lightly pan-toast it for 1-2 minutes per side (school-safe, as long as you send a thermos). Alternatively, bake rolled wraps at 350°F for 10 minutes for a “crispy wrap” style.
– Portion Changes: For younger children (ages 4–7), cut wraps into 4-5 small pinwheels. For tweens and teens, use burrito-sized tortillas for a larger meal.
– Dietary Adaptations: For a dairy-free version, use avocado spread and skip the Greek yogurt. For a nut-free lunch, double-check that hummus is made in a nut-free facility, or substitute with cream cheese alternative.
Common Mistakes to Avoid
Even experienced packers can fall into these traps. Here’s how to avoid them:
– Mistake: Using wet vegetables. Chopped cucumbers and tomatoes release water, turning the wrap soggy by lunchtime. Solution: Pat vegetables dry with a paper towel after washing. Better yet, use firmer veggies like bell peppers and carrots that stay crisp.
– Mistake: Under-seasoning the filling. Kids often prefer bland food, but a little seasoning goes a long way. Solution: Taste the filling before rolling. A pinch of salt and a squeeze of lemon can make ingredients pop.
– Mistake: Rolling too loosely. A loose wrap falls apart in the lunchbox. Solution: Roll tightly and secure with a toothpick (remind kids to take it out) or a small piece of parchment paper.
– Mistake: Packing wraps directly next to an ice pack. Condensation can soak the wrap from the outside. Solution: Wrap the ice pack in a paper towel or place the wrap in a separate compartment or zip-top bag.
Storage & Meal Prep Tips
Proper storage ensures safety and quality from morning to lunchtime.
– Refrigeration: Assembled wraps can be stored in the fridge for up to 2 days. Keep them tightly wrapped in plastic or beeswax wrap.
– Freezing: Wraps can be frozen for up to 1 month. Wrap individually in plastic wrap, then place them in a freezer bag. Pro tip: Freeze without the vegetables (like lettuce and cucumber) to prevent them from becoming limp. Add fresh veggies after thawing.
– Thawing: Move a frozen wrap to the fridge the night before serving. Never thaw at room temperature, as the filling may spoil.
– Reheating: If you want a warm lunch, remove the plastic wrap, place the wrap in a microwave-safe container, and microwave on high for 20-30 seconds. Alternatively, use a thermos for hot filling components.
– Packing for School: Use a Bento-style box to keep components separate—wrap in one compartment, fruit in another, and a crunchy snack (like baby carrots or popcorn) in a third. This helps prevent cross-contamination and keeps textures distinct.
Conclusion
Crafting a lunch that’s both loved and lived has never been easier. By focusing on fresh, whole ingredients and taking a few minutes to prepare, you can eliminate the guesswork and the guilt associated with store-bought options. These wraps are the perfect foundation for building Back-to-School Lunches that are affordable, customizable, and endlessly flexible. More importantly, they’re a gateway to cultivating healthy habits that prioritize Nutritious Lunches—not just for one day, but for the entire school year. Try this recipe this week, and watch your child’s lunchbox come home empty (the ultimate win!). Have a favorite variation? Share it in the comments below—I’d love to hear what works for your family.
FAQs
1. Can I make these wraps the night before?
Yes! In fact, they often taste better the next day as the flavors meld. Just make sure to wrap them tightly and refrigerate immediately. Avoid adding very wet vegetables (like tomatoes) until morning if possible to prevent sogginess.
2. My child is a picky eater. How can I adapt this?
Start with familiar flavors. Use a spread they already like (like cream cheese or plain butter), and incorporate one new vegetable at a time. You can also let them “build their own” wrap at dinner and pack the leftovers—a great way to give them ownership.
3. Can I substitute the tortilla for a low-carb option?
Absolutely. Large lettuce leaves (like iceberg or butter lettuce), collard greens (blanched for flexibility), or even nori sheets (seaweed) work well. For a grain-free option, use thin slices of roasted sweet potato.
4. How long can these wraps safely sit in a lunchbox?
According to USDA guidelines, perishable foods should not be left at room temperature for more than 2 hours. Use an insulated lunch bag with at least two ice packs to keep everything cold until lunchtime. If the school doesn’t have a refrigerator, invest in a quality insulated bag.
5. The wrap fell apart in my child’s lunchbox. What went wrong?
This usually happens if the wrap was rolled too loosely or if the filling was too wet. Next time, pat vegetables dry, roll tightly, and use a toothpick to secure the roll. Also, consider cutting the wrap into pinwheels—they hold together much better than a whole wrap.
Best way to grow Back-to-School Lunches: 5 Fast Ideas
Equipment
- Baking sheet
- Cutting board
- Knife
- Mixing bowls
- Skillet
Ingredients
Lunch Idea 1: Hummus & Veggie Pinwheels
- 2 Large whole wheat tortillas
- 4 tbsp Hummus
- 0.5 cup Grated carrots
- 1 cup Spinach leaves
- 0.5 cup Cucumber, thinly sliced
Lunch Idea 2: Chicken & Cheese Quesadillas
- 2 Whole wheat tortillas
- 1 cup Cooked chicken, shredded
- 0.5 cup Cheddar cheese, shredded
- 2 tbsp Salsa for dipping
Lunch Idea 3: Pasta Salad with Pesto
- 2 cups Cooked pasta (e.g., rotini, penne)
- 1 cup Cherry tomatoes, halved
- 0.5 cup Mozzarella balls (bocconcini), halved
- 0.25 cup Pesto
- 2 tbsp Fresh basil, chopped
Lunch Idea 4: Mini Sausage Rolls
- 1 Puff pastry sheet
- 250 g Sausage meat
- 1 Egg, beaten
Lunch Idea 5: Turkey & Avocado Wraps
- 2 Large whole wheat tortillas
- 6 slices Sliced turkey breast
- 1 Avocado, sliced
- 4 Lettuce leaves
- 2 tbsp Mayonnaise
Instructions
Hummus & Veggie Pinwheels
- Spread hummus evenly over each tortilla, then layer with grated carrots, spinach, and cucumber slices.
- Roll the tortillas tightly, then slice them into 1-inch pinwheels and pack them in a lunchbox.
Chicken & Cheese Quesadillas
- Place a tortilla in a pan, sprinkle with cheese and chicken, then top with another tortilla.
- Cook until golden brown on both sides, slice into wedges, and pack with salsa for dipping.
Pasta Salad with Pesto
- Combine cooked pasta, cherry tomatoes, mozzarella, pesto, and fresh basil in a bowl.
- Mix well to coat, then store in an airtight container for a refreshing lunch.
Mini Sausage Rolls
- Roll out the puff pastry, cut it into strips, and place sausage meat along one edge.
- Roll up the pastry, brush with beaten egg, and bake until golden brown and cooked through.
Turkey & Avocado Wraps
- Spread mayonnaise on tortillas, then layer with turkey, avocado, and lettuce leaves.
- Roll up tightly, halve, and pack for a quick and nutritious lunch.