Quick way to grow a 5-Star Poke Bowl Garden
Learn how to grow your own ingredients for a delicious poke bowl garden!
Ahi Tuna
Soy Sauce
Avocado
Cucumber
Edamame
Plant the seeds for your edamame in a sunny spot.
Carefully water and nurture your avocado tree.
Slice the cucumber into thin rounds for your garden.
Cube the ahi tuna into bite-sized pieces.
Drizzle soy sauce over your fresh veggies and tuna.
Why Your Homemade Poke Bowl Tastes Better (And Costs Half the Price)
Have you ever wondered why restaurant Poke Bowl options feel so refreshing yet leave your wallet empty? The secret isn’t complicated techniques or hard-to-find ingredients—it’s freshness and balance. Learning to prepare this high-protein dish at home puts you in control of quality, portions, and flavor. While traditional Hawaiian Poke is rooted in simplicity, mastering a few core principles transforms your kitchen into your favorite island spot.
—
Ingredients & Kitchen Tools
Fish & Protein Base
– Sashimi-grade ahi tuna (1 lb): The gold standard for raw consumption
– Firm tofu (optional): Excellent plant-based substitute
Rice & Texture Base
– Sushi rice (2 cups): Short-grain stickiness creates authentic mouthfeel
– Rice vinegar, sugar, salt: Seasoning for sushi rice
The Marinade (Essential Umami)
– Soy sauce (¼ cup): Low-sodium recommended
– Sesame oil (2 tbsp): Toast it lightly for deeper flavor
– Mirin (2 tbsp): Adds gentle sweetness
– Fresh ginger (1 tsp grated): Brightens the marinade
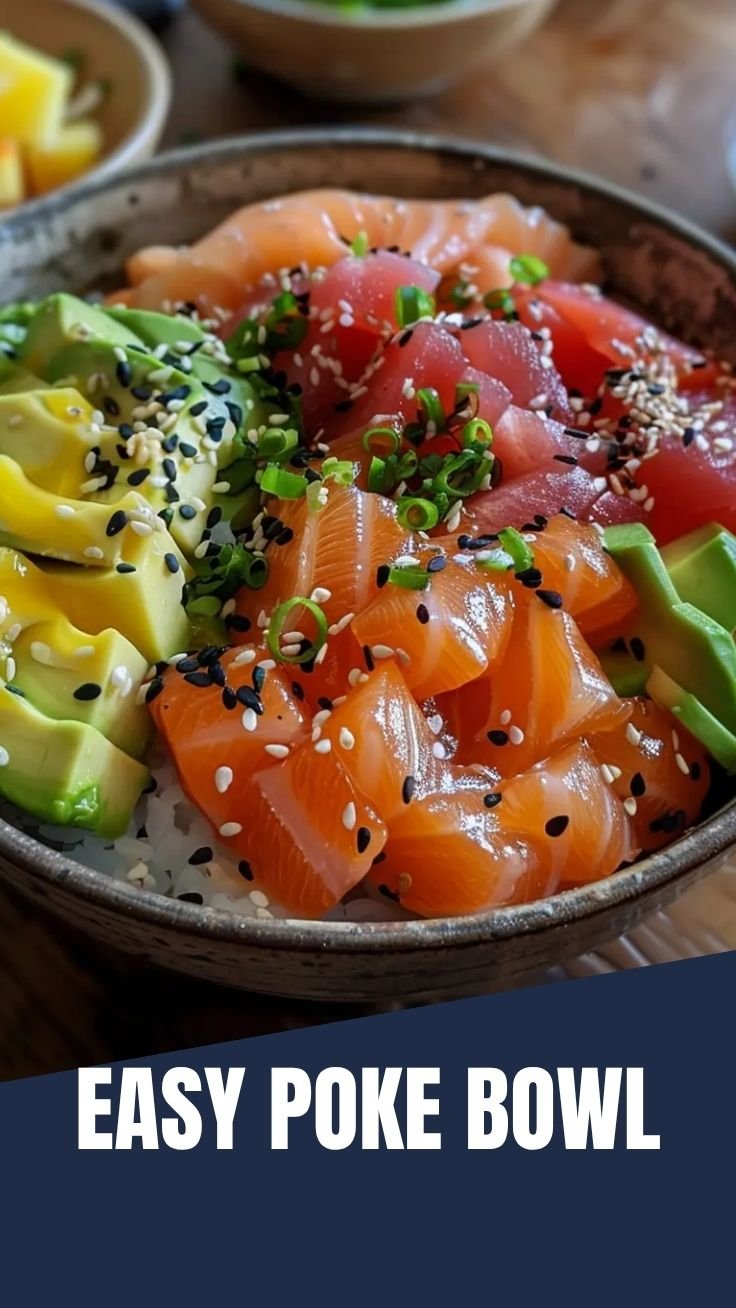
Toppings & Garnish
– Avocado (sliced), cucumber (diced), edamame, seaweed salad
– Scallions, sesame seeds, spicy mayo
Required Tools
– Sharp chef’s knife: Dull blades crush delicate fish
– Mixing bowls: Glass or stainless steel
– Rice cooker or heavy-bottomed pot
– Fine mesh strainer: For rinsing rice
—
Prep Time & Cooking Schedule
| Component | Time Required | Notes |
|———–|—————|——-|
| Rice cooking | 25 minutes | Includes 10-minute rest |
| Fish preparation | 10 minutes | Keep chilled |
| Marinating | 15–30 minutes | Do not exceed 30 minutes |
| Topping prep | 10 minutes | Dice vegetables |
| Assembly | 5 minutes | Serve immediately |
Total active time: 35 minutes
Total waiting time: 45 minutes (rice cooling + marinating)
Plan accordingly: cook the rice first, allowing it to cool while you prep fish and toppings. Timing your marinade so it finishes just before assembly ensures peak texture.
—
Step-by-Step Instructions

1. Prepare Sushi Rice
Rinse 2 cups of sushi rice under cold water until the water runs clear (about 4–5 changes). Cook according to your rice cooker’s instructions. While hot, fold in a mixture of 3 tbsp rice vinegar, 1 tbsp sugar, and 1 tsp salt. Fan the rice to cool it quickly—this gives it the glossy, separated texture essential for any quality Poke Bowl.
2. Dice the Fish
Pat the ahi tuna completely dry with paper towels. Using your sharpest knife, cut the fish into ½-inch cubes. Critical tip: Avoid sawing; use one clean, confident slice per piece. Uneven cubes cook (marinate) at different rates.
3. Prepare the Marinade
Whisk together:
– ¼ cup soy sauce
– 2 tbsp sesame oil
– 2 tbsp mirin
– 1 tsp grated ginger
– Pinch of red pepper flakes (optional)
4. Marinate the Fish
Gently fold the diced tuna into the marinade. Cover and refrigerate. This step builds the authentic Hawaiian Poke flavor profile—balanced umami with subtle sweetness. Marinate for exactly 15–30 minutes; longer than that breaks down the fish’s delicate structure.
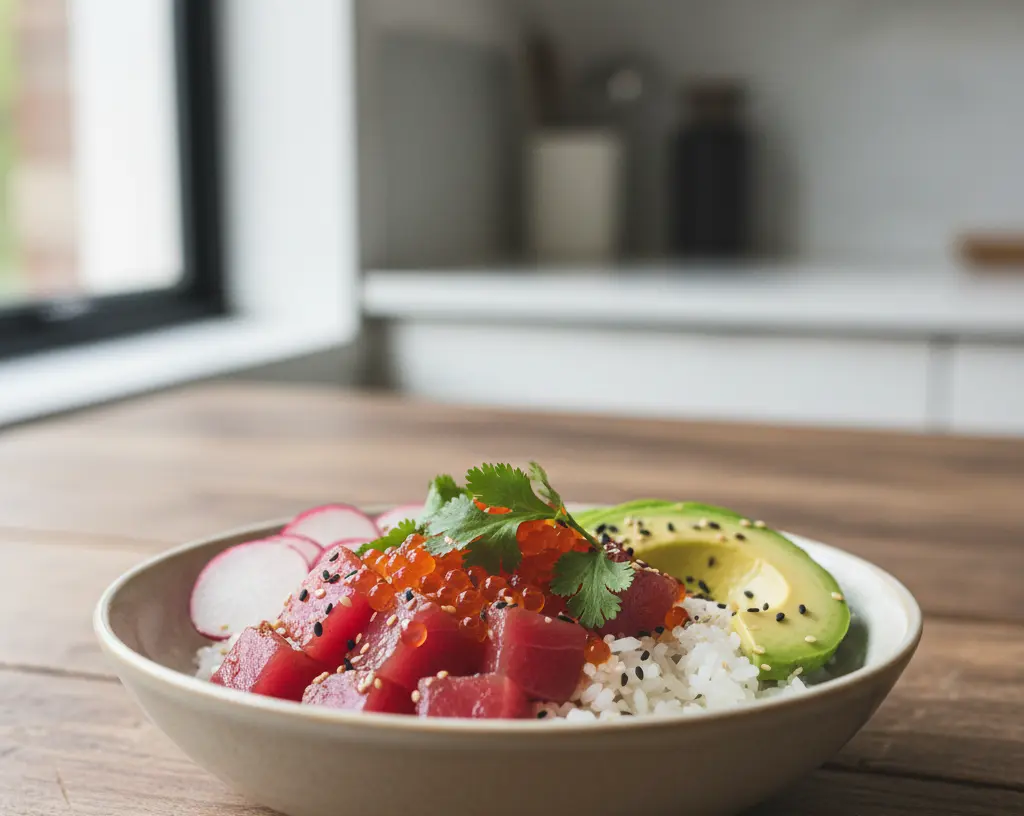
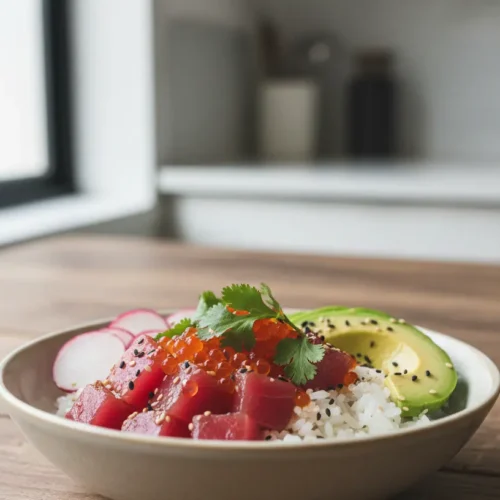
5. Assemble Your Bowl
Start with a generous bed of seasoned sushi rice. Layer the marinated tuna evenly. Arrange toppings in separate sections: avocado slices, cucumber cubes, edamame, and seaweed salad. Drizzle with spicy mayo and sprinkle sesame seeds plus scallions.
—
Nutritional Benefits & Advantages
| Nutrient | Per Serving (approx.) | Benefit |
|———-|———————-|———|
| Protein | 35–40g | Muscle repair, satiety |
| Omega-3 fatty acids | 1.5g | Heart and brain health |
| Fiber | 6–8g | Digestive health |
| Healthy fats | 15g (avocado + sesame oil) | Hormone balance |
Why homemade wins: Restaurant bowls often overload on sugary sauces and fried toppings. At home, you control sodium, sugar, and oil. This bowl is naturally gluten-free (use tamari) and dairy-free.
—
Tips Variations & Cooking Advice
Flavor Twists
– Spicy garlic mayo: Mix 3 tbsp mayo + 1 tbsp Sriracha + 1 minced garlic clove
– Yuzu ponzu: Replace soy sauce with ponzu for citrusy brightness
– Smoked salmon swap: Use cold-smoked salmon; skip marinating (already cured)
Dietary Adaptations
– Low-carb: Substitute cauliflower rice or zucchini noodles
– Vegan: Replace fish with marinated mango + firm tofu (press for 30 minutes first)
– Nut-free: Confirm sesame oil purity; skip sesame seeds
Texture Perfection
– Chill your bowl: Cold bowl keeps fish at safe temperature during assembly
– Warm rice, cool fish: Temperature contrast elevates every bite
—
Common Mistakes to Avoid
| Mistake | Consequence | Solution |
|———|————-|———-|
| Over-marinating | Mushy, broken-down fish | Strict 15–30 minute timer |
| Warm rice | Soggy texture, bacterial risk | Fan rice to cool completely |
| Dull knife | Bruised, torn fish pieces | Sharpen before dicing |
| Skipping rice rinse | Glue-like, gummy rice | Rinse until water runs clear |
| Wet fish | Watery marinade, bland flavor | Pat tuna thoroughly dry |
Pro insight: If your fish looks cloudy or smells “fishy” (instead of like clean ocean), it’s not fresh enough for raw consumption. When in doubt, lightly sear the cubes for 30 seconds per side.
—
Storage & Meal Prep Tips
Refrigeration Guidelines
– Marinated fish: Store in airtight container, up to 2 days max
– Cooked rice: Refrigerate separately, up to 3 days
– Prepped toppings: Keep avocado and cucumber in separate bags (add at serving)
Freezing (Not Recommended for Assembled Bowls)
– Rice becomes grainy and dry when thawed
– Fish texture degrades significantly
– Instead: Freeze sashimi-grade tuna in vacuum-sealed bags for up to 3 months; thaw overnight in refrigerator
Reheating (Rice Only)
– Microwave with damp paper towel: 30-second bursts
– Avoid reheating fish—it’s meant to be served cold or at room temperature
—
Conclusion
Building your own Poke Bowl at home is a rewarding way to enjoy authentic island flavors any day of the week. By respecting the core techniques of Hawaiian Poke—clean cuts, balanced marinades, and temperature contrast—you’ll create a protein-packed meal that rivals your favorite restaurant. We’d love to see your creation! Share your bowl on social media and tag us, or explore our other high-protein recipes for more fresh inspiration.
—
FAQs
1. Can I use frozen fish for Poke Bowls?
Yes, but freeze at -4°F (-20°C) for at least 7 days to kill parasites. Thaw overnight in the refrigerator. Sashimi-grade frozen tuna is widely available and safe.
2. How do I know if my fish is fresh enough for raw consumption?
Look for bright, translucent color, firm texture, and a clean ocean smell (not fishy). Always buy from reputable sources labeled “sashimi-grade” or “sushi-grade.”
3. Can I make Poke Bowls ahead of time for meal prep?
Store components separately: rice, marinated fish, and toppings in individual containers. Assemble just before eating to maintain texture. Do not freeze assembled bowls.
4. What’s the best substitute for sushi rice?
Calrose or jasmine rice work in a pinch. Cook with slightly less water for firmer texture. Season identically with vinegar, sugar, and salt.
5. Is this recipe gluten-free?
Yes, if you substitute tamari or coconut aminos for soy sauce. Verify that your mirin is labeled gluten-free (some brands contain wheat).
Quick way to grow a 5-Star Poke Bowl Garden
Equipment
- Shovel
- Trowel
- Watering Can
- Gardening Gloves
Ingredients
Garden Essentials
- 1 bag Seed Starting Mix for optimal germination
- 20 lbs Organic Soil rich in nutrients
Plant Seeds
- 1 packet Cherry Tomato Seeds
- 1 packet Cucumber Seeds
- 1 packet Radish Seeds
- 1 packet Edamame Seeds
- 1 plant Avocado Plant A small sapling for faster growth
- 1 packet Green Onion Seeds
- 1 packet Cilantro Seeds
- 1 packet Mint Seeds
Instructions
Garden Preparation
- Select a sunny spot that receives at least 6-8 hours of direct sunlight daily and clear it of weeds and debris.
- Amend the soil with organic compost and a balanced fertilizer to create a nutrient-rich foundation for your plants.
Planting
- Plant seeds according to packet instructions, ensuring proper spacing and depth for each variety.
- Place avocado sapling in a well-drained area, providing it with ample space to grow.
Care and Maintenance
- Water your garden regularly, especially during dry periods, ensuring the soil remains consistently moist but not waterlogged.
- Fertilize your plants bi-weekly with an organic liquid feed to support healthy growth.
- Protect plants from pests using organic pest control methods and prune as needed to encourage fruit production and air circulation.
Harvesting
- Harvest vegetables and herbs as they mature, typically over several weeks, to encourage continuous production.
- Enjoy your fresh, home-grown ingredients in your homemade poke bowls!