Best way to grow Ice Cream Sandwiches (Homemade)
Learn how to make delicious homemade ice cream sandwiches.
Chocolate Chip Cookies
Vanilla Ice Cream
Sprinkles
Chocolate Chips
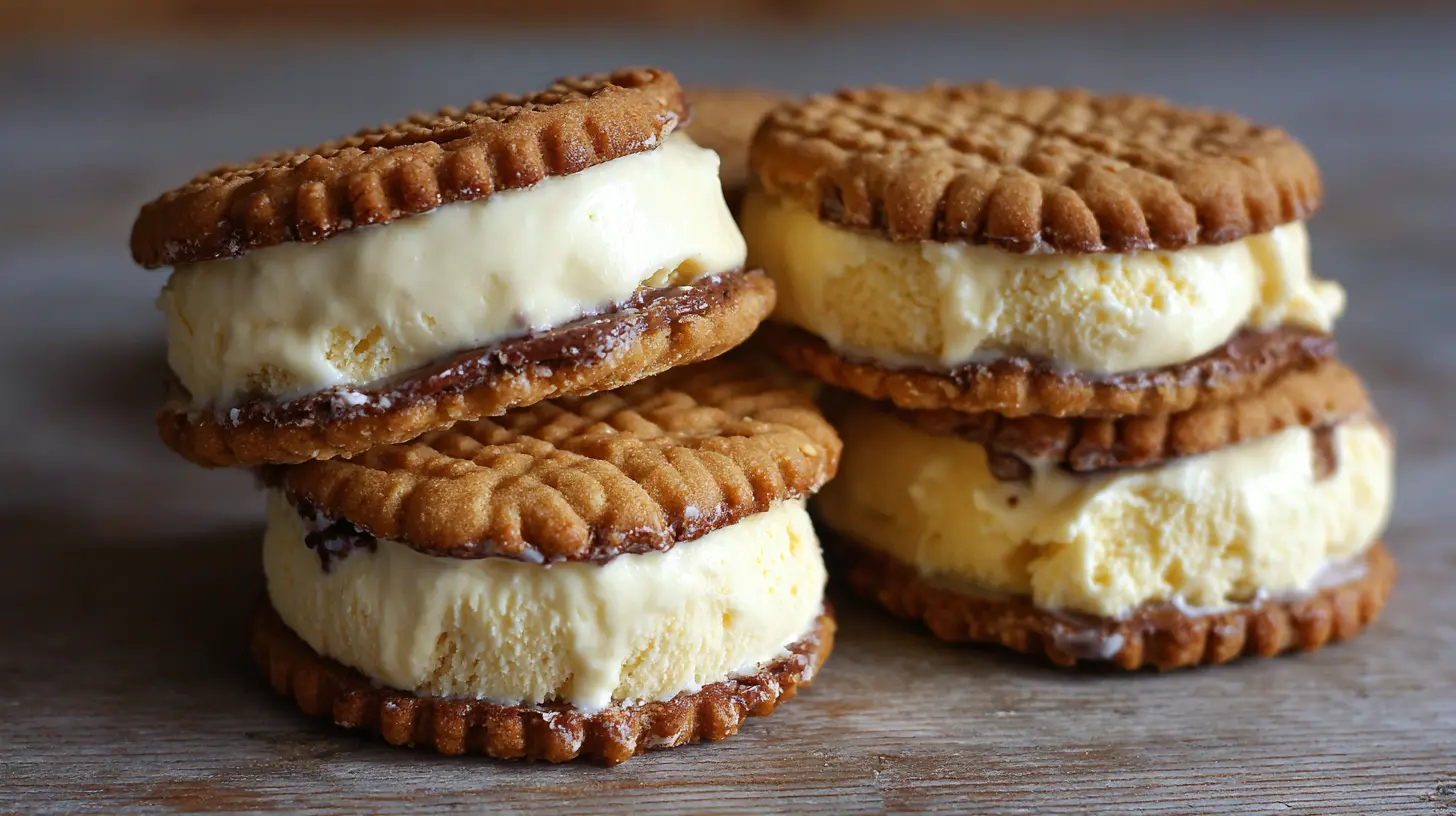
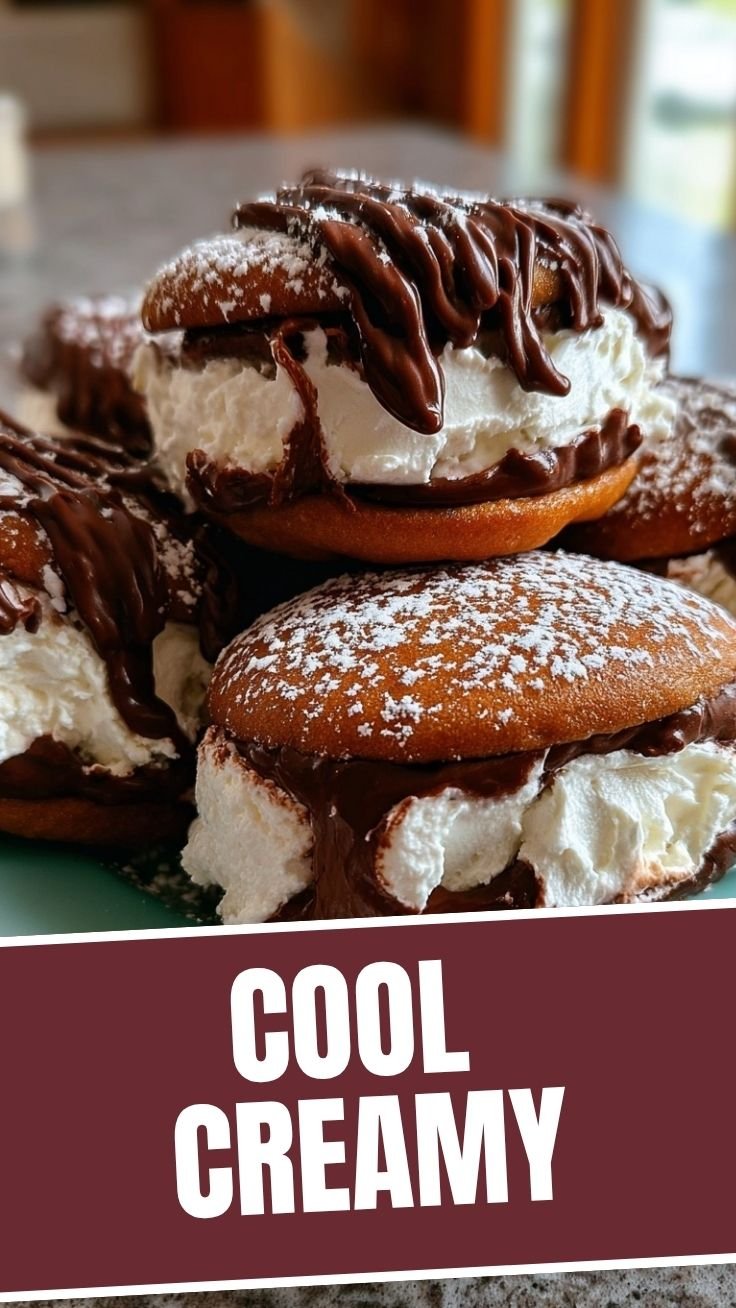
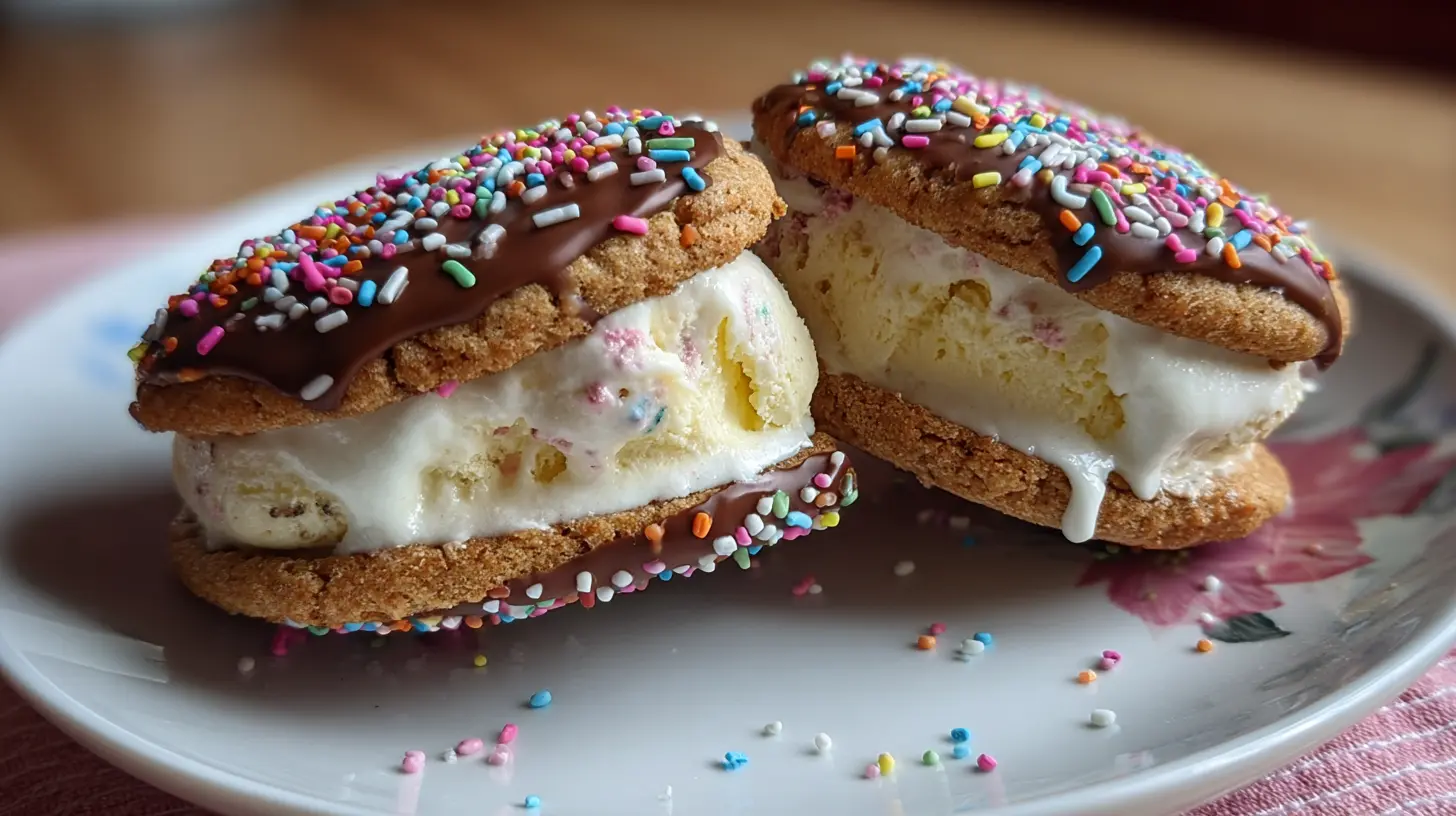
Scoop vanilla ice cream onto one cookie.
Place another cookie on top to create a sandwich.
Roll the edges of the ice cream sandwich in sprinkles.
Melt chocolate chips and drizzle on top for extra sweetness.
Homemade Chocolate Chip Ice Cream Sandwiches: The Ultimate Summer Treat
There’s something undeniably magical about biting into a perfectly crafted ice cream sandwich on a hot summer day. Making Ice Cream Sandwiches (Homemade) gives you complete control over ingredients, flavors, and textures that store-bought versions simply can’t match. This delightful treat combines the chewy goodness of chocolate chip cookies with creamy, rich ice cream for a dessert that will impress family and friends alike. Following a reliable Cookie Dough Recipe ensures these frozen treats turn out perfectly every time, with that ideal balance of sweetness and structure.
Ingredients & Kitchen Tools
For the Cookie Layers:
– 2¼ cups all-purpose flour (sifted for better texture)
– 1 tsp baking soda
– ½ tsp salt
– 1 cup unsalted butter, softened (room temperature works best)
– ¾ cup granulated sugar
– ¾ cup packed brown sugar (dark or light both work)
– 2 large eggs (room temperature)
– 2 tsp vanilla extract
– 2 cups semi-sweet chocolate chips
For the Ice Cream Layer:
– 1.5 quarts premium vanilla ice cream (or flavor of choice)
– Optional: ¼ cup mini chocolate chips or sprinkles for edges
Kitchen Tools:
– 13×9-inch baking pan
– Parchment paper
– Stand mixer or hand mixer
– Rubber spatula
– Offset spatula
– Sharp knife
– Plastic wrap
– Freezer-safe container
Prep Time & Cooking Schedule
Prep Time: 30 minutes
Bake Time: 15-18 minutes
Freezing Time: Minimum 6 hours (preferably overnight)
Total Time: About 7 hours (including freezing)
Plan to make these a day ahead of when you want to serve them. The extended freezing time ensures proper setting and makes slicing much easier. You can also prepare the cookie layers up to 3 days in advance and store them tightly wrapped at room temperature.
Step-by-Step Instructions
1. Prepare the Cookie Layers:
– Preheat your oven to 350°F (175°C). Line your 13×9-inch baking pan with parchment paper, leaving overhang on the sides for easy removal.
– In a medium bowl, whisk together flour, baking soda, and salt.
– In your stand mixer, cream butter and both sugars until light and fluffy, about 3 minutes.
– Add eggs one at a time, then vanilla, beating well after each addition.
– Gradually add the flour mixture until just combined, then fold in chocolate chips.
2. Bake the Cookie Base:
– Divide the Cookie Dough Recipe in half. Press half the dough evenly into the prepared pan.
– Bake for 15-18 minutes until golden brown but still slightly soft in the center.
– Cool in the pan for 10 minutes, then transfer to a wire rack to cool completely.
– Repeat with the remaining dough.
3. Assemble the Ice Cream Sandwiches (Homemade):
– Take ice cream out of freezer 15 minutes before assembly to soften slightly.
– Place one cookie layer back in the clean, lined baking pan.
– Spread softened ice cream evenly over the cookie base using an offset spatula.
– Top with the second cookie layer, pressing down gently.
– Wrap tightly with plastic wrap and freeze for at least 6 hours or overnight.
4. Slice and Serve:
– Remove from freezer and use the parchment overhang to lift out the entire sandwich.
– With a sharp knife, cut into desired-sized rectangles, wiping the knife clean between cuts.
– If desired, roll edges in mini chocolate chips or sprinkles.
– Serve immediately or wrap individually and return to freezer.
Nutritional Benefits & Advantages
While these treats are certainly indulgent, they can be part of a balanced diet when enjoyed in moderation. The calcium from dairy in ice cream supports bone health, while eggs provide protein and essential vitamins. Using high-quality dark chocolate chips can add antioxidants, and homemade versions eliminate artificial preservatives found in commercial alternatives.
Tips, Variations & Cooking Advice
– Ice Cream Variations: Try chocolate, mint chip, or coffee ice cream for exciting flavor combinations.
– Cookie Variations: Add nuts, different chip varieties, or incorporate cinnamon or espresso powder into the dough.
– Dietary Adaptations: Use gluten-free flour blend and dairy-free ice cream for allergen-friendly versions.
– Thickness Control: For thinner cookies, divide dough into three layers instead of two.
– Neat Edges: For restaurant-quality presentation, trim the edges before cutting into individual sandwiches.
Common Mistakes to Avoid

1. Over-softening Ice Cream: If ice cream becomes too soft during assembly, the layers will blend. Return it to the freezer if it starts melting.
2. Underbaking Cookies: Cookies should be fully baked but not crispy—aim for chewy but fully set.
3. Rushing Assembly: Not allowing cookie layers to cool completely can melt the ice cream prematurely.
4. Skipping Freezing Time: The full freezing period is essential for proper setting and easy cutting.
5. Cutting with a Warm Knife: Always use a chilled knife for clean cuts.
Storage & Meal Prep Tips
These ice cream sandwiches can be stored in the freezer for up to 2 weeks. Wrap each sandwich individually in plastic wrap, then place in a freezer-safe container or ziplock bag. For best texture, allow sandwiches to soften at room temperature for 5 minutes before serving. This makes them perfect for advance preparation for parties or summer gatherings.
Conclusion
Creating delicious Ice Cream Sandwiches (Homemade) is a rewarding culinary project that delivers incredible results with relatively simple ingredients. The contrast between the chewy cookies and smooth ice cream creates a textural masterpiece that store-bought versions simply can’t match. By following our detailed Cookie Dough Recipe and assembly instructions, you’ll create a memorable dessert that will become a family favorite. Don’t be afraid to get creative with flavors and mix-ins to make this classic treat uniquely yours!
FAQs
Can I use store-bought cookie dough to save time?
Yes, but homemade dough typically yields better texture. If using store-bought, choose a chocolate chip cookie dough and follow the same baking instructions.
How do I prevent the ice cream from melting during assembly?
Work quickly and ensure your cookie layers are completely cooled. You can also chill your baking pan before assembly and work in a cool kitchen.
Can I make mini ice cream sandwiches instead?
Absolutely! Use a smaller baking pan or cookie cutters to create individual cookies, then assemble with ice cream scoops.
Why are my cookies too hard after freezing?
This typically happens if the cookies were overbaked. For freezer-friendly cookies, slightly underbake them (while ensuring they’re food-safe) for a softer frozen texture.
How can I make these more visually appealing for a party?
Roll the exposed ice cream edges in colorful sprinkles, mini chocolate chips, crushed nuts, or cookie crumbs for an attractive presentation.

Best way to grow Ice Cream Sandwiches (Homemade)
Equipment
- Gardening gloves (optional)
Ingredients
Main Ingredients
- 1 packet Ice Cream Sandwich Seeds
- 2 cups Sweet Soil
- as needed Sunlight (or a very bright lamp)
- a lot Imagination
Instructions
Growing Process
- First, choose a sunny spot in your garden or a pot on your windowsill that receives ample sunlight to ensure optimal growth for your ice cream sandwiches.
- Next, prepare the sweet soil by loosening it and adding a sprinkle of magic dust (optional) to enhance the flavor profile of your future treats.
- Plant your ice cream sandwich seeds about an inch deep in the prepared soil, spacing them a few inches apart to give each sandwich room to grow.
- Water gently with sweet, cool water, making sure not to overwater, as ice cream sandwiches prefer a well-drained environment.
- Patiently wait for your ice cream sandwiches to sprout, which usually takes a few hours of sunny weather and positive thoughts.
- Once sprouted, continue to water and provide sunlight, and watch as your mini ice cream sandwiches grow into full-sized, delicious desserts.
- Harvest your homegrown ice cream sandwiches when they reach your desired size and enjoy the fruits of your imaginative labor!